
Easter is the perfect occasion to fire up your 3D printer again. With our honeycomb Easter ornaments, you can print modern decorations for your Easter branches. The delicate honeycomb structure makes each ornament a real eye-catcher. The STL files are optimized to print smoothly on all printers, without any unnecessary stress or failed prints.
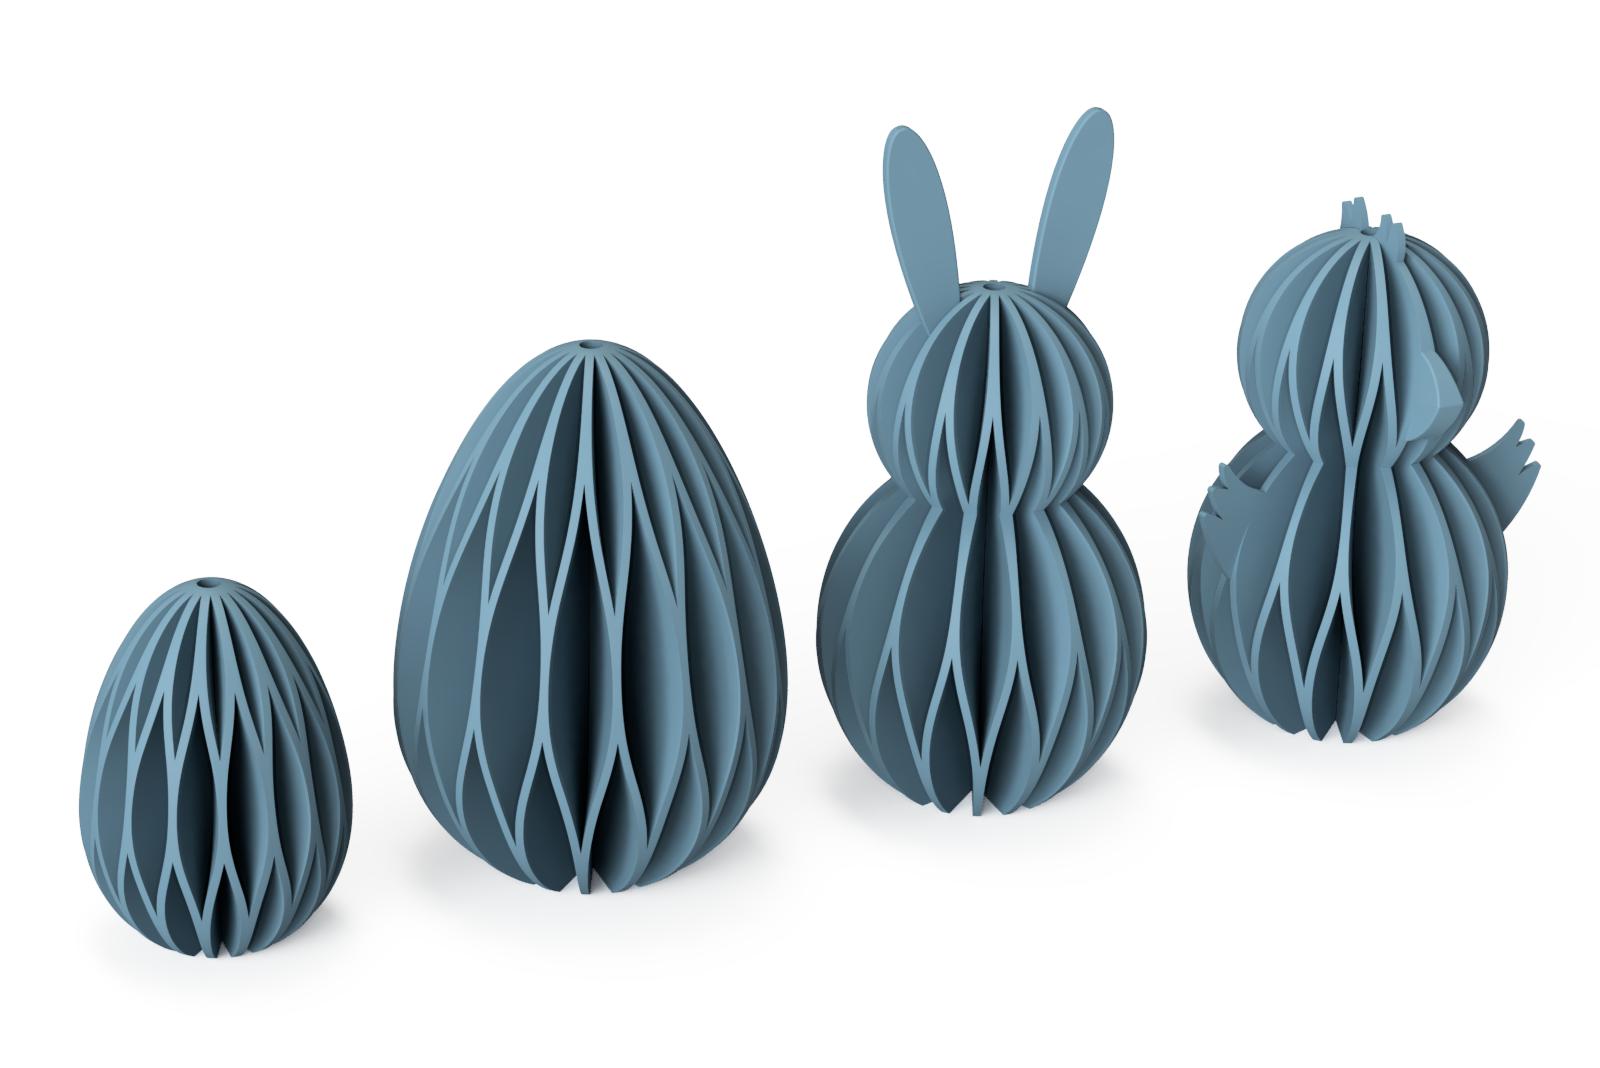
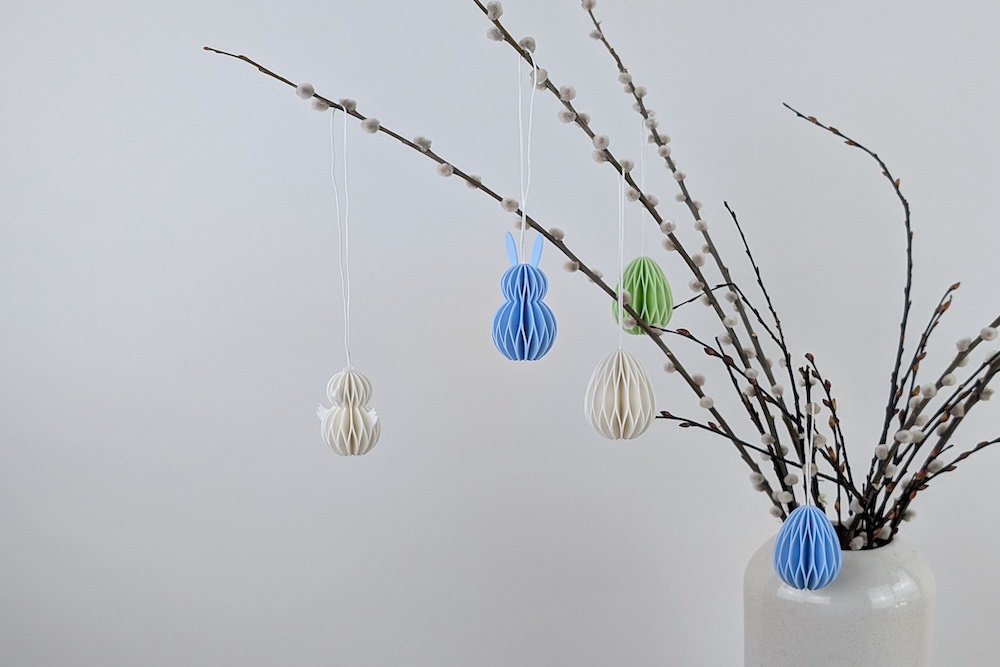
The set includes honeycomb eggs in two different sizes, along with an Easter bunny and an Easter chick. There is a hole in the middle of the Easter ornament for threading a string. You can pull any kind of string through it. Either a clear nylon thread or a colorful ribbon to give the ornament that perfect finishing touch.
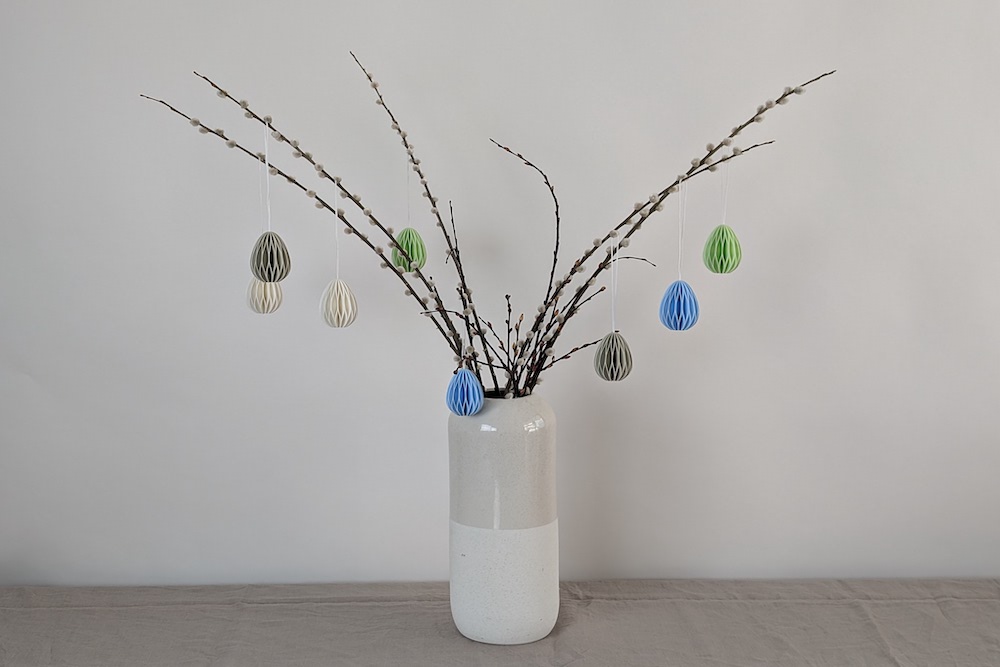
Pro-tip: You can also stand these stylish Easter ornaments upright to decorate your Easter table, or place them in the garden and on shelves to spread some Easter cheer. The print is very easy, fast, and doesn’t require any extra hardware. I’ll explain exactly how it works in the instructions below.
This article contains affiliate/promotional links, which are marked with an asterisk (*). If you make a purchase through these links, I may earn a commission at no additional cost to you.
3D Printed Parts Easter Ornaments
These are purely digital products, you get all the files you need to print the parts yourself in a ZIP folder. It contains the STL files for all required components and variants.
- 016500_Easter_Ornament_Egg_small (STL file)
- 016600_Easter_Ornament_Egg (STL file)
- 016700_Easter_Ornament_Bunny (STL file)
- 016800_Easter_Ornament_Chick (STL file)
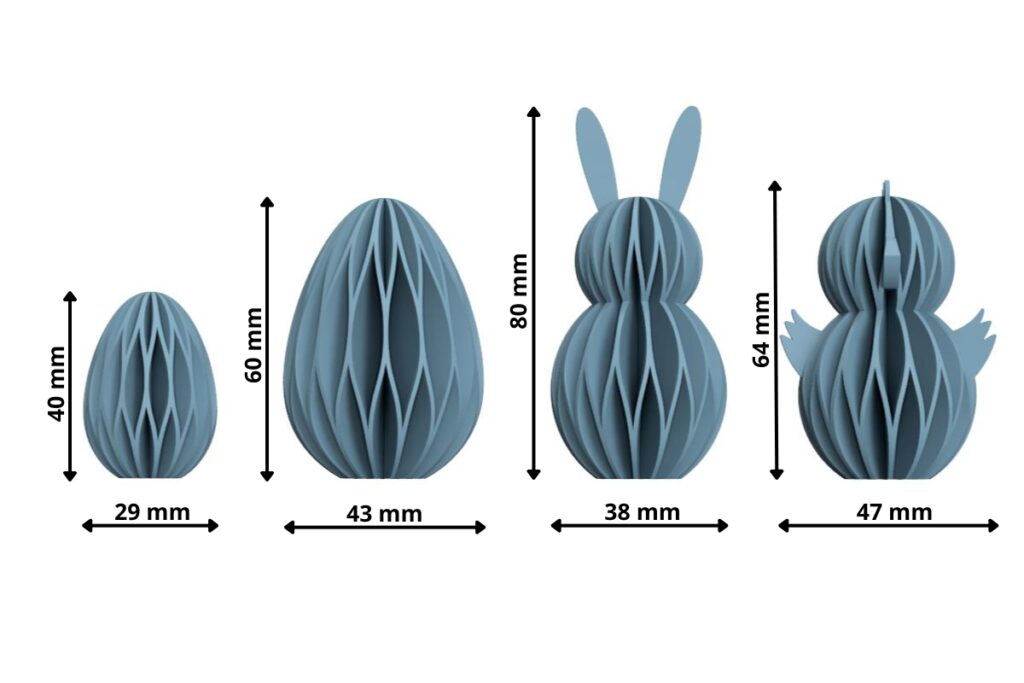
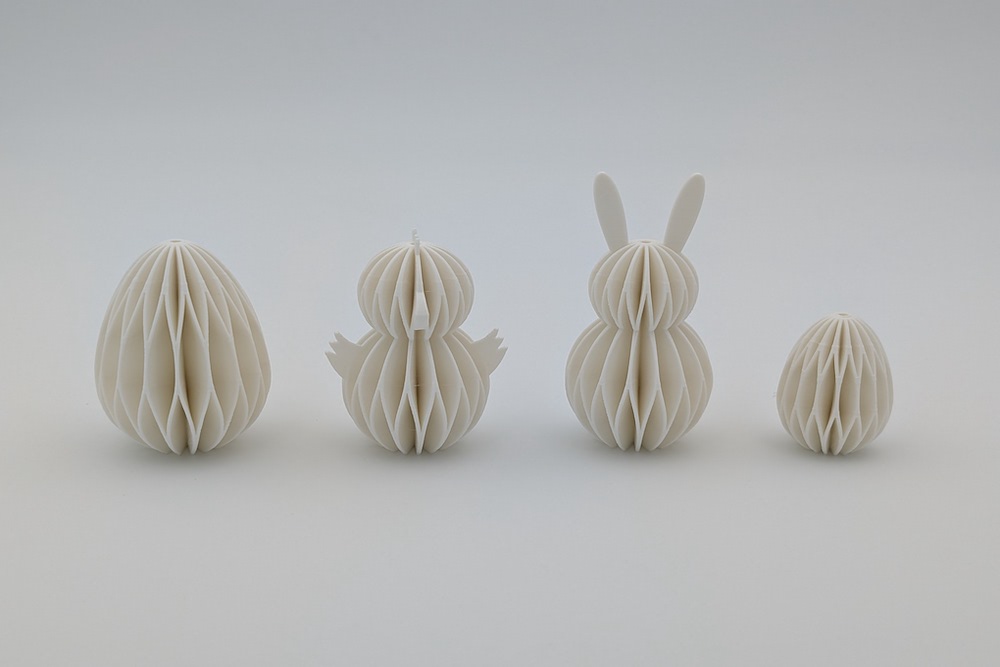
The 3D printing files have a maximum height of 80 mm (Z-axis) and a maximum width of 47 mm. Therefore, any standard 3D printer is suitable for this project. The following figure shows the individual pendants and their dimensions.
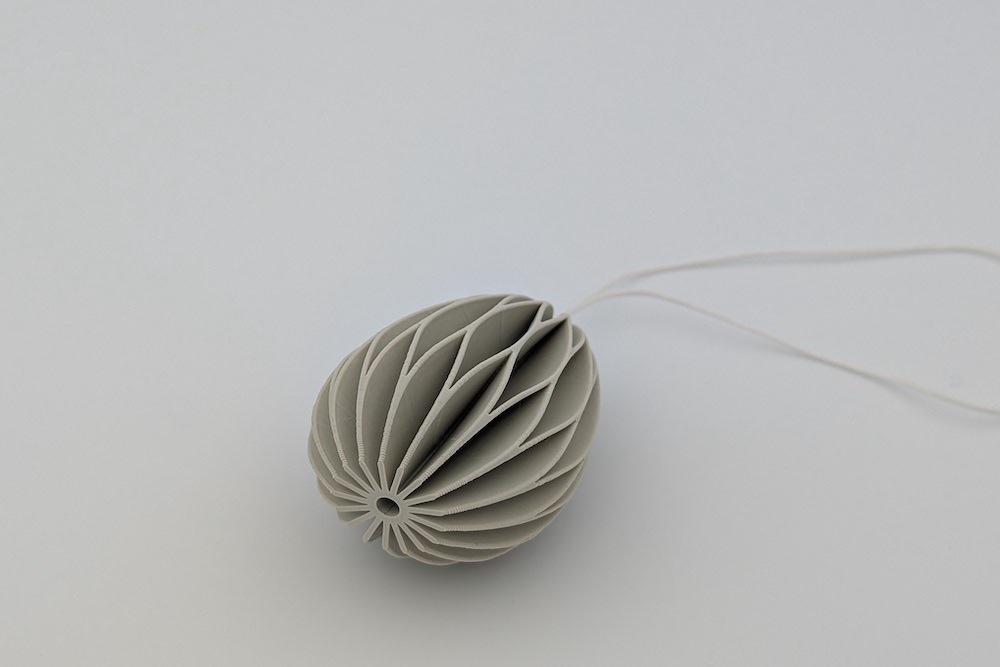
Attaching the ornaments is extremely easy, because the Easter figures feature a through-hole that tapers toward the top. The following cross-section of a 3D printed honeycomb Easter ornament shows the mechanism for invisibly attaching the hanging cords. The hole at the bottom is 4 mm, and the hole at the top exit is 2.7 mm.
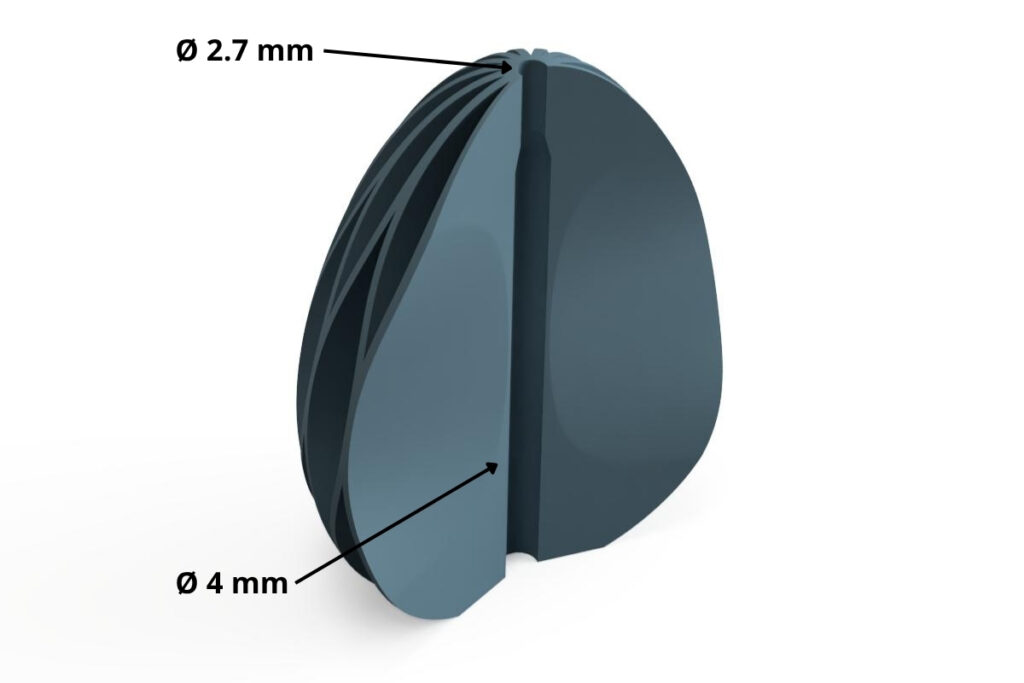
The thread or string used for hanging is threaded through the small hole at the top and knotted underneath the Easter ornament. The knot is then pulled up into the ornament, where it gets caught in the narrow section, securely anchoring the hanging string or cord. As a result, the knot is neatly hidden inside the ornament, and no knot is visible from the outside at the bottom.
Below is a brief step-by-step guide for attaching the retaining cord or thread:
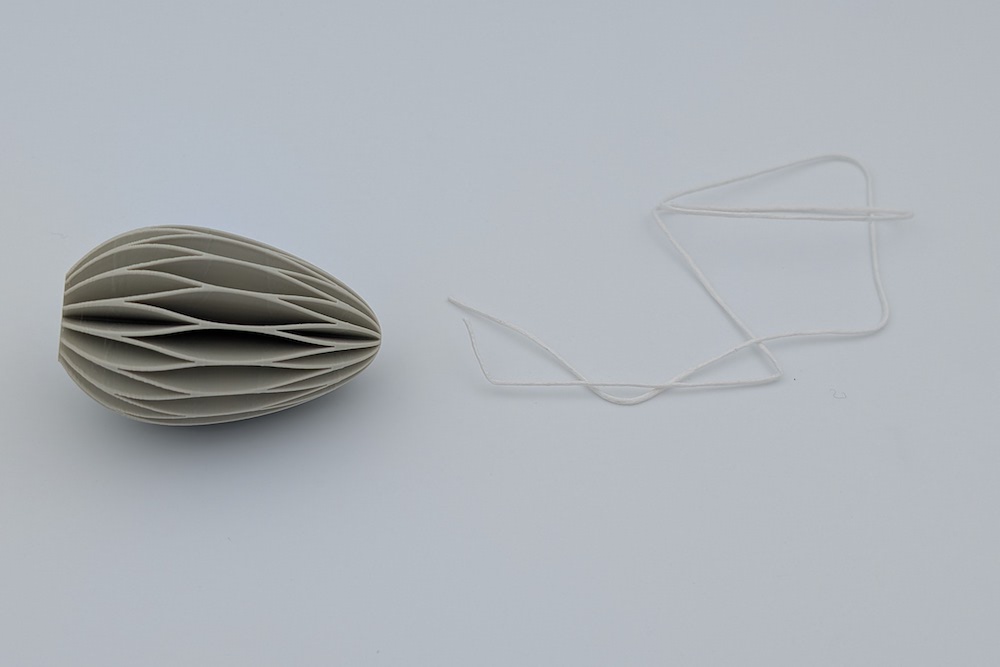
Step 1: Cut a piece of string about 45 cm long, fold it in half, and prepare it for threading.
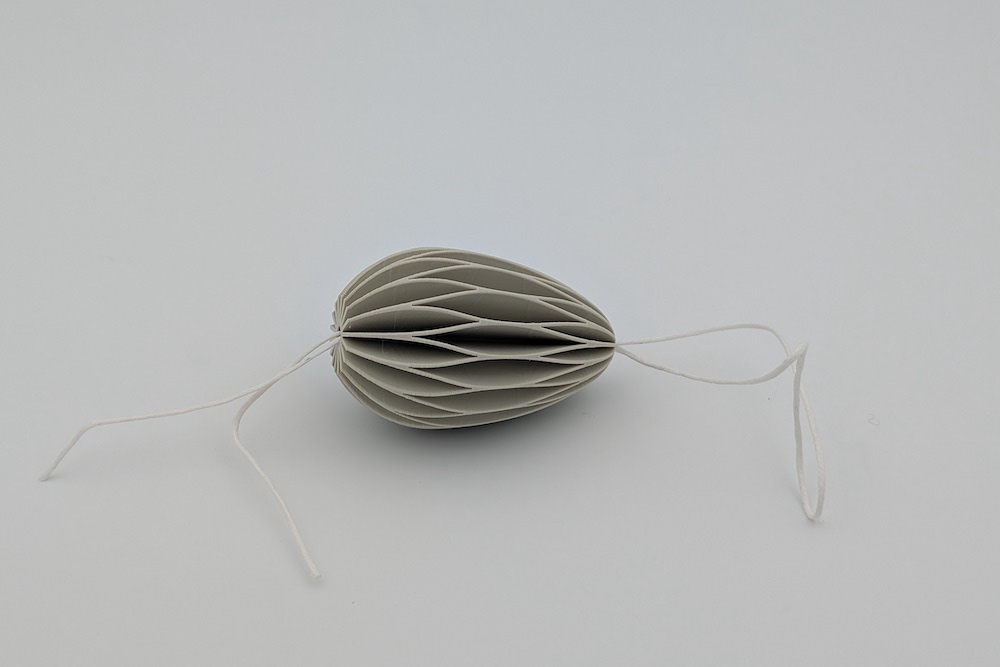
Step 2: Thread the loose ends of the cord into the top of the pendant and push them through until they come out the bottom.
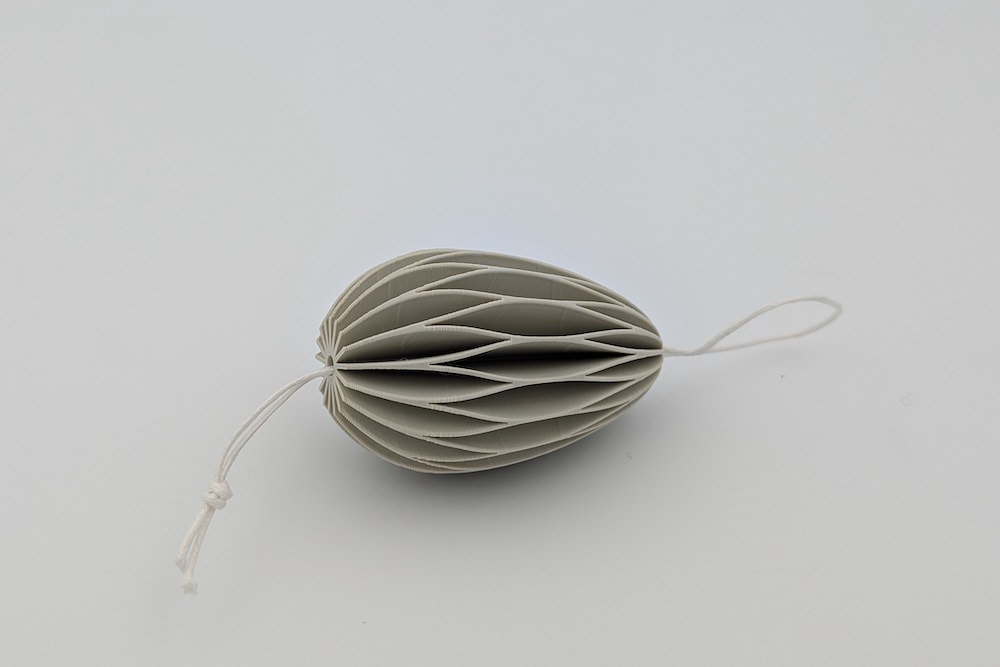
Step 3: Tie a knot in the loose ends of the string under the pendant.
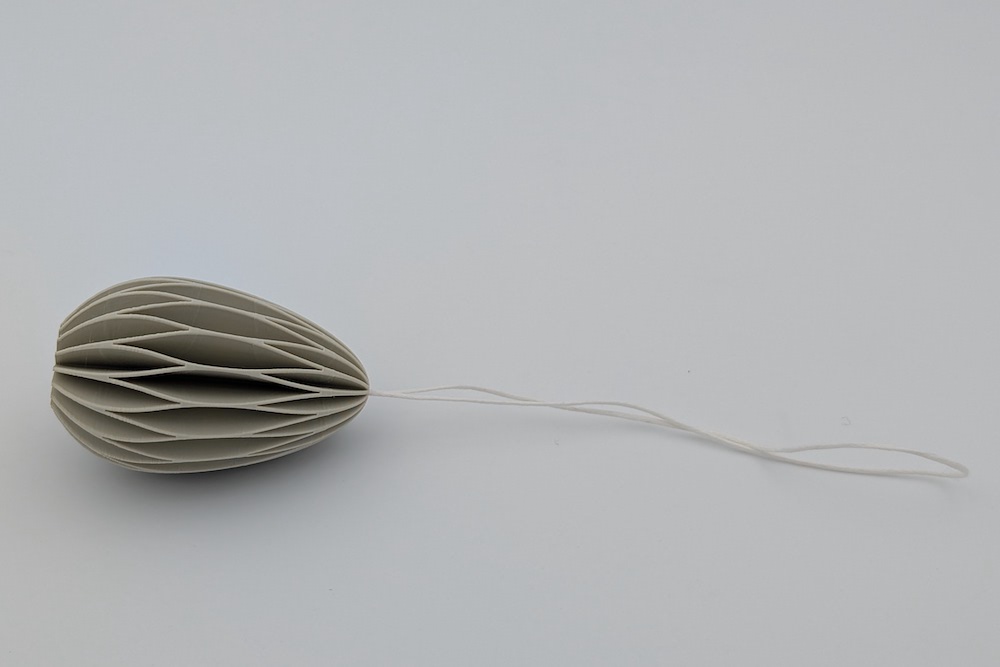
Step 4: Pull the cord up and let the knot disappear inside the egg. It will catch at the narrow opening at the top of the egg, and the Easter ornament is ready to hang.
3D Print Settings for Easter Decoration Ornaments
The 3D printed Easter ornaments shown here were printed with the following parameters:
- Layer height 0.2 mm and 15% infill (grid)
If there are problems with print adhesion on the print bed, it is best to use a brim for better adhesion.
If strings form on the Easter ornaments, either reduce the nozzle temperature during printing or, after 3D printing, briefly blow hot air on the strings with a heat gun to melt them away.
Used 3D printing filament and 3D printer
The Easter prints shown in this guide were printed on a Bambulab X1C and a Bambulab P2S using a 0.4 mm nozzle with the following filaments:
- Beige: OVERTURE Matte PLA Beige*
- Mint Green: ELEGOO Matte PLA Mint Green* (currently unavailable) – alternatively DEEPLEE Matte PLA Mint Green*
- Pink: 3D Jake ecoPLA Pastel Pink (currently unavailable) – alternatively ELEGOO PLA Pink*
- White: Bambulab PLA Matte Ivory White – alternatively ELEGOO Matte PLA White*
- Light Blue: 3D Jake ecoPLA Pastel Blue (currently unavailable) – alternatively ELEGOO Matte PLA Ice Blue*
With the selected settings, about 24 g of filament is used for the large ornaments and about 10 g for the small Easter egg. At a filament price of 20 EUR per kilogram, the material costs for the 3D-printed Easter decorations come to approximately 0.50 EUR for the large ornaments and 0.20 EUR for the small one.
The print time for a large easter pendant is approx. 1 h 20 min (Bambulab P2S), the print time for the small Easter egg pendant is approx. 50 min (Bambulab P2S).
Bill of materials
Besides a 3D printer and filament in your preferred color, all you need is some suitable string or thread to hang the Easter decorations. For those whose craft drawers are currently lacking the right cords, here are two suggestions for the hanging string. Depending on your taste, you can use either a transparent thread or a white or colored cotton cord.
Instructions: Printing 3D Honeycomb Easter Decorations
Safety Guidelines
Safety first! Read and follow the assembly instructions!
Carefully read through the entire assembly guide and follow the instructions and safety guidelines. If anything is unclear, simply contact support (support@3d-druck-vorlagen.de).
These instructions are only intended for persons of legal age (over 18 years old). If you lack knowledge in handling the tools or processes that occur, then it is essential to seek the help of trained persons. The preparation and assembly of the project is at your own risk.
3D printing of the eggs, bunnies, and chicks
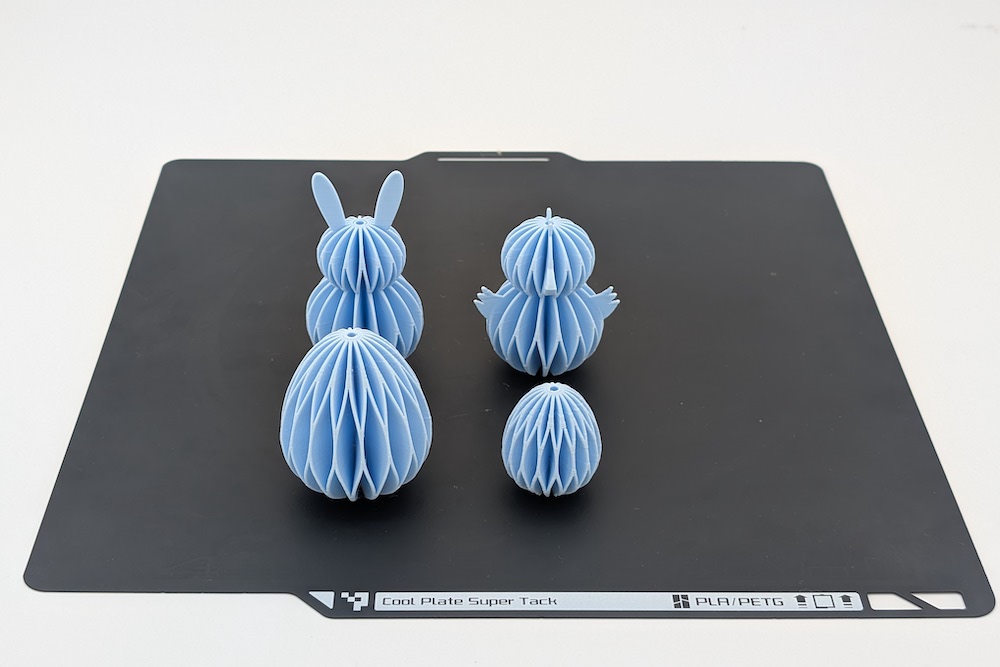
3D printing is incredibly easy. The STL files are already oriented correctly and just need to be placed on the build plate in the slicer. The models are designed so that no support structure is needed during printing. Below, the 3D printed parts are shown on the build plate of a Bambulab P2S and “in action” on an Easter tree.
If there are issues with print adhesion on the print bed, it is best to enable a brim in the slicer for better adhesion and print with it.
3D Printed Parts Easter Ornament Honeycomb
Here, the different versions of the Easter decorations in Scandinavian design are shown on the build plate of the Bambulab P2S printer.
- 1 pc 016500_Easter_Ornament_Egg_small
- 1 pc 016600_Easter_Ornament_Egg
- 1 pc 016700_Easter_Ornament_Bunny
- 1 pc 016800_Easter_Ornament_Chick
Layer height 0.2 mm and 15% infill (grid)
Below, the printed Easter ornaments are shown in detail in various filament colors. You can find matching filaments above under used filaments.
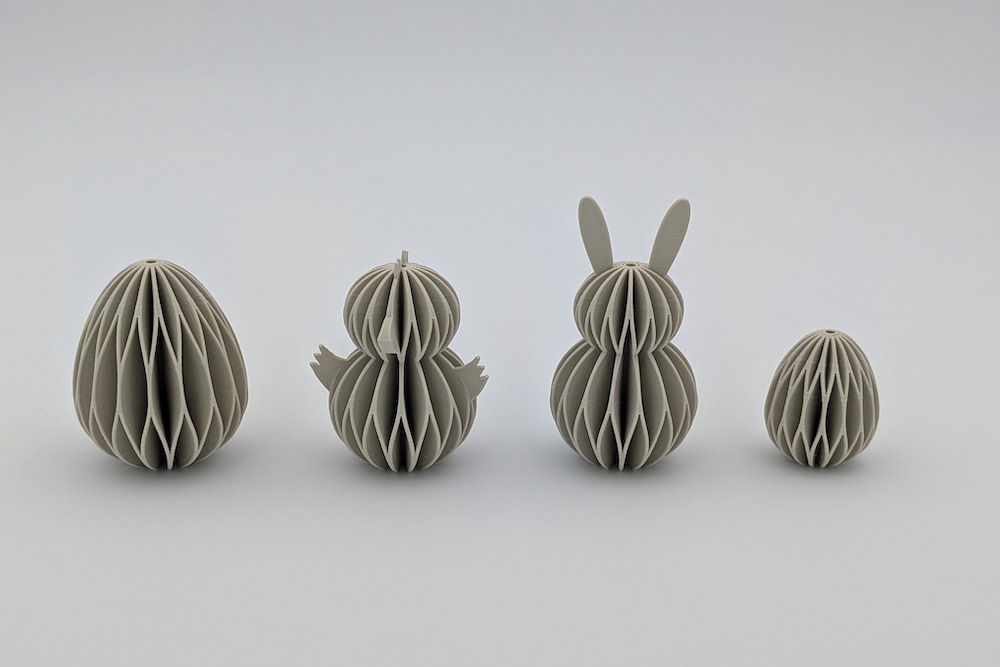
Easter ornaments printed in matte beige filament, from left to right: egg, chick, and Easter bunny, as well as the small Easter egg.
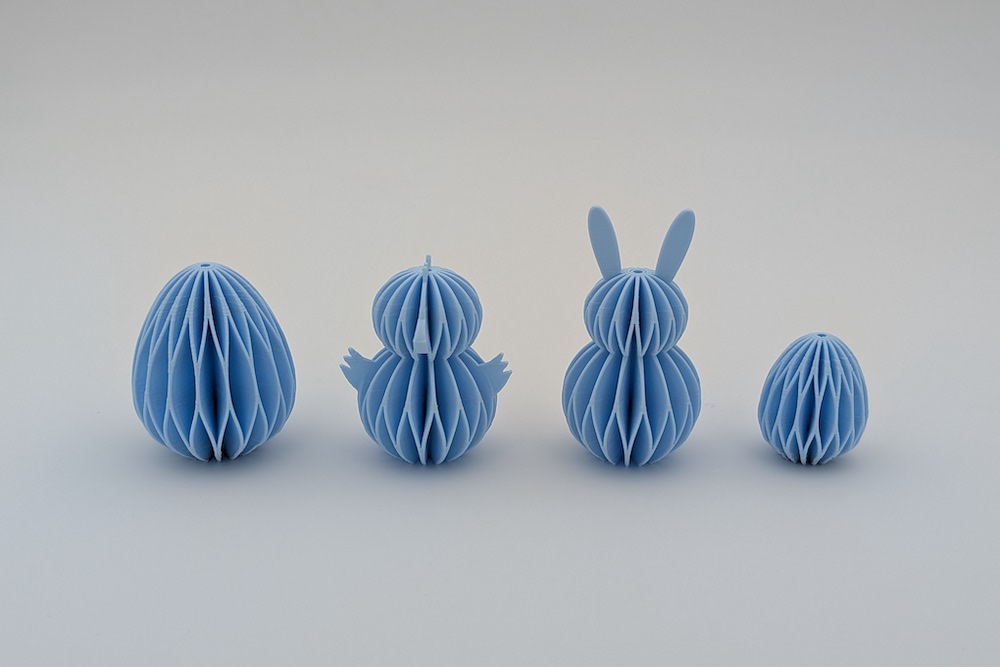
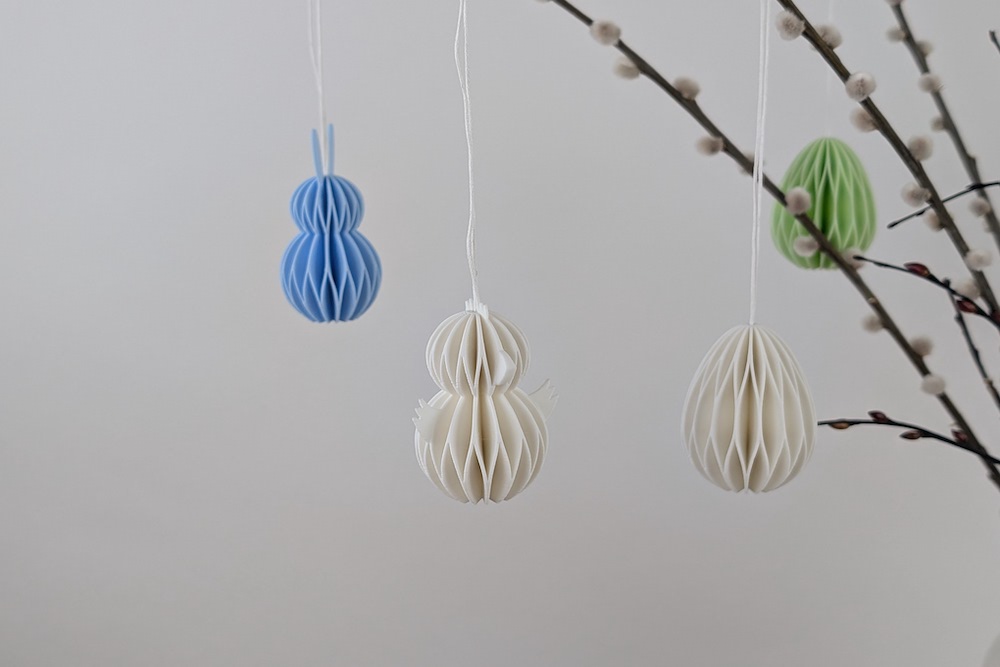
This picture shows the Easter decorations for the Easter tree in pastel light blue.
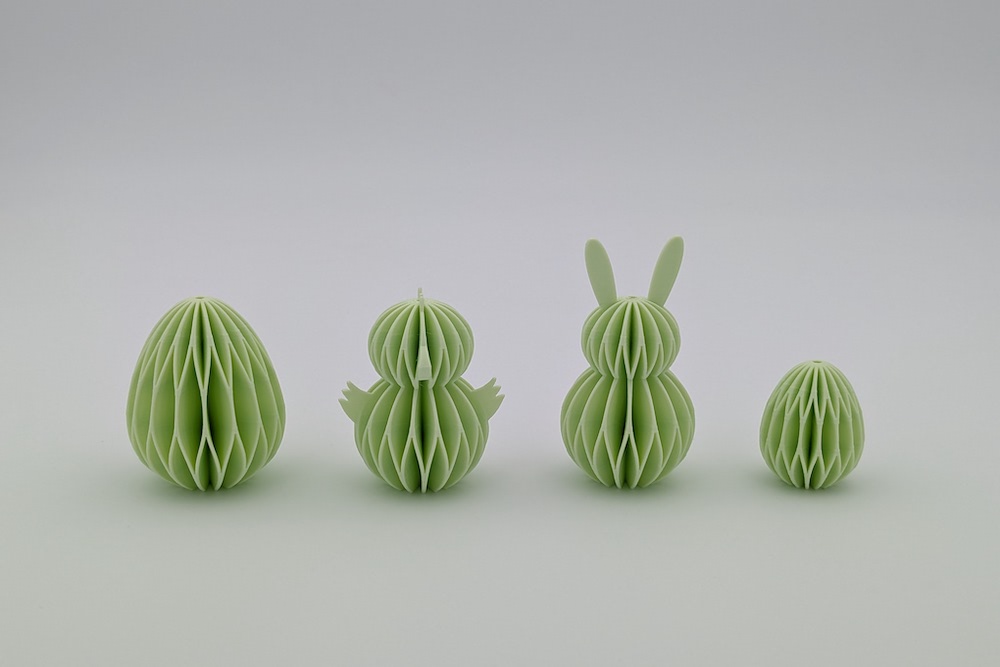
Shown here is the Easter ornament in a honeycomb design when printed with mint green filament.
The Easter ornaments also look very beautiful 3D printed in plain matte white.
Of course, the 3D printed Easter ornaments in the shape of chicks, bunnies, and eggs can be printed in any color and with any material, for example, even with recycled PETG.
The small Easter eggs can either be attached to a small bouquet or tied together into a beautiful wreath. This makes quite an impression as a beautiful centerpiece on the Easter table.

Below is a little inspiration for special colors and variations of the 3D printed Easter ornaments. Have fun with your self-printed Easter decorations and have a happy Easter.

Disclaimer
The instructions and the associated files are an inspiration of Ingenieurbüro Dr. Janko GmbH to build this project yourself. Since Ingenieurbüro Dr. Janko GmbH has no way of checking and influencing the required quality of the printed components and purchased parts as well as the quality of the assembly and the correct functioning of the project or if any inadmissible changes and modifications to the project has been made, Ingenieurbüro Dr. Janko GmbH accepts no liability for functionality, stability or damage incurred by the project.
0 Comments