
These honeycomb-style Easter decorations are trending right now. The eggs and bunnies can be placed directly on your table as decor. Thanks to their sturdy 3D printed structure, they won’t tip over or collapse, unlike similar paper versions. This means you can reuse these decorations for years to come to perfectly set the scene for your Easter brunch.
You can choose the color of your Easter decor yourself depending on the filament you pick. For the finished honeycomb eggs and bunnies shown here, I used filaments in matte white and subtle pink. Once you have the 3D print files, you can obviously decide on the filament type and color yourself, depending on whether you want your Easter decor to be a colorful eye-catcher or a more subtle background accent. You can find the corresponding STL files for the Easter bunnies and eggs in the 3D printing guide below.
This article contains affiliate/referral links, which are marked with an asterisk (*). If you make a purchase through these links, I may receive a commission at no additional cost to you.
3D printed parts
These are purely digital products, you get all the files you need to print the parts yourself in a ZIP folder. It contains the STL files for all required components and variants.
- 017200_Easter_Egg_Table_Decoration_small
- 017300_Easter_Egg_Table_Decoration
- 017400_Easter_Bunny_Table_Decoration_small
- 017500_Easter_Bunny_Table_Decoration
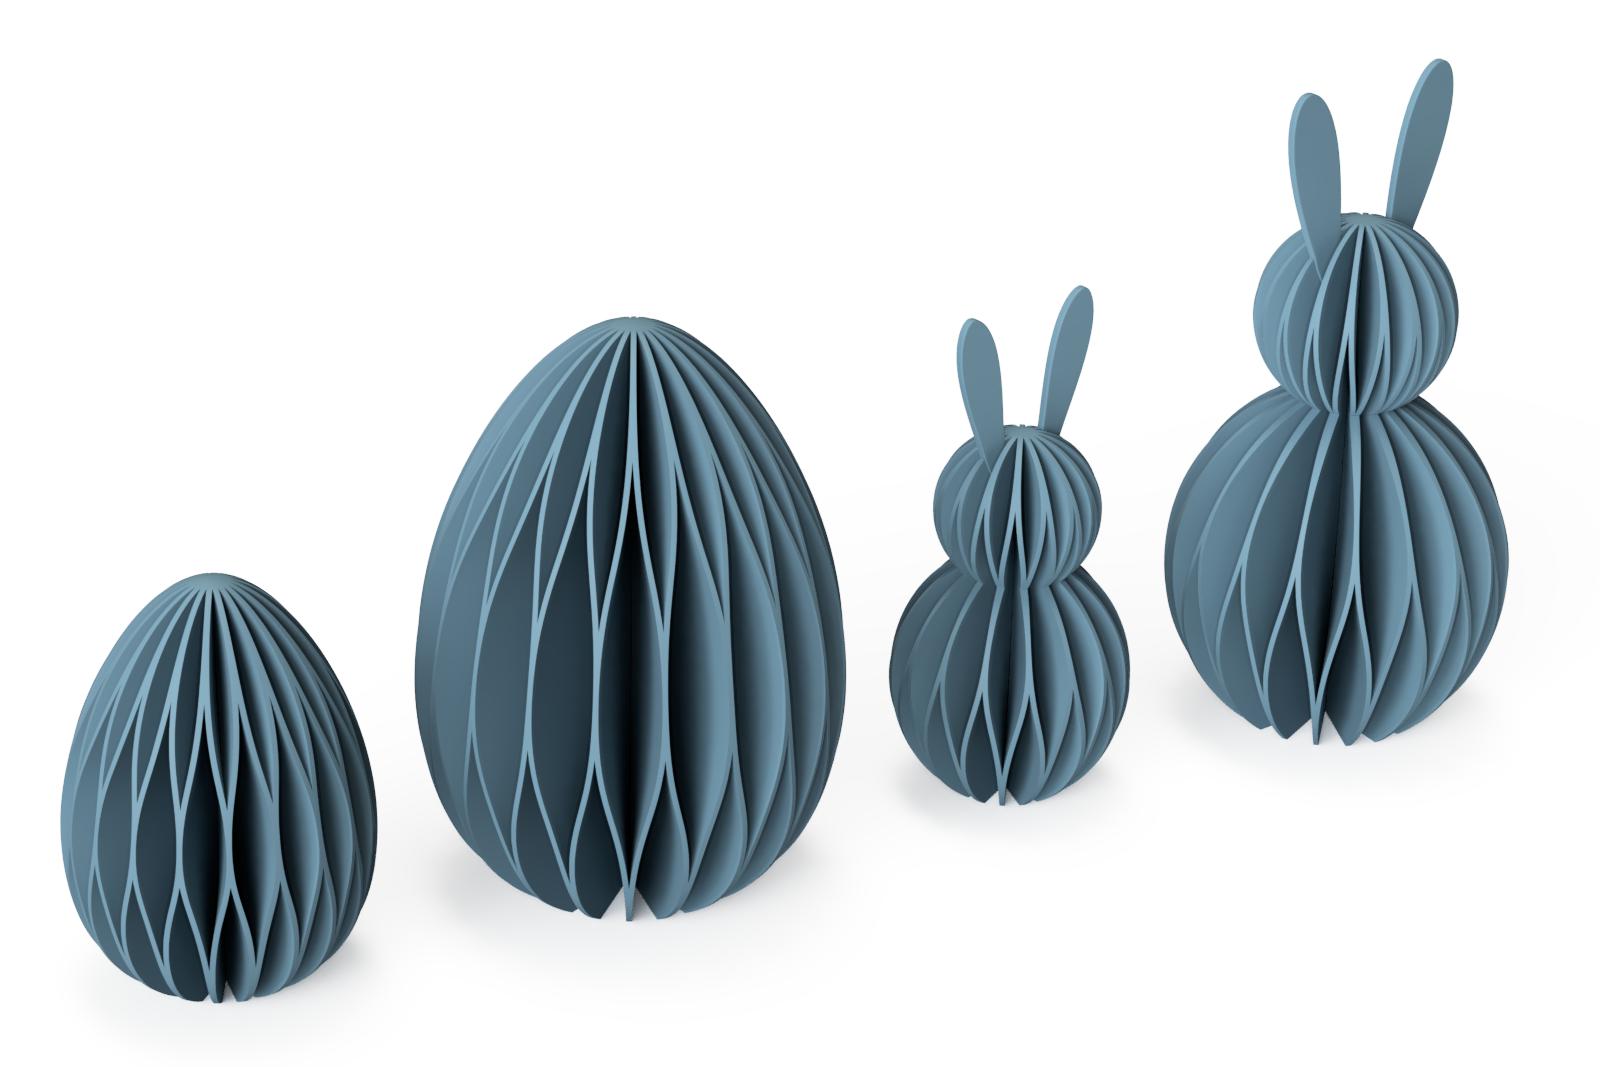
The 3D print files have a maximum height of 120 mm (Z-axis) and a maximum diameter of 72 mm. This means any standard 3D printer is suitable for this project. The following image shows the individual Easter decoration elements and their dimensions in detail.

Of course, you can still scale the STL files for the Easter eggs and bunnies to a different size in your slicer. However, keep in mind that the wall thickness decreases when scaling down and increases when scaling up. If you shrink them, the individual fan-like structures might become too thin to print cleanly. Conversely, if you enlarge the Easter decorations, the tissue paper effect might diminish as the thickness of the individual honeycombs increases.
3D print settings
The 3D printed Easter table displays shown here were printed using the following parameters:
- Layer height 0.2 mm and 15% infill (grid)
If there are problems with print adhesion on the print bed, it is best to use a brim for better adhesion.
If strings form on the Easter ornaments, either reduce the nozzle temperature during printing or, after 3D printing, briefly blow hot air on the strings with a heat gun to melt them away.
Used 3D printing filament and 3D printer
The honeycomb Easter decorations shown in this guide were printed on a Bambu Lab X1C and a Bambu Lab P1S using a 0.4 mm nozzle with the following filaments:
- White: Bambulab PLA Matte Ivory White – alternatively ELEGOO Matte PLA White*
- Pink: 3D Jake ecoPLA Pastel Pink (currently unavailable) – alternatively ELEGOO PLA Pink*
With the selected settings, the 3D printed Easter decorations will use between 25 g (small Easter bunny) and 85 g (large Easter egg) of filament, depending on the model chosen. At a price of 20 EUR per kilogram, the material costs range from 0.50 EUR to 1.70 EUR per piece.
Print time for the honeycomb Easter stands is approximately 1.5 to 3.5 hours (Bambu Lab P1S), depending on which part of the Easter decoration is being printed. The small bunny is the fastest (1.5 h), while the large Easter egg takes the longest (3.5 h).
Tutorial: How to 3D Print Honeycomb Easter Decorations
Safety Guidelines
Safety first! Read and follow the assembly instructions!
Read the entire assembly manual carefully and follow all instructions and safety guidelines. If anything is unclear, just reach out to support (support@3d-druck-vorlagen.de).
These instructions are only intended for persons of legal age (over 18 years old). If you lack knowledge in handling the tools or processes that occur, then it is essential to seek the help of trained persons. The preparation and assembly of the project is at your own risk.
3D printing of the parts
3D printing is incredibly easy. The STL files for the 3D printed table decor are already correctly oriented and just need to be placed on the build plate in your slicer.
If there are issues with print adhesion on the print bed, it is best to enable a brim in the slicer for better adhesion and print with it.
3D printed parts
Here are the finished 3D printed Scandinavian-style Easter decorations shown right on the build plate of the Bambu Lab P2S printer.
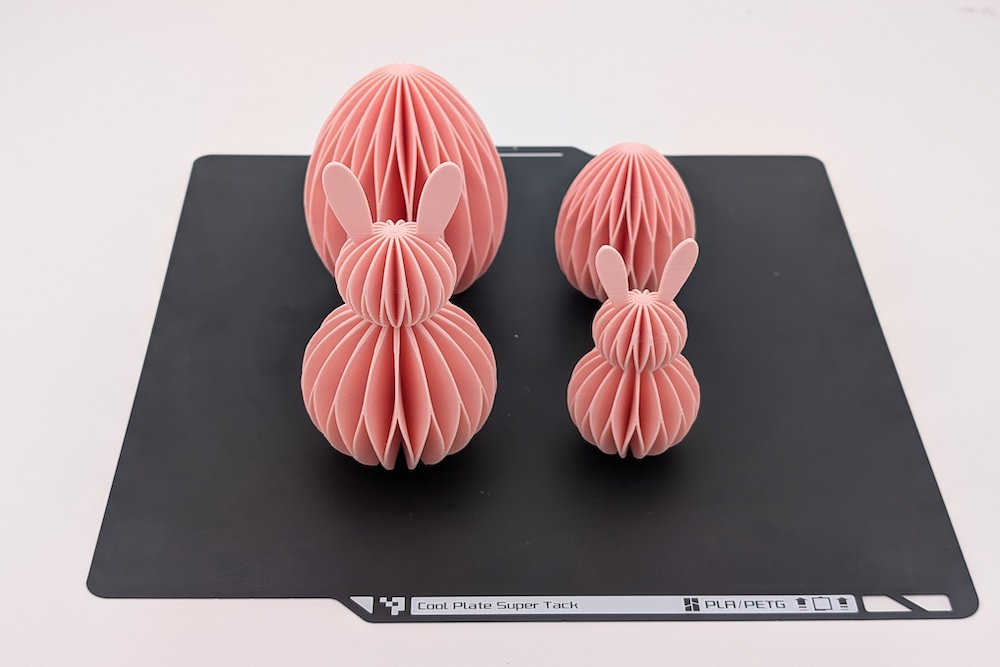
- 1 pc 017200_Easter_Egg_Table_Decoration_small
- 1 pc 017300_Easter_Egg_Table_Decoration
- 1 pc 017400_Easter_Bunny_Table_Decoration_small
- 1 pc 017500_Easter_Bunny_Table_Decoration
Layer height 0.2 mm and 15% infill (grid)
Below, you’ll find a detailed look at the 3D print Easter decor designs, shown here in pink and matte white.
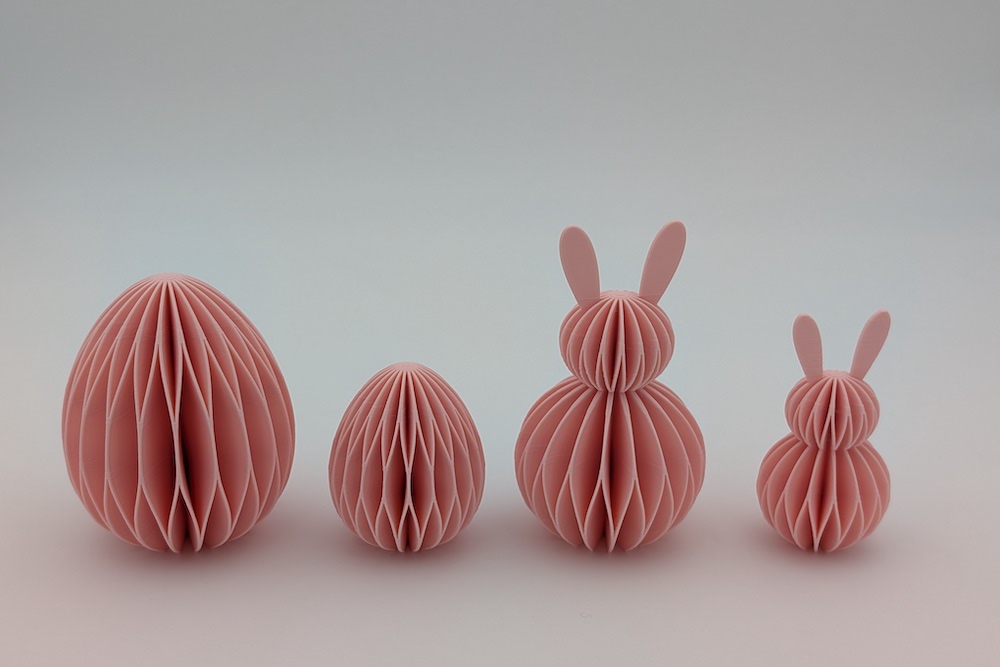
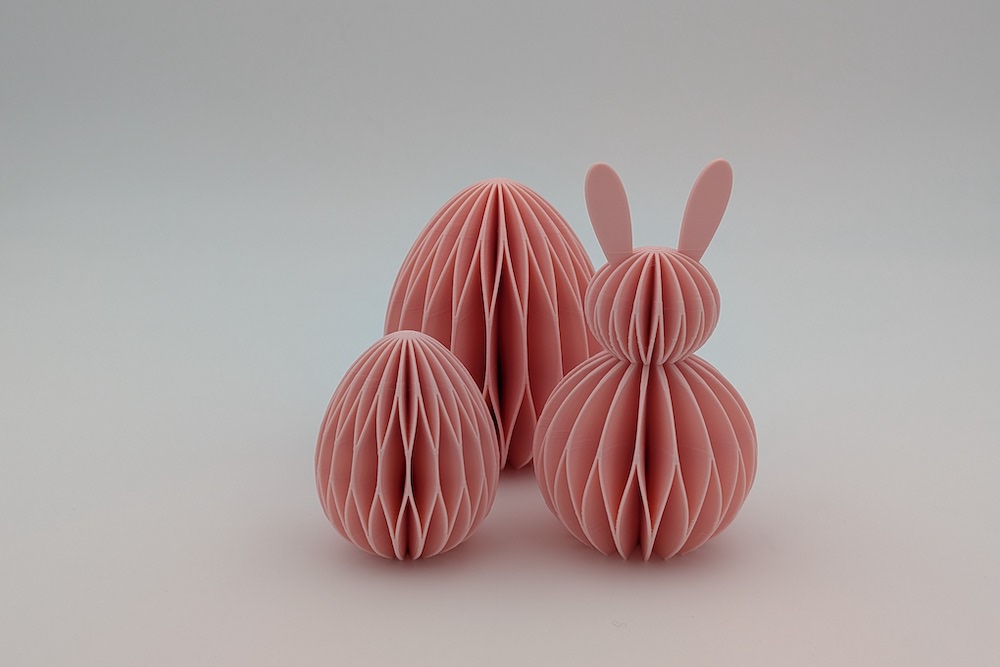
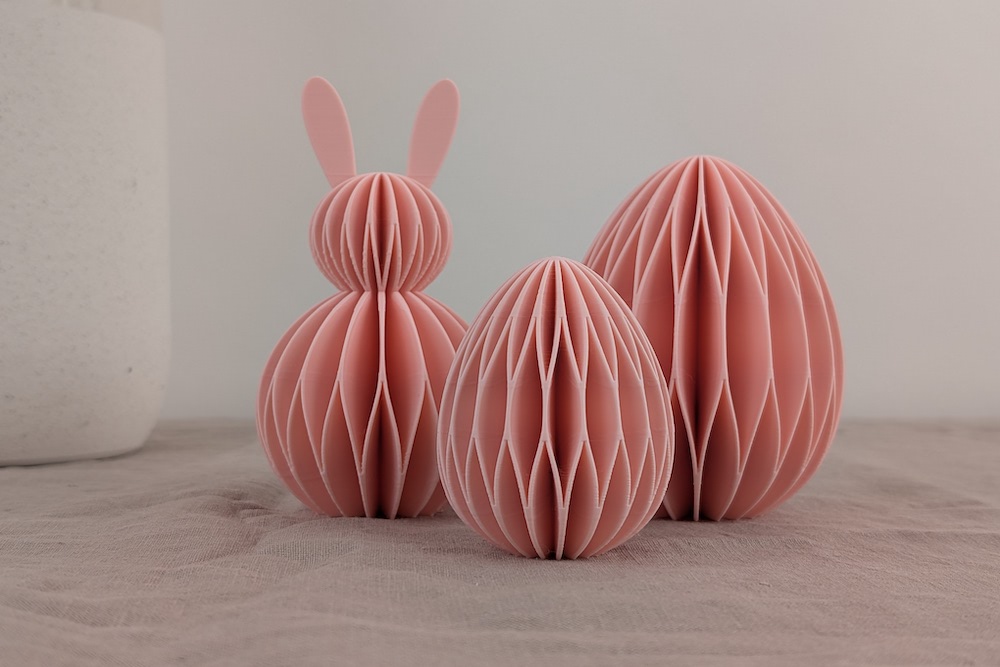
Honeycomb Easter decorations 3D printed in a subtle pink filament. From left to right: large egg, small Easter egg, large Easter bunny, and small bunny.
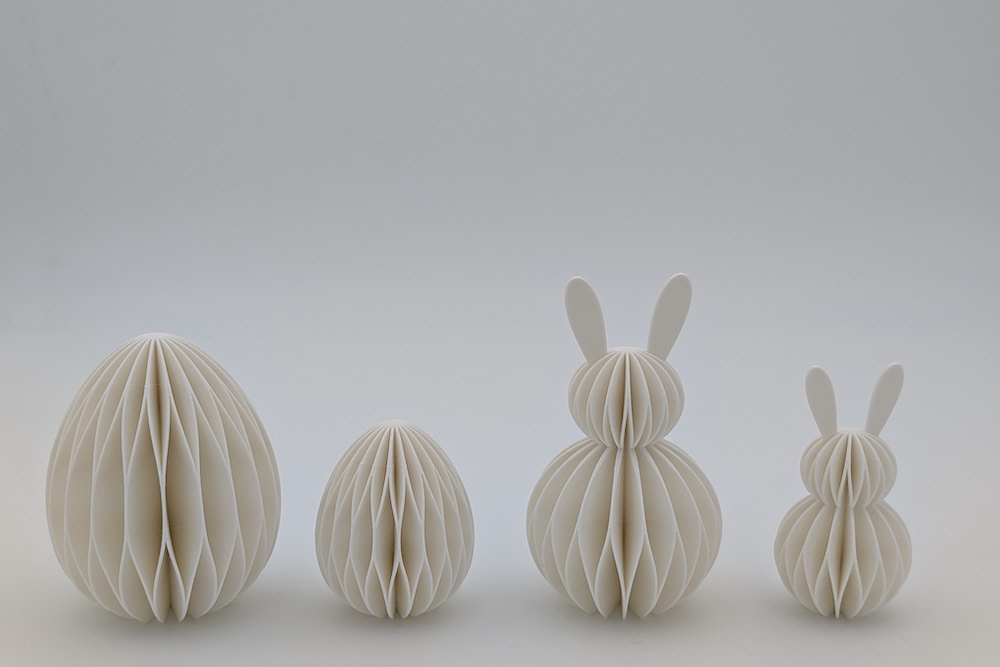
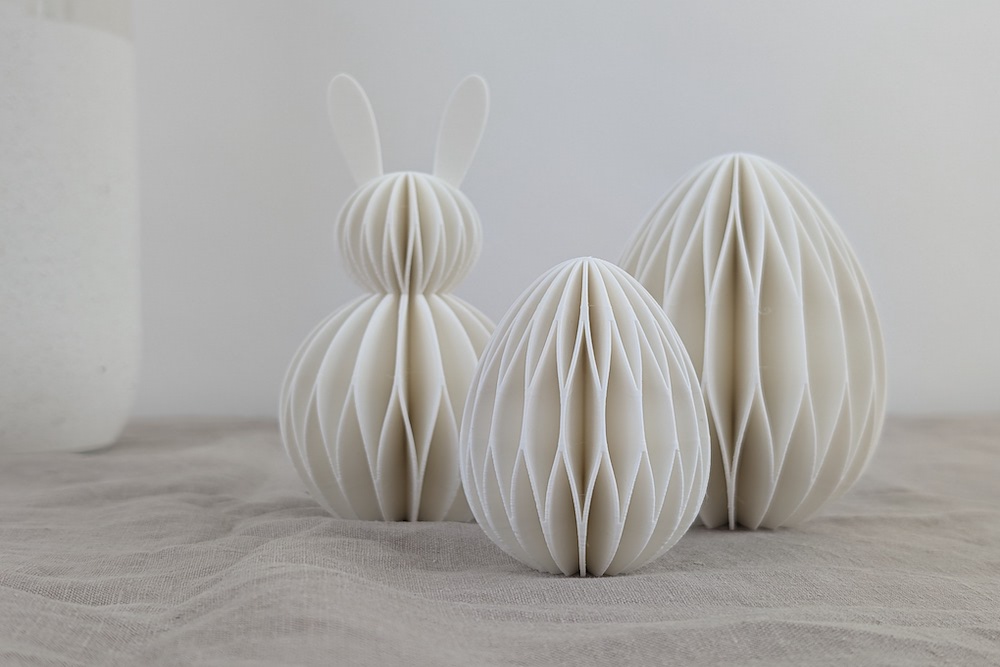
This image showcases Danish-style Easter decorations for your Easter holiday table, 3D printed in matte white.
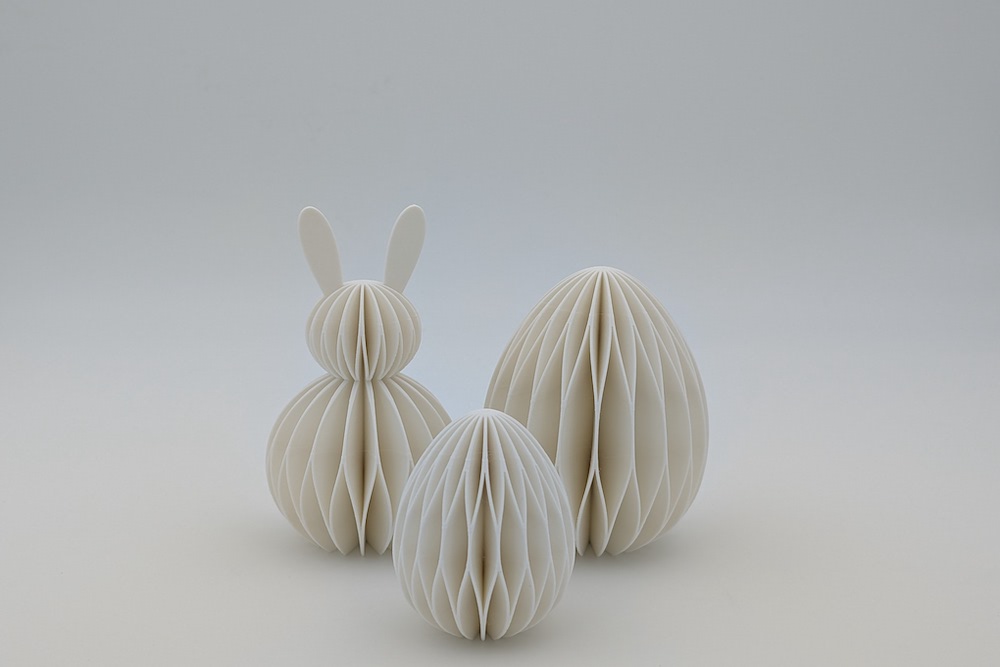
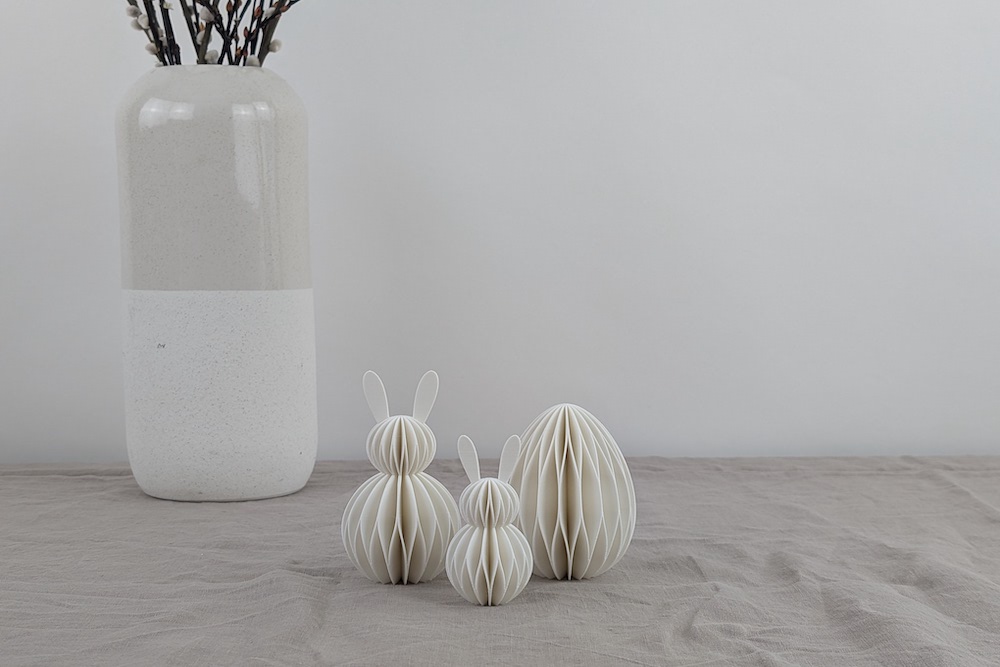
Below, the tissue-paper-style Easter displays are arranged in small groups again.
Of course, these 3D printed bunnies and eggs can be printed in any color and material you like, including recycled PETG.
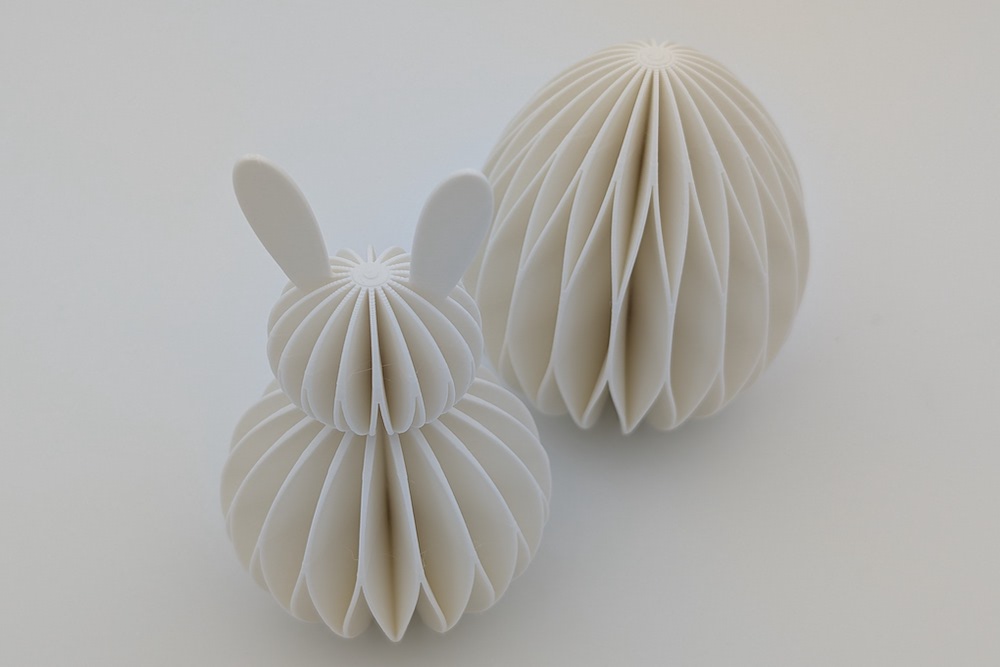
Here are some photos to give you some inspiration for your 3D printed Easter table decor.
Disclaimer
The instructions and the associated files are an inspiration of Ingenieurbüro Dr. Janko GmbH to build this project yourself. Since Ingenieurbüro Dr. Janko GmbH has no way of checking and influencing the required quality of the printed components and purchased parts as well as the quality of the assembly and the correct functioning of the project or if any inadmissible changes and modifications to the project has been made, Ingenieurbüro Dr. Janko GmbH accepts no liability for functionality, stability or damage incurred by the project.
0 Comments