

The awesome Ikea hack for your filament and 3D printer setup. Use Ikea Samla boxes to store your filament airtight and dry. Print directly from the Samla box and then simply close the filament feeder. Your filament spools always stay dry and dust-free. Save yourself the annoying trouble of unpacking and packing the filament spools.
Do you want to build a filament dry box out of an Ikea Samla box? Here is the perfect DIY Ikea hack for your 3D printing setup!
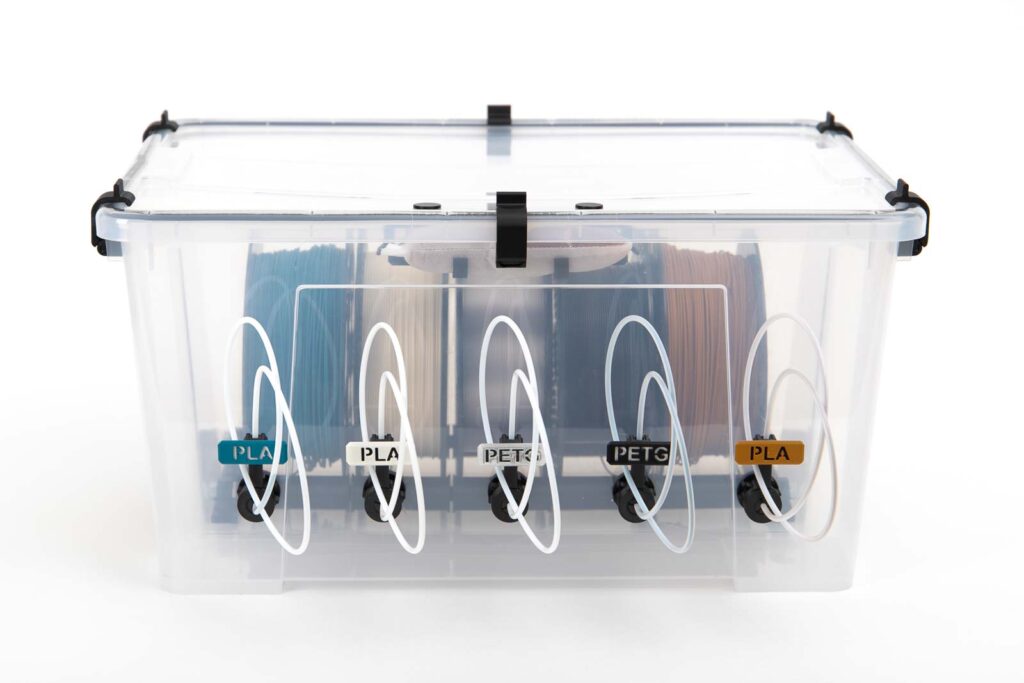
Thanks to the desiccant built into the filament storage box, the box always stays nice and dry. With the help of a few printed fasteners and sealing tape glued into the lid, you can transform your Ikea Samla boxes into airtight filament dry boxes. You can either build a small 22 liter (6 gallon) Samla box for up to 3 spools or a large 45 liter (12 gallon) Samla box for up to 5 filament spools.

The advantages are obvious: Ikea Samla boxes in 22 liter (6 gallon) and 45 liter (12 gallon) are available anywhere in the world at a reasonable price. In just a few steps they can be converted into airtight and dust-free filament storage and improve your 3D printing setup.
This short guide shows how to prepare the Samla boxes for their use as filament dry storage boxes. Especially how the sealing tape is attached to the lid and how the 3D printed fasteners for the 22 liter (6 gallon) or 45 liter (12 gallon) Samla Box are fixed.
You can find the instructions for building the filament box here:
The article contains affiliate links / advertising links, these are marked with an asterisk (*). If you make a purchase through these links, I may receive a commission at no additional cost to you.
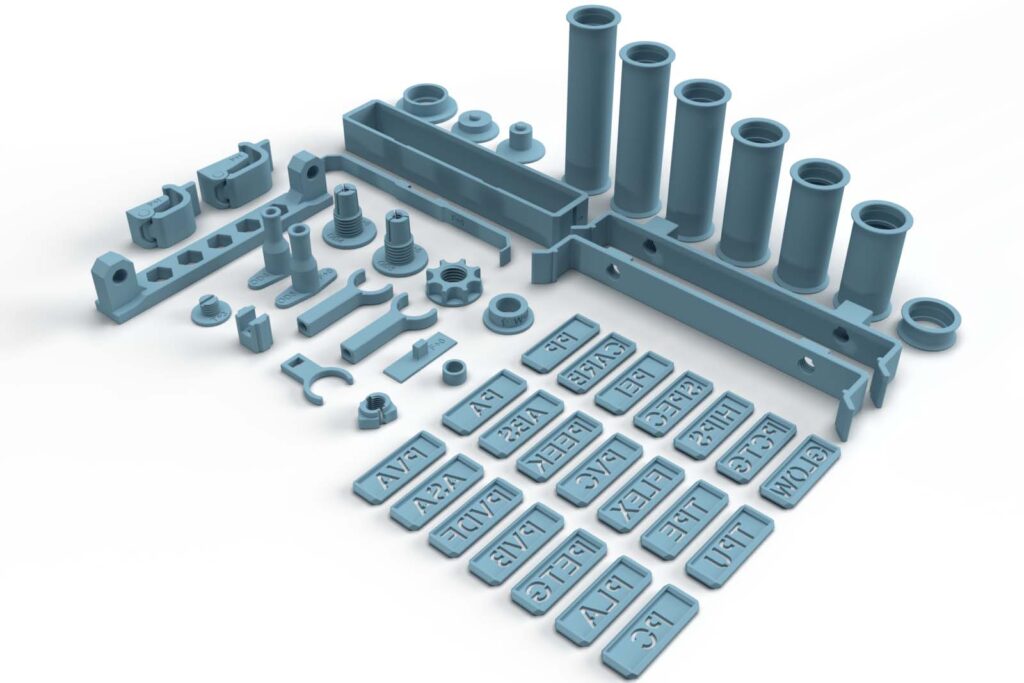
3D printed parts
The 3D printing parts are the same as for the classic filament box, see instructions here: DIY filament dry box
When converting a Samla box, the STL files 010900_Samla_Fastener_22L or 011000_Samla_Fastener_45L are required.
These are purely digital products, you get all the files you need to print the parts yourself in a ZIP folder. It contains the STL files for all required components and variants, as well as additional accessories.
Bill of materials: Needed purchased parts for the Samla box modification
Except for the Samla boxes and an additional sealing tape, the purchased parts are also the same as for the classic version of the filament dry box, see instructions here: DIY filament dry box
Instead of the airtight boxes, get either a 22 liter (6 gallon) IKEA Samla box or a 45 liter (12 gallon) IKEA Samla box including a lid and a self-adhesive sealing tape.
- IKEA Samla 12 gallon (45 liter) with lid (approx. 13 USD / pc) for a large Samla filament box
- IKEA Samla 6 gallon (22 liter) with lid (approx. 7 USD / pc) for a small Samla filament box
- Sealing tape D-type 9×6 mm (Amazon.com US)* (approx. 8 USD / 10 m) for sealing the Samla boxes
Required tools
As always, a new project is the best excuse to buy new tools 😉
- Box cutter (Amazon.com US)*
- Double-sided tape (Amazon.com US)*
- Super glue (Amazon.com US)* (optional)
Instructions: Prepare the IKEA Samla Box
In order to use the IKEA Samla Box as an airtight box, it requires a sealing tape so that the lid closes airtight as well as 3D printed fasteners so that the sealing tape is firmly pressed on. With newer Samla Box lids, the implemented locking lugs have to be cut away before.
Safety Guidelines
Safety first! Read and follow the assembly instructions!
Read the entire assembly instructions carefully and follow the instructions and safety warnings. If anything is unclear, simply contact support (support@3d-druck-vorlagen.de).
These instructions are only intended for persons of legal age (over 18 years old). If you lack knowledge in handling the tools or processes that occur, then it is essential to seek the help of trained persons. The preparation and assembly of the project is at your own risk.
Legend: Warnings and Symbols


General safety instructions for assembling the project
Wear assembly gloves to protect your hands during all processing steps in which saws or knives are used.
Separating the locking ledge on the lid
Newer (from 2022) lids for the Samla Box have two small ledges on the sides which fix the lid onto the box. Since the sealing tape increases the distance between the box and the lid, they no longer fit. That’s why they are quickly cut off with a box cutter.

Identify the locking ledge on the lid and get the cutter ready.
Place the knife close to the lid and cleanly cut off the ledge.
Cut off the lead on the second side too.
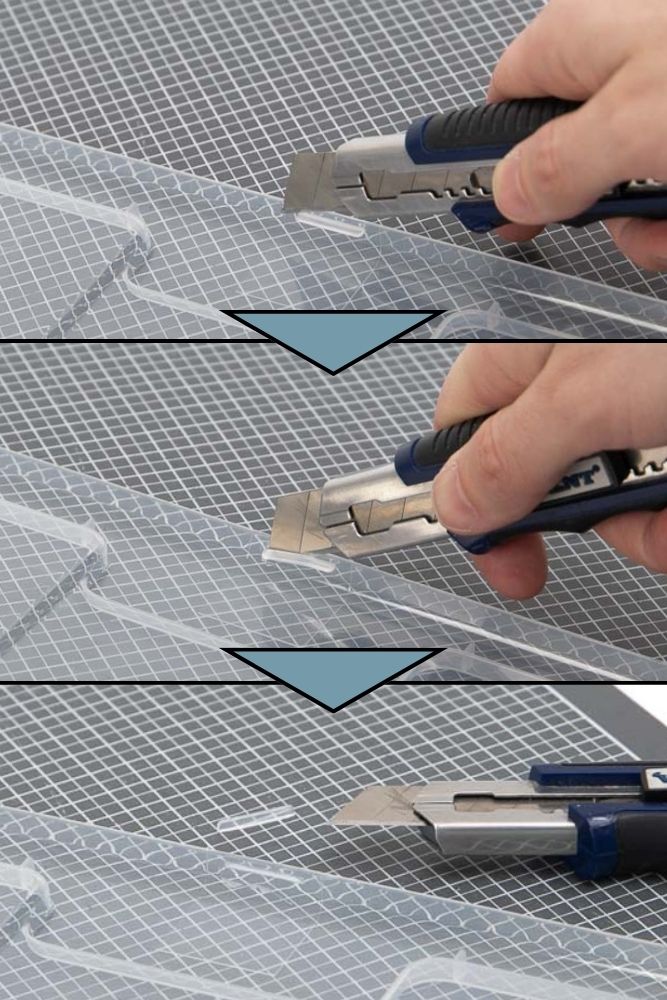
Attaching the sealing tape to the lid of the Samla Box
In order to make the Ikea Samla box airtight, a self-adhesive sealing tape must be attached to the lid.
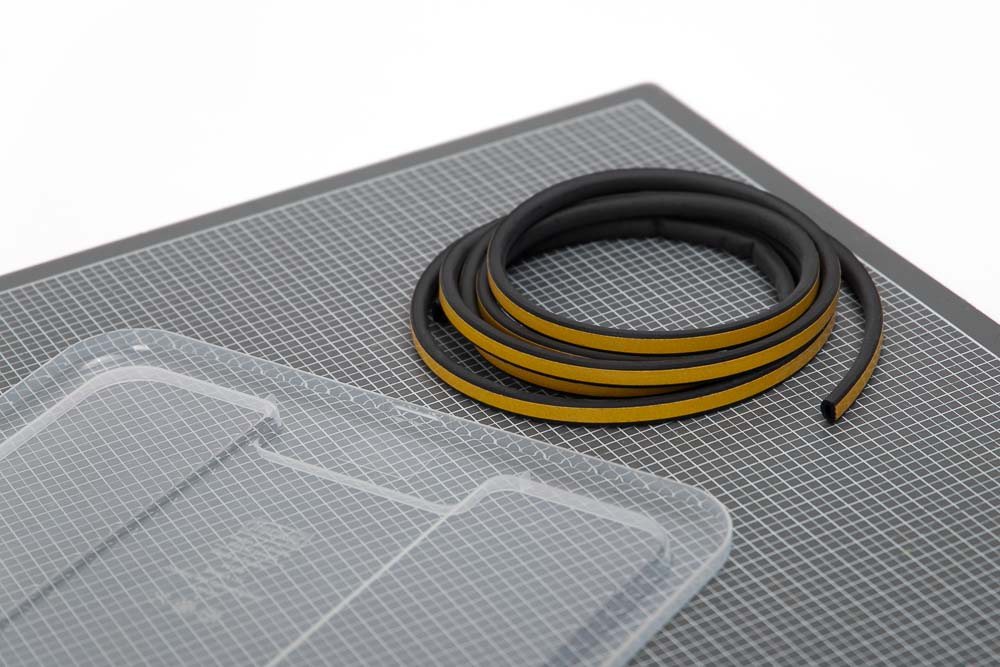
Prepare Ikea Samla lid and sealing tape.
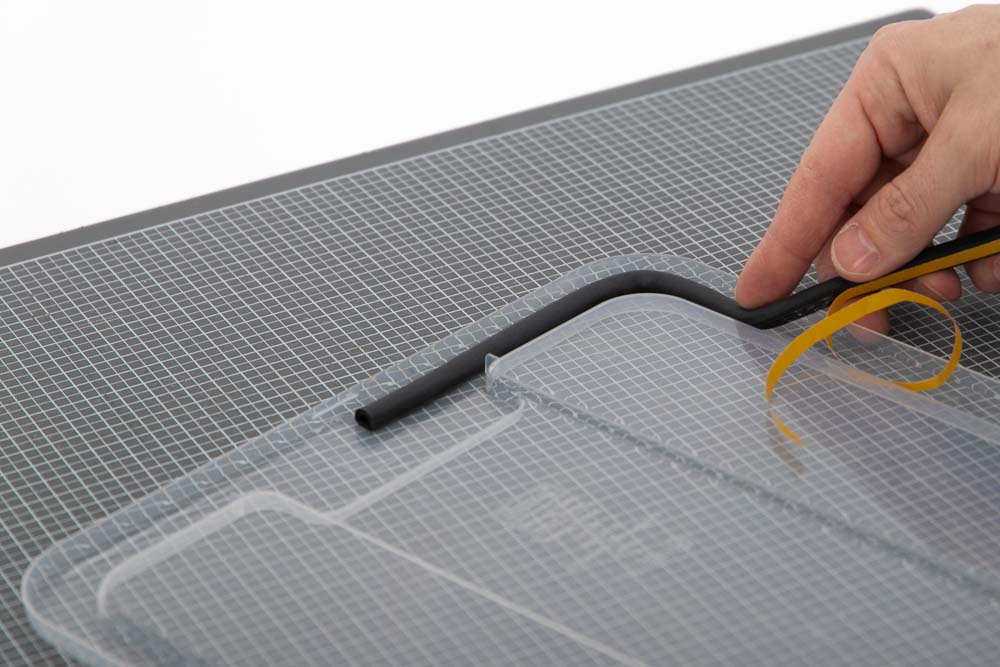
Remove the adhesive strip from the sealing tape and stick it piece by piece to the lid.

Attach to the radii as far outside as possible, see photo.
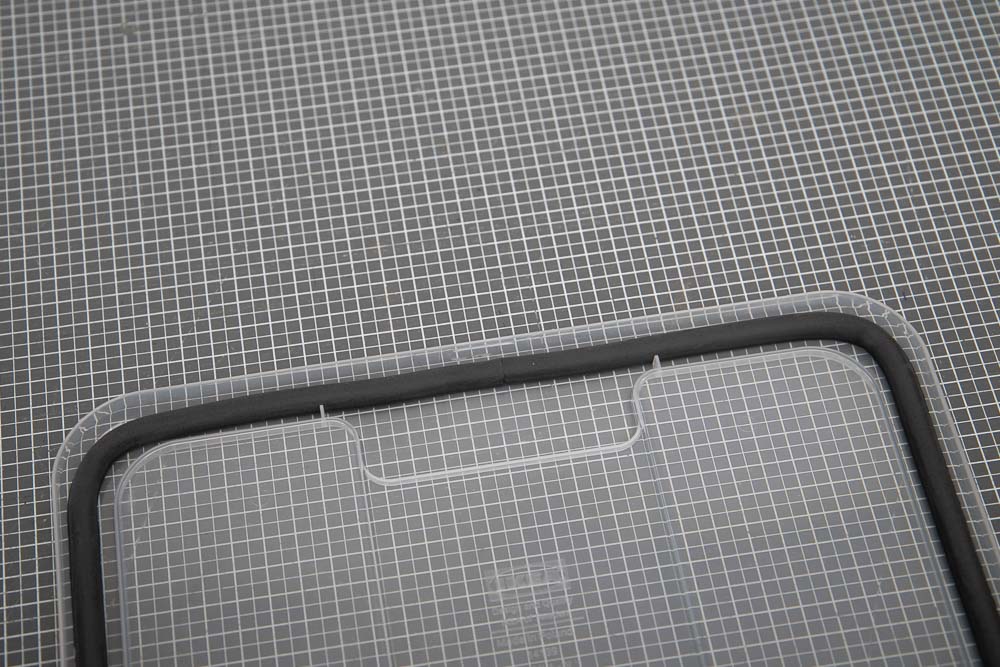
At the end, cleanly cut through the sealing tape with a box cutter and connect it as closely as possible to the starting point. Optionally glue the two ends together with super glue.
Great, the Samla lid is prepared! Now a little 3D printing magic comes into play to close the boxes neatly 😉
Attach 3D printed fasteners to the Samla Box
In the last step 3D printed fasteners are needed. Depending on whether you have a 22l (6 gallon) Samla Box or 45l (12 gallon) Samla Box, you will need 4 or 6 pieces of the 3D printed fasteners.
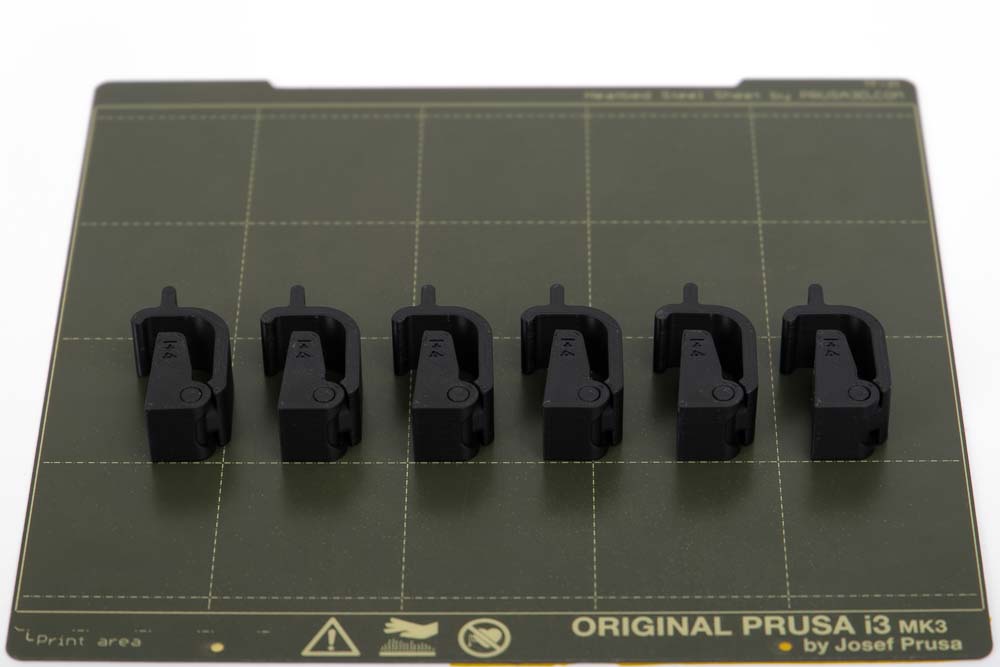
Required 3D printed parts
The fasteners are already printed with an integrated joint. Since every 3D printer has different printing accuracies, the gaps between parts can be too narrow or too wide. That’s why this 3D printing part is executed as a PrintFit System file. This means that there are 5 different STL files with various gaps widths of the print-in-place joints.
Depending on whether you build the 22l (6 gallon) or the 45l (12 gallon) version, there are different fasteners that differ slightly in height. You going to need 4 pieces for the 22l box and 6 pieces for the 45l version of the Samla box in order to press the lid evenly onto the box.
For the 22l (6 gallon) Ikea Samla Box:
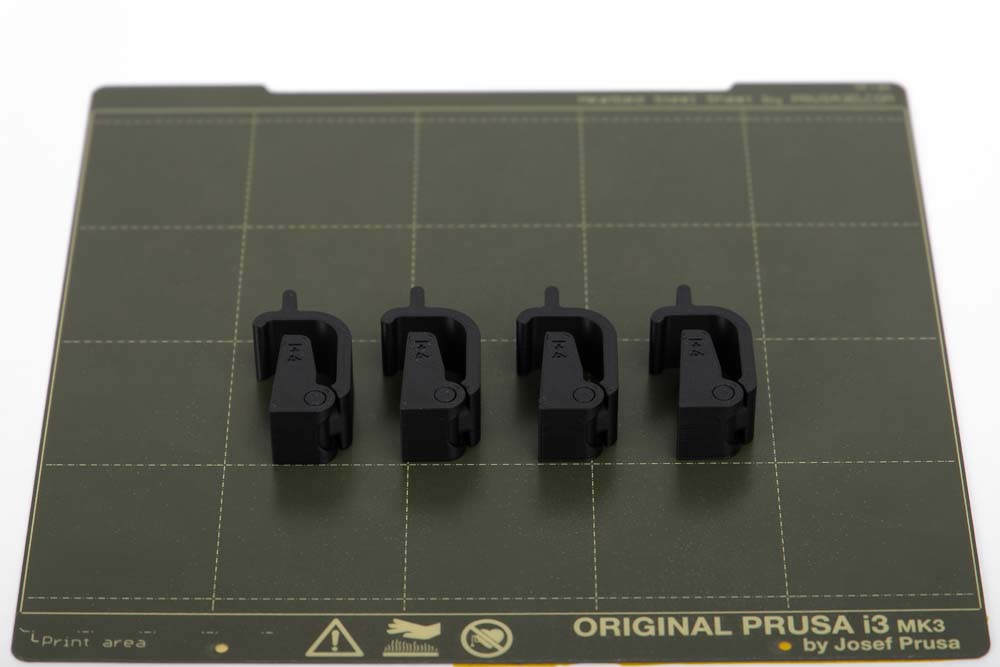
- 4 pcs 010900_Samla_Fastener_22L_I+4
Layer height 0.2 mm and 100% infill (rectangular)
The fastener is a PrintFit System part:
The standard 3D print file of the fastener is the I+4. If the joint cannot be moved, then print version I+5, which has a larger gap between the joint print-in-place parts. If the standard version of the joint is too loose then print version I+3, which has a smaller joint gap.
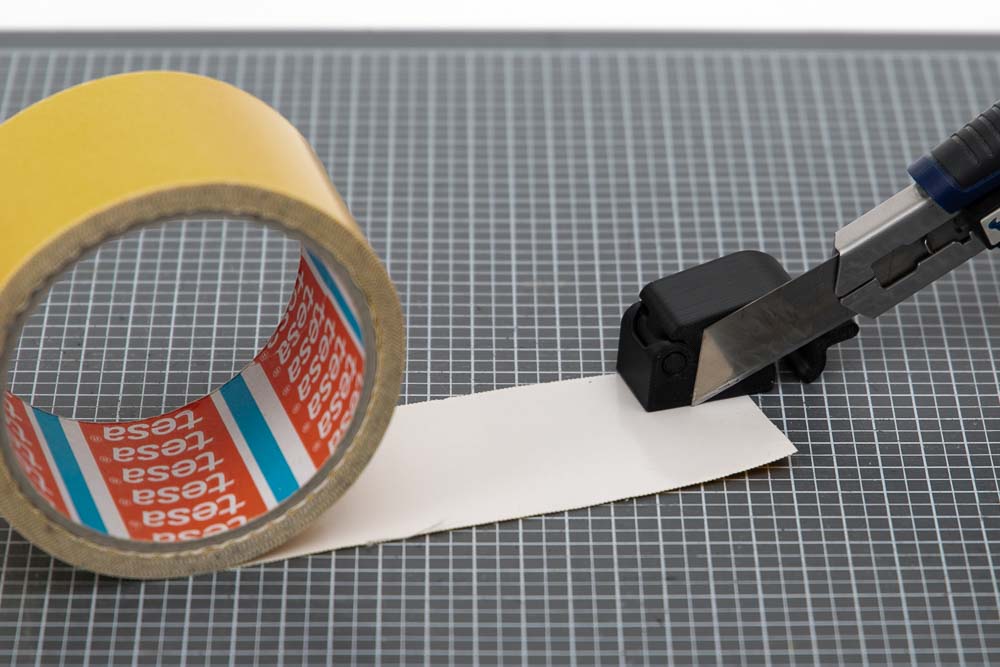
Apply double-sided adhesive tape to the 22l fasteners on the side which is later facing the box. The easiest way is to place the fastener on the tape and cut along at the side with a box cutter.
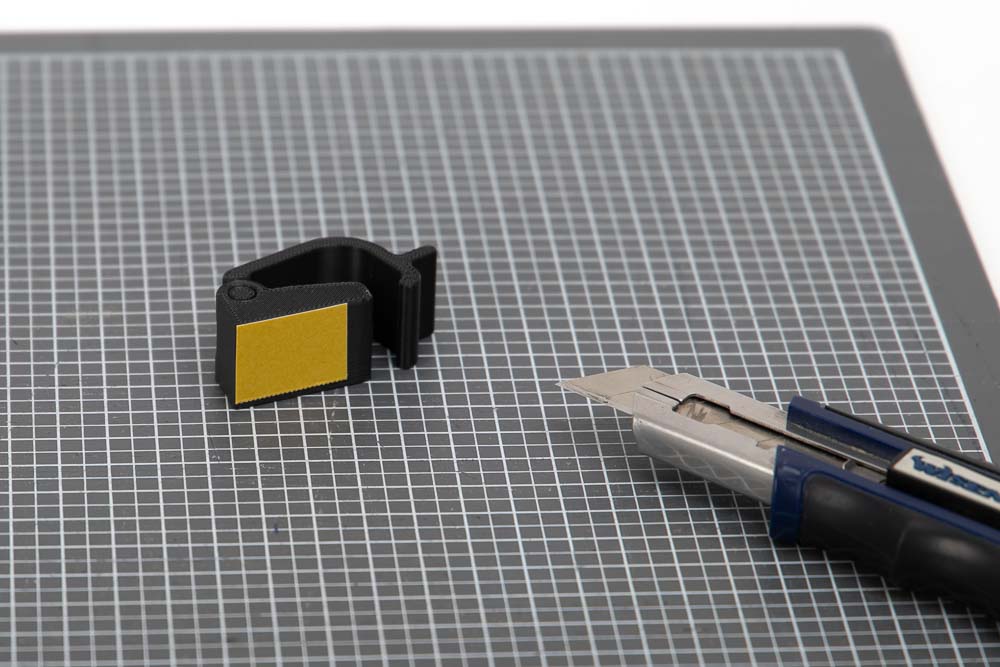
Prepared 3D printed fastener, ready to be attached to the Samla Filament Box.
Attach the four prepared 22l fasteners to the Samla Box as shown in the photo.
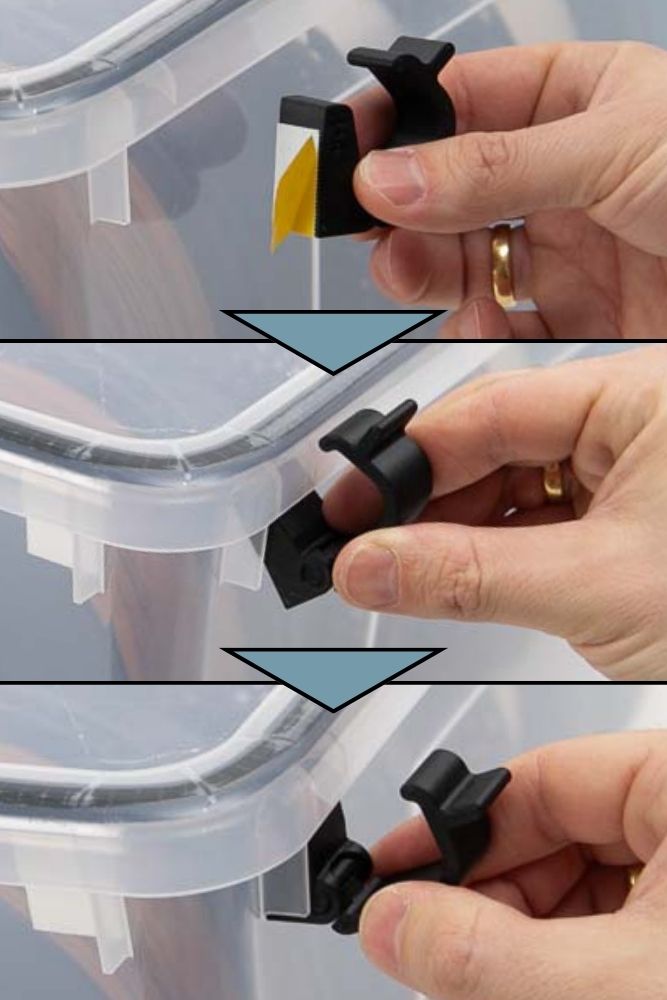
To do this, remove the protective film from the double-sided adhesive tape and slide the fastener under the brim of the box right next to the reinforcing rib. Make sure that the adhesive tape does not yet touch the side wall. Only when the fastener is in place (touching the brim inside), press it towards the side wall of the box and fix it.
For the 45l (12 gallon) Ikea Samla Box:
- 6 pcs 011000_Samla_Fastener_45L_I+4
Layer height 0.2 mm and 100% infill (rectangular)
The fastener is a PrintFit System part:
The standard 3D print file of the fastener is the I+4. If the joint cannot be moved, then print version I+5, which has a larger gap between the joint print-in-place parts. If the standard version of the joint is too loose then print version I+3, which has a smaller joint gap.
Apply double-sided adhesive tape to the 45l fasteners on the side which later facing the box. The easiest way is to place the fastener on the tape and cut along the side with a knife.
Prepared 3D printed fastener, ready to be attached to the Samla Filament Box.
Attach the six prepared 45l fasteners to the 45 liter (12 gallon) Samla Box as shown in the photo.
To do this, remove the protective film from the double-sided adhesive tape and slide the fastener under the brim of the box right next to the reinforcing rib. Make sure that the adhesive tape does not yet touch the side wall. Only when the fastener is in place (touching the brim inside), press it towards the side wall of the box and fix it.
Functional test of the fasteners on Samla Box
As a quick final test of the converted box, briefly check whether the fasteners close well and if they squeeze the sealing tape all around the box, in order to make the box airtight.
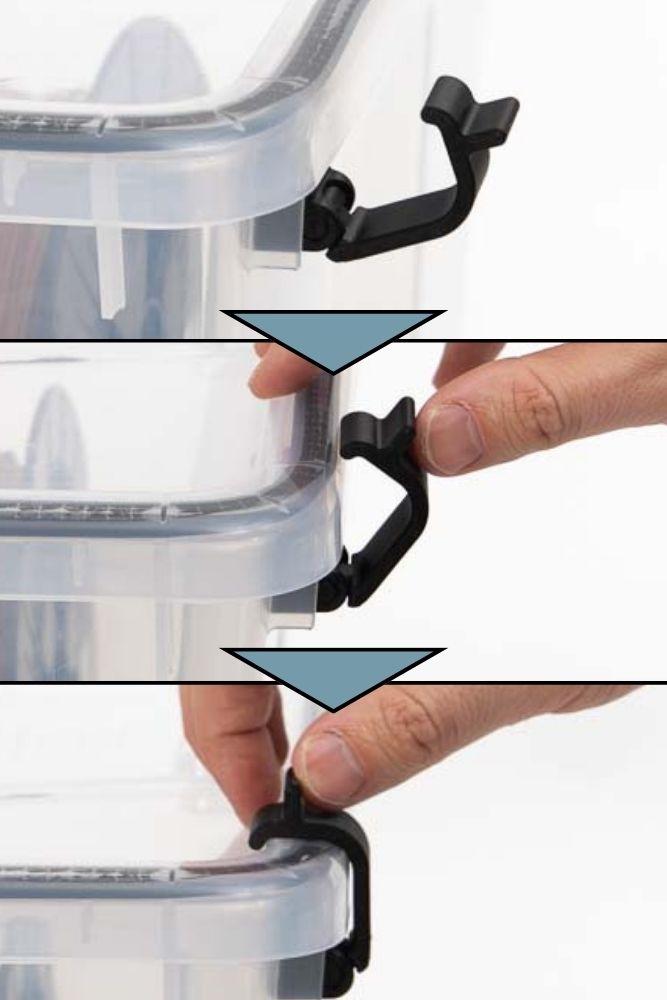
To do this, press the lock over the edge of the lid of the IKEA Samla Box with your thumb. The closure should slightly squeeze the sealing tape and click into place on the lid.


If the fasteners close well and the sealing tape is pressed firmly all around, you have completed the first step! Congratulations the Ikea Samla Box is now ready to be turned into a filament dry box.
You can find all further steps in the instructions for building the filament box:
Additional instructions for building a filament storage from Samla boxes
If IKEA Samla boxes are used, it is important to adjust the threaded M8 rod length and the drilling pattern for the filament feedthroughs.
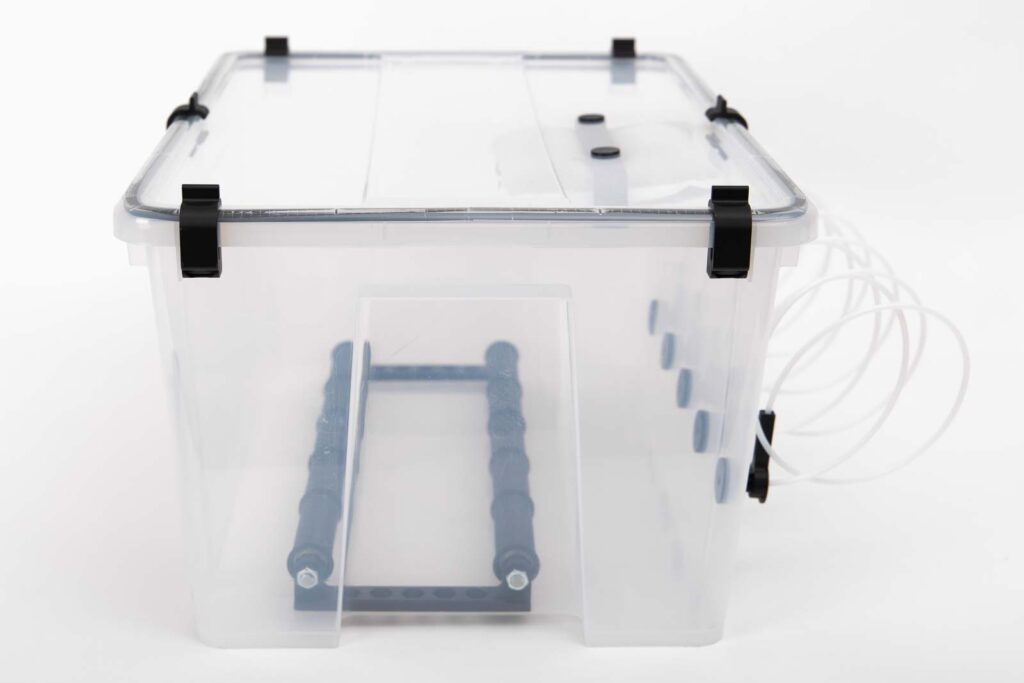
Maximum possible threaded rod length for 22 and 45 liter Samla Box
When building the filament dry box IKEA Hack, it is important to saw off the threaded rods for the Filament spool storage to the correct length. Following maximum threaded rod lengths are possible:
- 304 mm in the 22 liter (6 gallon) Samla box
- 448 mm in the 45 liter (12 gallon) Samla box
The Samla filament boxes shown here were built with these threaded rod lengths. In the 22l (6 gallon) Samla box, 3x 80 mm wide pulleys were then placed side by side onto the threaded M8 rod.
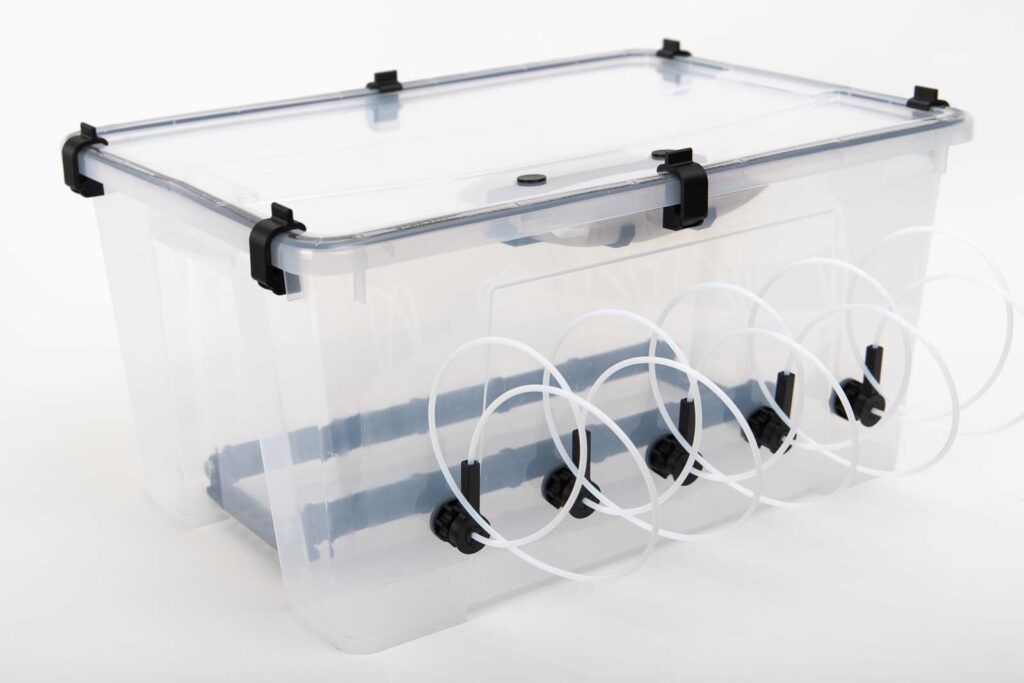
2x 80 mm wide pulleys and 3x 70 mm wide pulleys are used in the 45l (12 gallon) Samla box. The 80 mm wide pulleys are located here on the sides of the box.
Drilling patterns for filament feed through in the 22 and 45 liter Samla Boxes
Below are two technical sketches with the drilling patterns for the holes on the Samla boxes. There are 5 holes for the 45l (12 gallon) Samla box and 3 holes for the 22l (6 gallon) box.
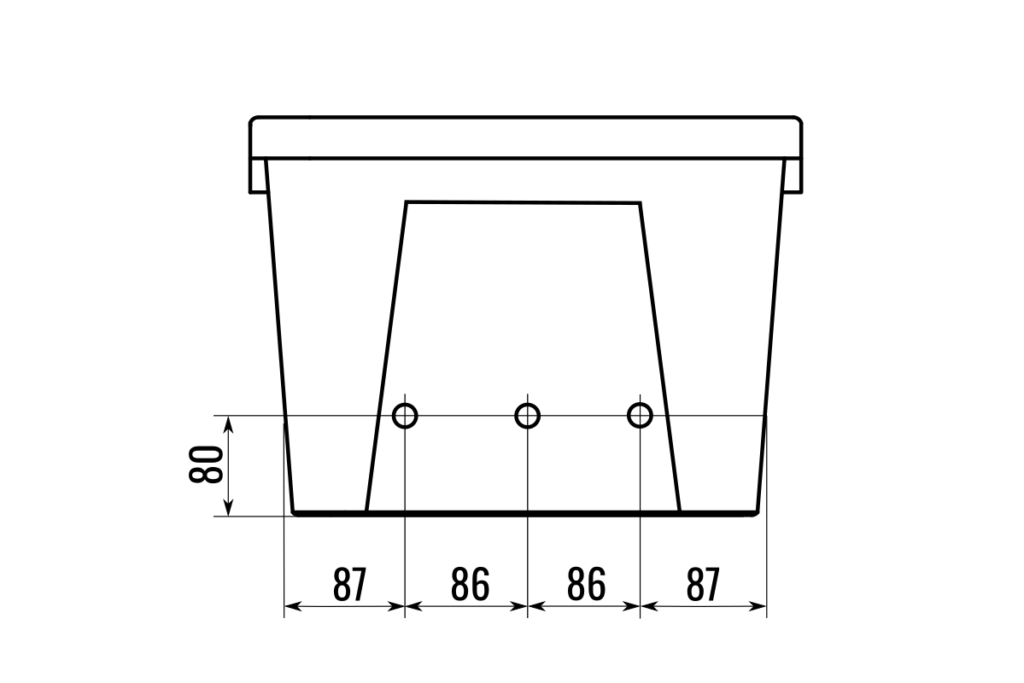
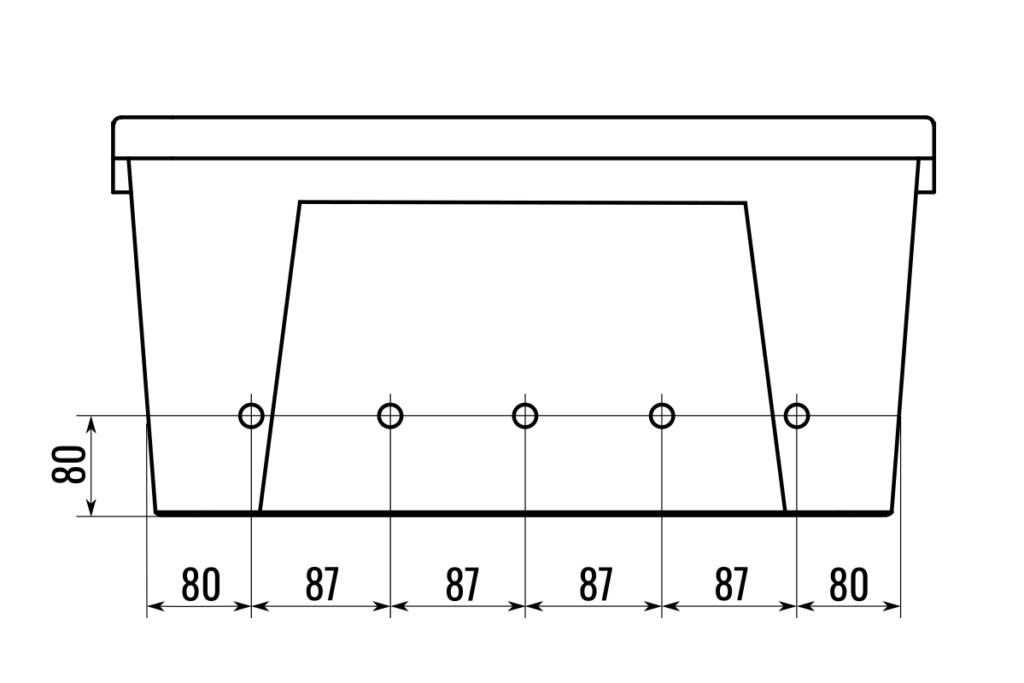
Of course, more or fewer filament feedthroughs / filament spools can also be used. The shown drilling patterns are those for the example boxes photographed in these instructions.
You can find all further steps in the instructions for building the filament box:
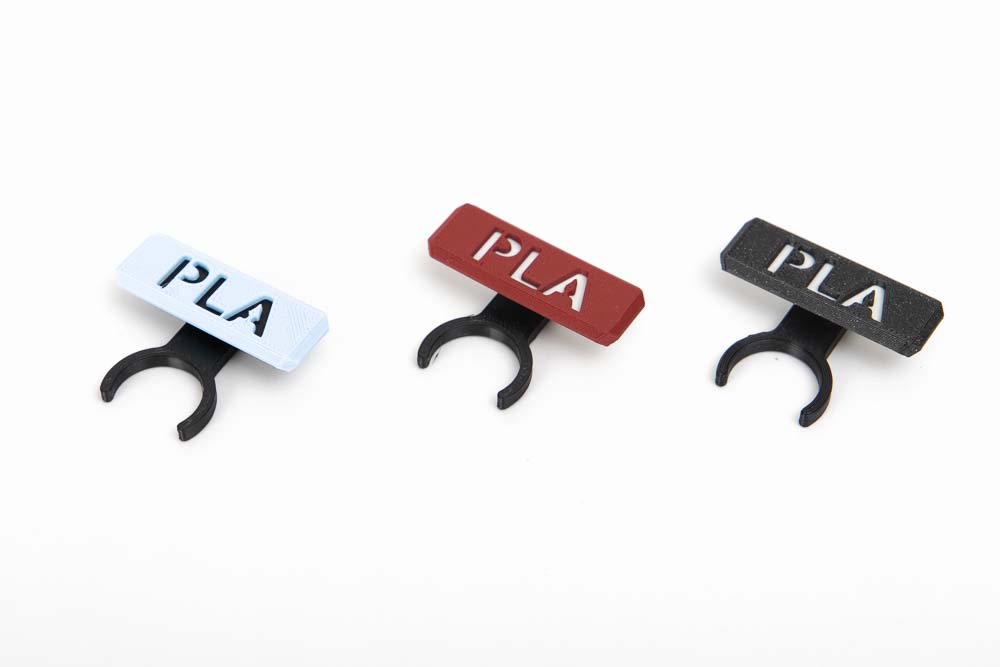
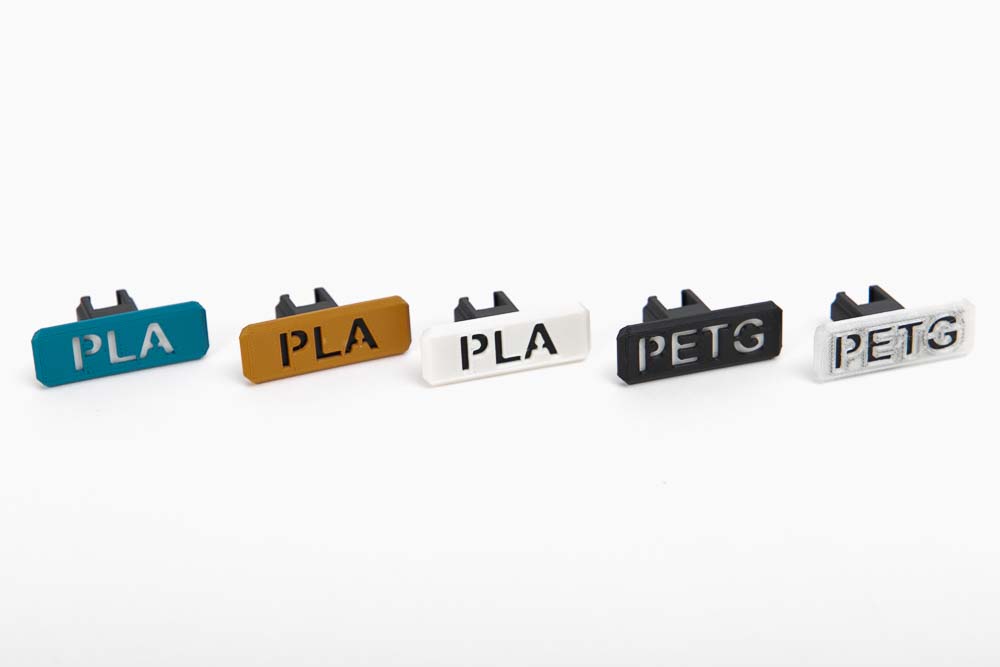
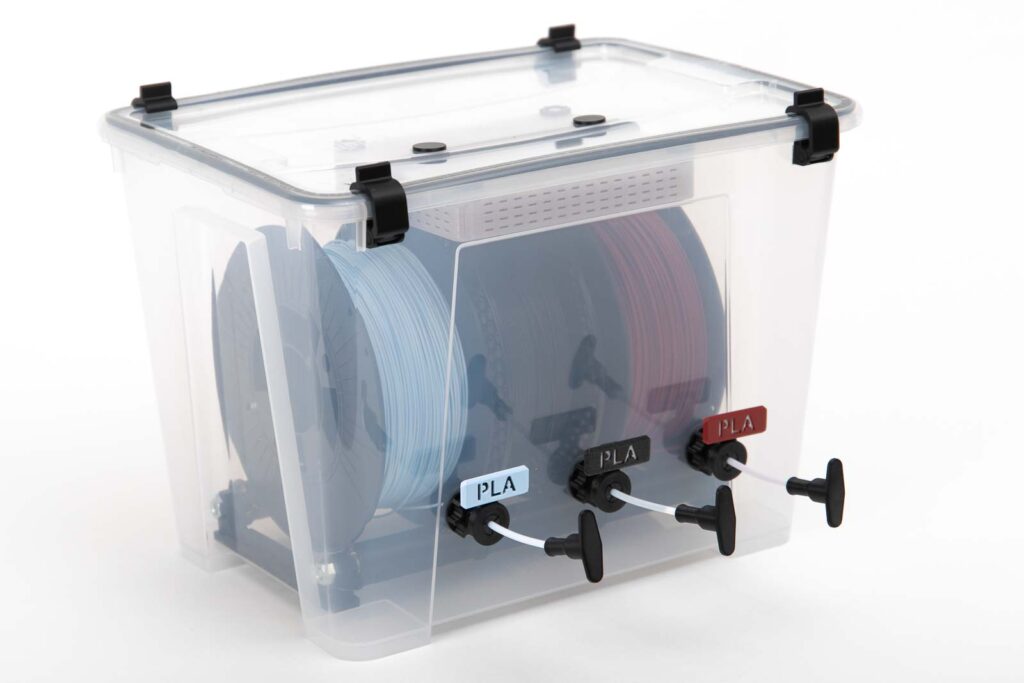
Material labels for the Samla filament boxes
Just like with the classic Filament Box, material labels can be printed for the IKEA Samla version of the Filament Box and be attached on the Filament Outlets.
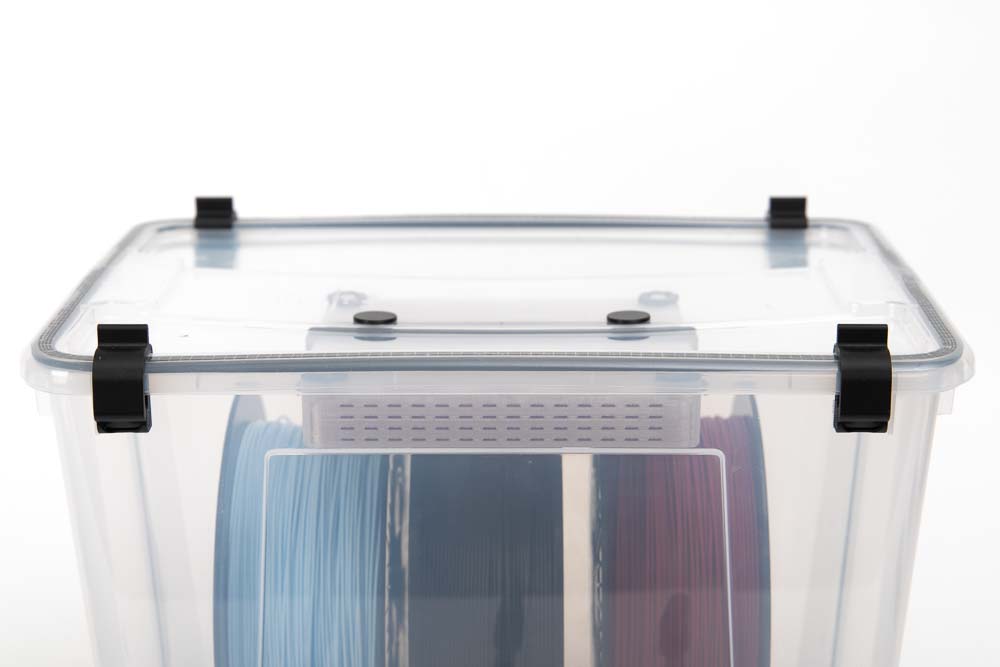
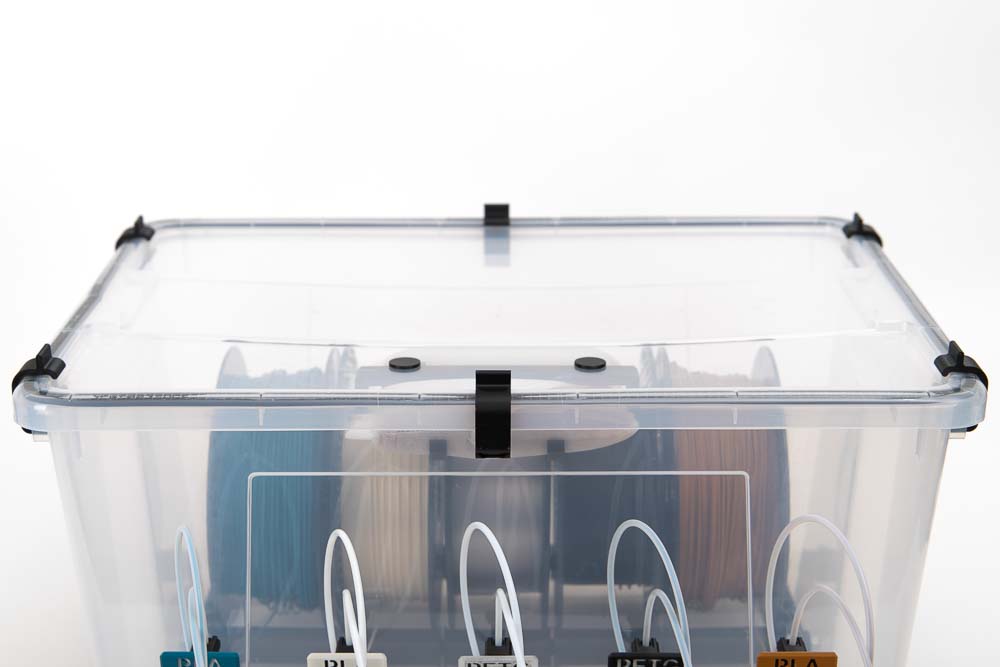
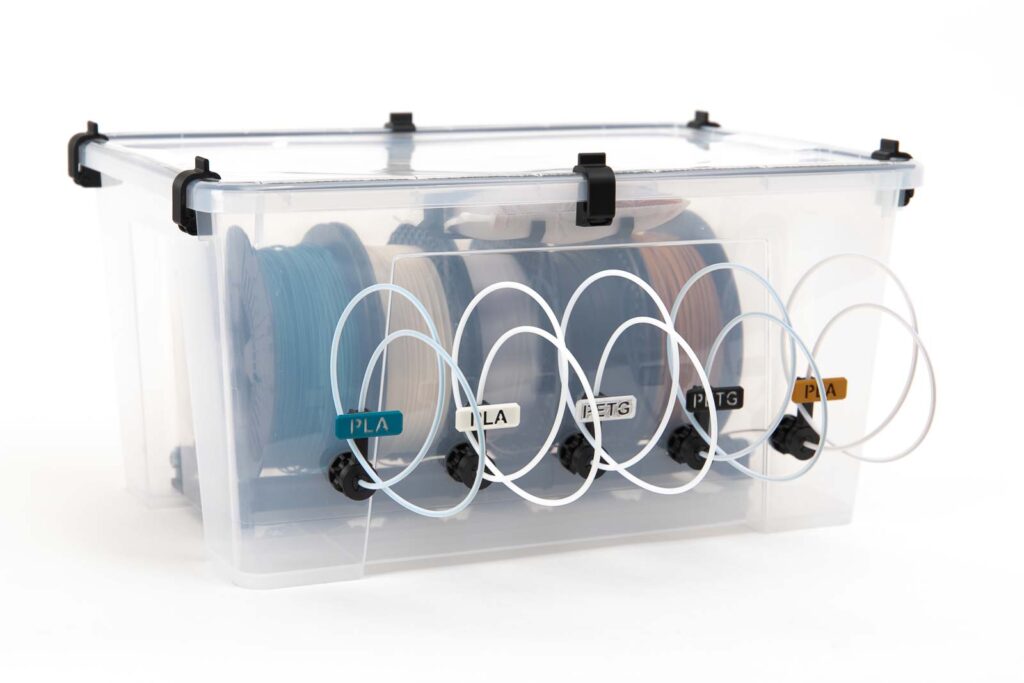
Below some photos of the built IKEA Samla filament boxes:
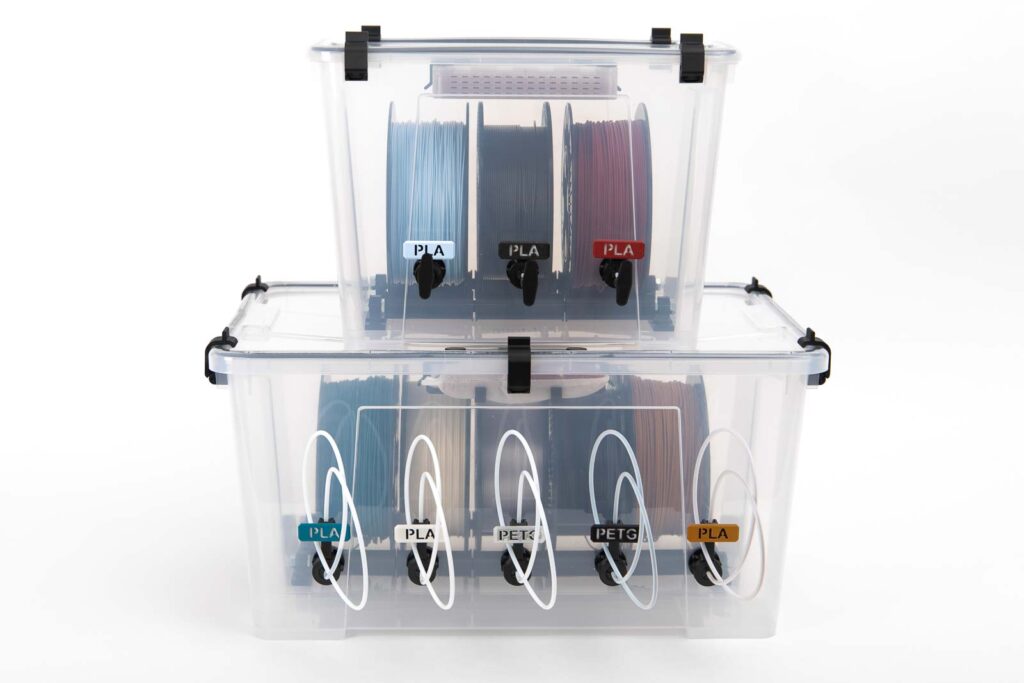
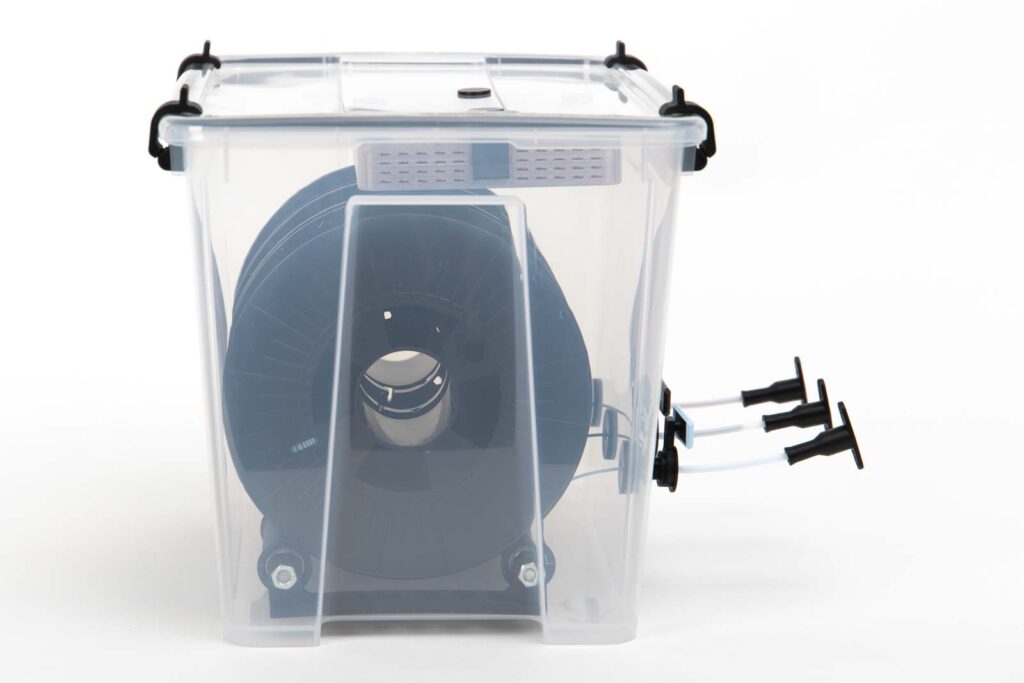
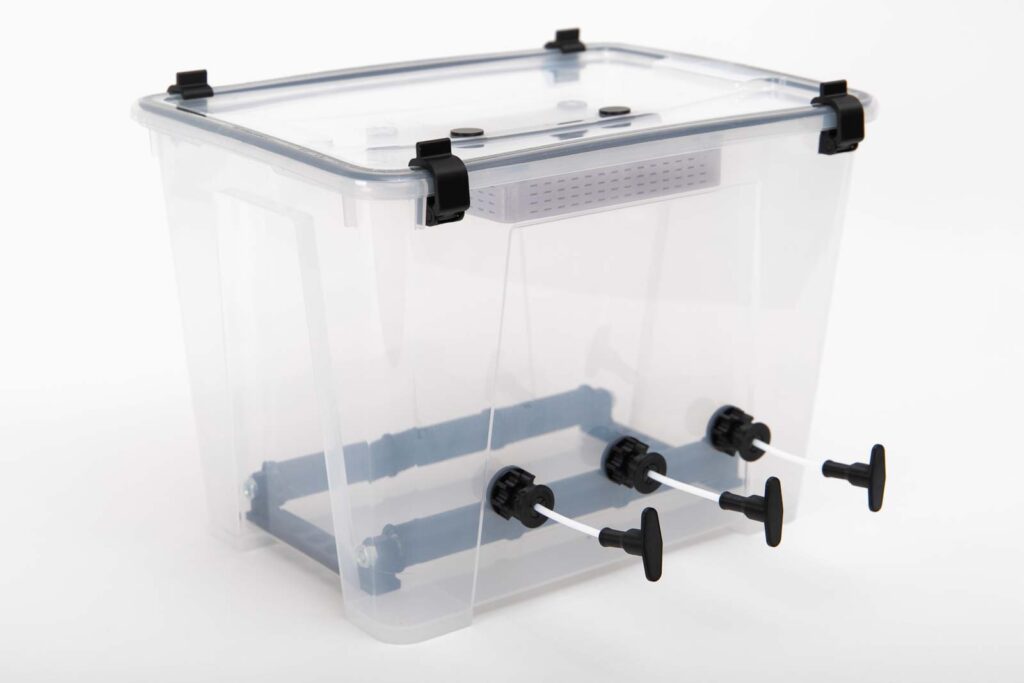
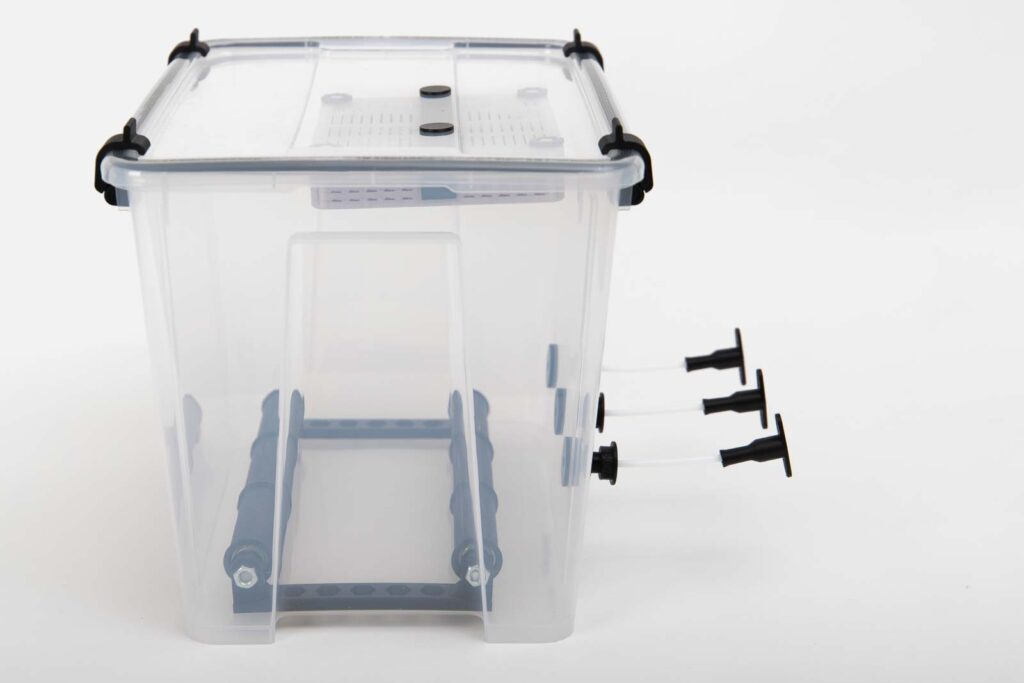
12 gallon (45 liter) Ikea Samla filament box for up to five filament spools
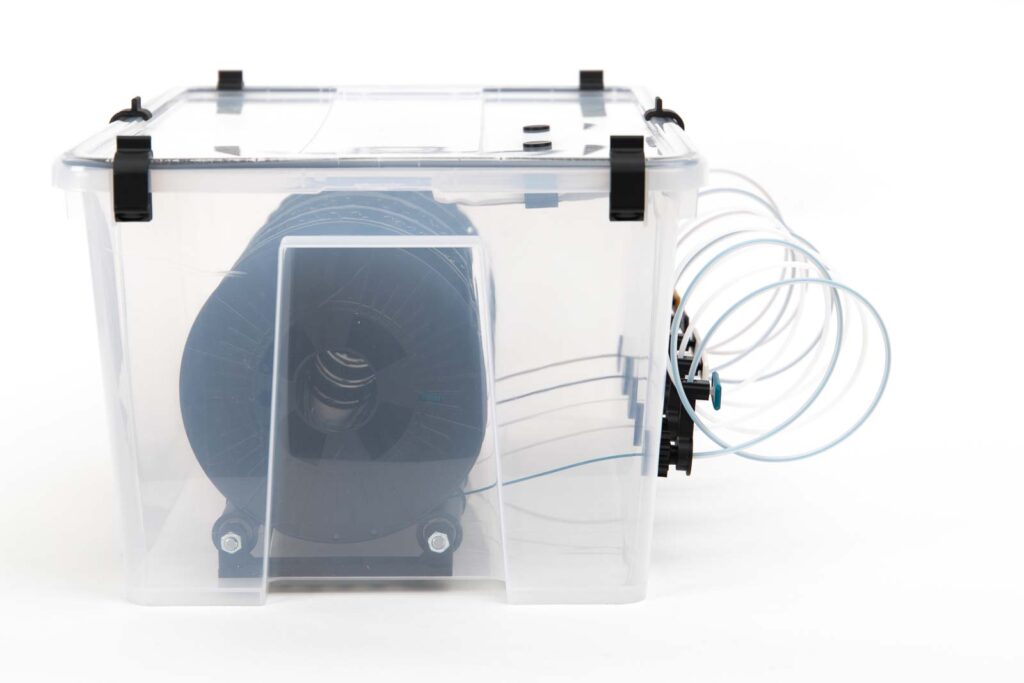

6 gallon (22 liter) Ikea Samla filament box for up to three filament spools

Want to give your filament a nice home? -> then get the STL files for your next 3D print project here:
Disclaimer
The instructions and the associated files are an inspiration of Ingenieurbüro Dr. Janko GmbH to build this project yourself. Since Ingenieurbüro Dr. Janko GmbH has no way of checking and influencing the required quality of the printed components and purchased parts as well as the quality of the assembly and the correct functioning of the project or if any inadmissible changes and modifications to the project has been made, Ingenieurbüro Dr. Janko GmbH accepts no liability for functionality, stability or the damage incurred by the project.
Super in-depth write up. Thank you for taking the time to share this!
Hi Rick,
thank you very much! Yes I always miss detailed step-by-step instructions for 3D printing projects. That’s why I want to create the best possible documentation.
Best regards
Marian