

The 3D printer is unpacked, and its initial setup is finished, the first 3D print is successfully completed. The printed part is beautiful, but sticks tight to the build plate – how to peel that off without breaking my fingers? Or more often: The 3D print comes off during 3D printing, what do I need to make it stick better?
These and other questions concern every 3D printing beginner. So here are my most useful tools and accessories you need for 3D printing. Starting with the ideal preparation of the 3D printer, to tools for getting parts of the plate, to nozzle care and finally filament storage.
The article contains affiliate links/advertising links, these are marked with an asterisk (*). If you make a purchase through these links, I may receive a commission at no additional cost to you.
Which 3D printing accessories do I need to enter the world of 3D printing?
To get more structure in this article, I oriented on the workflow in 3D printing to show the 3D printing accessories and tools needed in each step.
- Preparing the print bed
- Cleaning the nozzle
- Detaching the 3D prints from the print bed
- Deburring and cleaning of the 3D prints
- Unload, cut and store filament
Personal protective equipment is recommended in any case, consisting of protective safety glasses (Amazon.com US)* and safety work gloves (Amazon.com US)* for cleaning the nozzle and when deburring and cleaning the 3D prints. Use safety glasses and rubber gloves (Amazon.com US)* when handling the cleaning agents.
Best 3D printing tools – super short shopping list
Here is the super short shopping list, in the following the area of application and usage of the individual tools and accessories are described in detail.
1. Prepare the build plate
- Isopropanol – (Amazon.com US)*
- Acetone – (Amazon.com US)*
- Kores Glue Stick – (Prusa3d)*
- Masking Tape – (Amazon.com US)*
- Polyimide (Kapton) tape – (Amazon.com US)* or (3djake)*
2. Prepare 3D printing nozzle
- Mini needle nose pliers – (Amazon.com US)*
- Wire brushes – (Amazon.com US)*
- Cleaning needles – (Amazon.com US)* or (3djake)*
3. Detaching the 3D prints from the print surface
- Chisel set – (Amazon.com US)*
- Flexible Magnetic Plate – (Amazon.com US)*
4. Post-processing of 3D printed parts
- Scalpel – (Amazon.com US)*
- Cutting mat – (Amazon.com US)*
- Deburring tool – (Amazon.com US)*
- Modeling tools – (Amazon.com US)*
- Wire brushes – (Amazon.com US)*
- Drill bit set – (Amazon.com US)*
- Countersink drill bit set – (Amazon.com US)*
- Mini hot-air gun – (Amazon.com US)*
5. Filament storage
- Wire cutters – (Amazon.com US)* or (3djake)*
- Vacuum set – (Amazon.com US)* or (3djake)*
- Silcia gel desiccant beads – (Amazon.com US)*
- Filament Dry Box – DIY filament dry box
Best 3D printer accessories and tools I use
Details to the 3D printing accessories and tools I use are shown now, structured after their application depending on the task in 3D printing:
1. How do I prepare the build plate for 3D printing
Good adhesion between the print surface and the 3D printed part is crucial for successfully 3D printing. With some plastics it is important to increase the adhesion, for example by getting the print bed surface free of any oil or grease. At some pairings of plastics and print bed surfaces, however, the adhesion is so great that either the 3D printed part or the printing plate of the 3D printer is damaged when it is removed. In these cases, the adhesion must be reduced using a release agent.
Unfortunately, the tips cannot be generalized because it depends heavily on the pairing of filament and print bed surface, but also on the 3D printing components themselves, the thickness of the first layer, the temperatures, speeds, wear of the printing surface and much more. Here are a few tips and tricks, in most cases you simply must test what works best for the pairing of build plate and 3D printing filament.
Attention, the following examples refer to a flexible printing plate with a smooth PEI surface from a Prusa MK3S*. If a structured PEI surface, glass plate or other surface is used, the adhesion behavior can differ seriously from the cases described.
Optionally, other printing plates can also be retrofitted with PEI films to increase adhesion, such as with these films (Amazon.com US)*.
The preparation of the 3D printer’s build plate is always carried out with a cold heat bed – before heating it up. Especially when cleaning with isopropanol or acetone, it is dangerous and not particularly effective if the print bed is hot. At a hot surface the cleaning agent evaporates before it can even be cleaned.
Warning! When cleaning with chemicals, use rubber gloves and safety goggles and follow the product guidelines and warnings!
Warning! Only clean when the nozzle and heat bed are cold, otherwise there is a risk of burns!
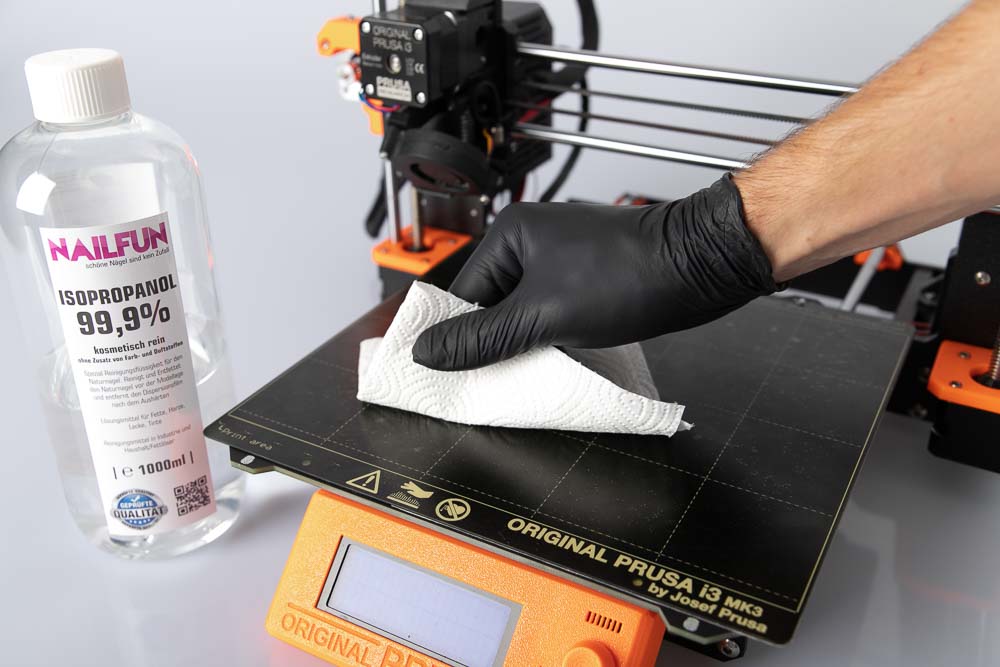
1.1. Isopropanol
Grease-free surface for good adhesion with all PLA and PETG filaments.
Cleaning with isopropanol is the standard procedure before every print with PLA and PETG filaments that I print, mostly I use the filaments from Prusament* or 3djake*.
Simply clean the printing plate surface before each print, apply a little Isopropanol on a kitchen roll and wipe the print bed surface. Important: only do this when the heat bed is cold, if the heat bed is up to temperature, the isopropanol evaporates too quickly, and the impurities (grease and plastic residues) cannot be dissolved and removed.
Isopropanol (3djake)*
Isopropanol (Amazon.com US)*
1.2. Acetone
To refresh the PEI surface of the print bed.
Basically it works like isopropanol, but the acetone is a much more aggressive solvent. It is used because the cleaning effect of the isopropanol weakens a little over time (every 20 to 40 cleanings with my 3D printer setup). Especially when 3D printing with PLA, the adhesion is gradually getting worse. If this occurs, the acetone can “activate” the PEI print bed again.
Caution! Do not carry out the process too often, as this can lead to small cracks and wear of the PEI coating. Additional information: Acetone can also be used to chemically smooth models made of ABS, ASA and HIPS.
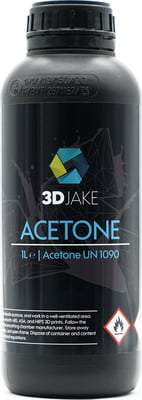
Acetone (3djake)*
Acetone (Amazon.com US)*
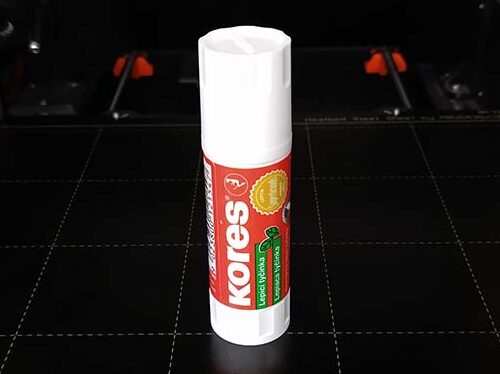
1.3. Kores glue stick
Release agent for strongly adhering filaments such as PC and ASA on PEI print surface.
In some cases, the adhesion of the 3D prints to the print bed must also be reduced. What is still extremely advantageous in the printing process is a problem when detaching the part. For example, the high-performance filaments Formfutura ApolloX ASA and Prusament PC Blend adhere so well to the PEI surface that they can almost not be detached from the build plate without damaging anything (part or build plate surface).
A good trick here is to use release agents that reduce the adhesion. Simply lubricate the spot on the printing plate where the 3D print is to be created later with the Kores Glue Stick (Prusa3d)*. After printing, the prints are easier to remove, and the residue of the adhesive can be easily removed with isopropanol. Warning! Please do not simply use Uhu glue sticks, these also work well as a release agent, but can then hardly be removed from the build plate, so that the print bed surface is damaged when cleaning the glue residue.
Kores glue stick (Prusa3d)*
1.4. Tesa painter’s tape
Handy for flexible filaments like TPE, TPU and TPC.
In the case of flexible filaments (for example, the Fiberflex 30D Black*), it can also happen that the adhesion is so extreme that it is not possible to detach the 3D printed component without destroying it. Especially since the finished 3D printed part is flexible. The flexible printing plate is of little help, since the component deforms with the plate. Because of the low heating bed temperature with flexible filaments, a trick can be used here.
The print bed is covered with painter’s masking tape (Amazon.com US)* where the 3D print is to be created later. After 3D printing, the component and painter’s tape can then simply be removed from the print bed. Since the painter’s tape is very flexible, it is easy to detach from the finished 3D print.
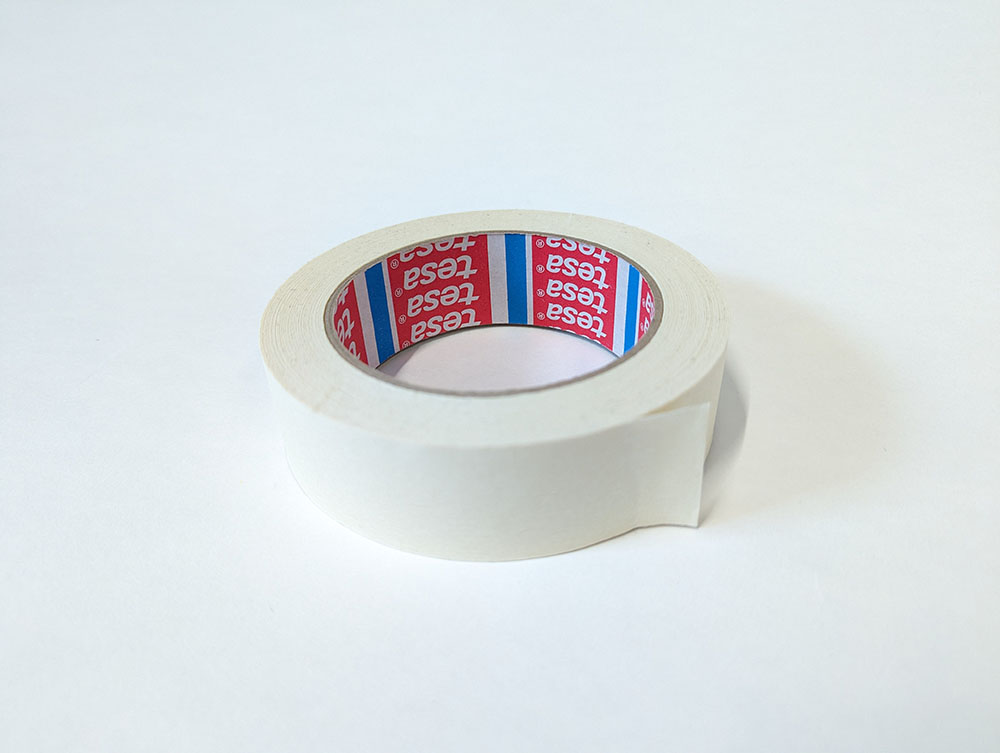
Masking tape (Amazon.com US)*
1.5. Kapton polyimide tape
Kapton tape works the same as painter’s tape but has a nicer, smoother finish and can withstand higher temperatures. Apply to the print bed and print on it, just like on the painter’s tape. The Fiberflex 30D Black* filament, for example, sticks good on the tape. After printing, it can be pulled off the build plate and the flexible 3D printed part smooth and nicely.
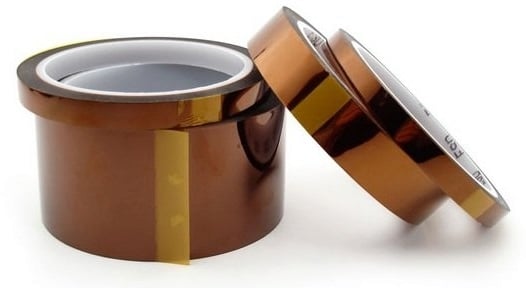
Kapton polyimid tape (3djake)*
Kapton polyimid tape (Amazon.com US)*
After preparing the build plate, you can start heating up the 3D printer and then briefly check the nozzle of the 3D printer.
2. How to clean the 3D printer nozzle before 3D printing
A short nozzle check before 3D printing saves a lot of post-processing afterwards. After a few printing processes, some plastic may have collected around the nozzle. The best way to clean the nozzle after heating up is to use mini needle-nose pliers and a wire brush.
Before cleaning, always heat up the nozzle to the operating temperature of the inserted filament to soften the plastic.
Attention! 3D printer nozzle, heating block and heating bed are very hot – do not touch, there is a risk of burns! Use safety goggles and gloves to protect yourself from burns and from brushed off, hot plastic particles flying around.
2.1. Mini needle-nose pliers
For removing excess filament string at the nozzle.
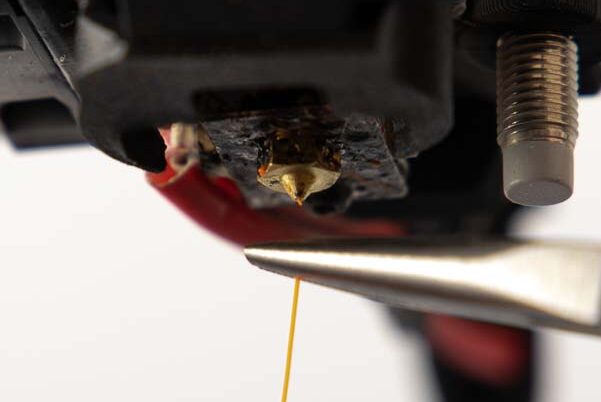
After the 3D printer has heated up to operating temperature, it usually pushes some filament through the 3D printer nozzle. This annoying plastic string can easily be snapped close to the nozzle and removed with the help of a pair of mini needle-nose pliers. The practical thing about the needle-nose pliers is that there is always enough distance between your own hand and the hot nozzle. In the case of the 3D printer kits from Prusa, such pliers are already included with the assembly accessories. Otherwise they are also available in hardware stores or here:
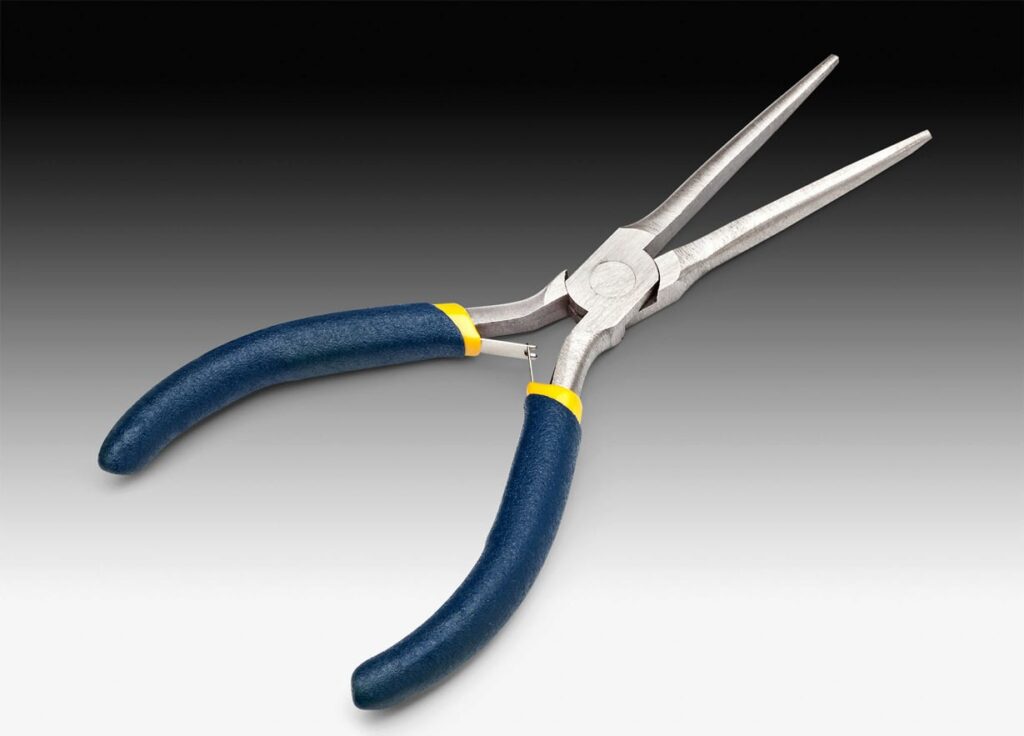
Mini Needle Nose Pliers (Amazon.com US)*
2.2. Wire brush
Cleaning the nozzle from filament scrap.
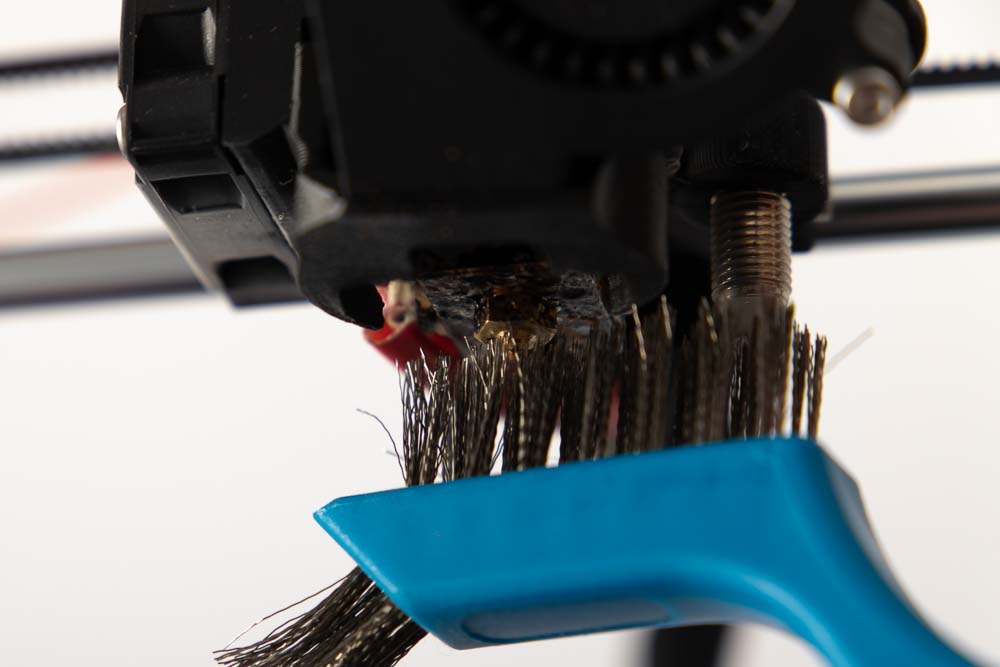
If a lot of plastic residues has accumulated around the nozzle, you can try to remove the deposits with the mini needle-nose pliers. However, it is usually easier to clean the nozzle with a small wire brush. Again, beware of the hot spots of the 3D printer, wear safety goggles and safety work gloves! Wire brushes are available in hardware stores or here:
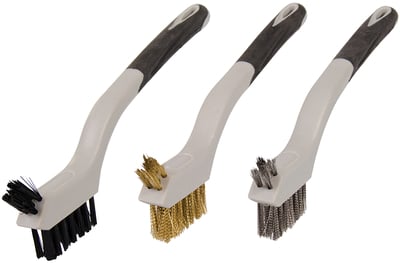
Wire brushes (Amazon.com US)*
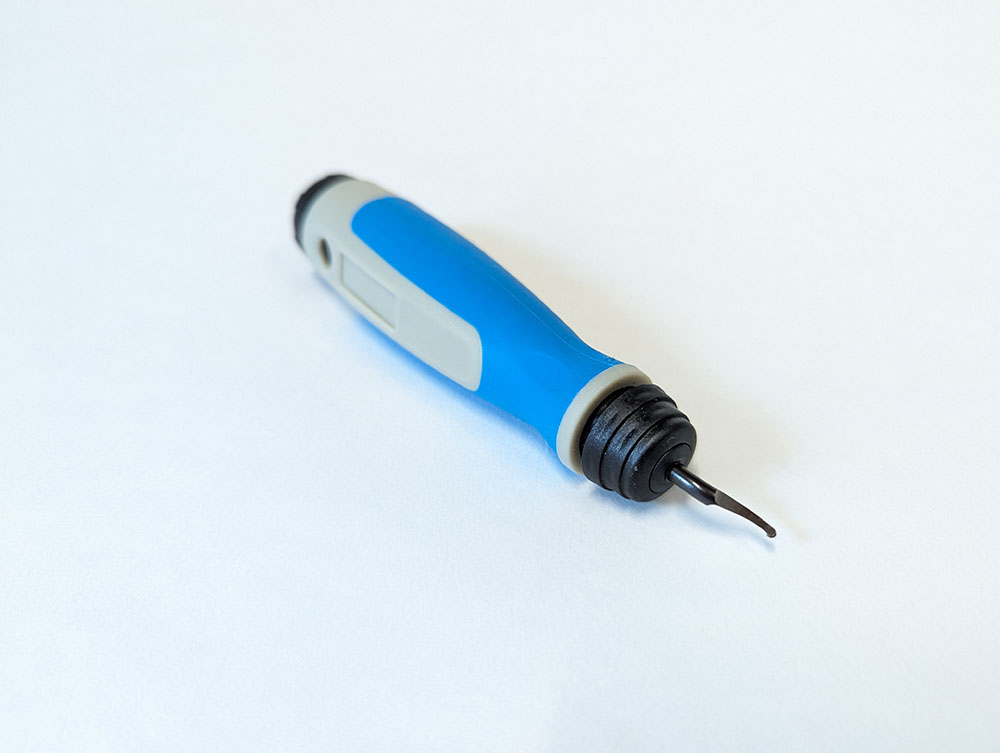
2.3. Cleaning needles
If the nozzle is clogged, you can try to get it running again.
If the 3D printer nozzle is clogged, you can clean it with a thin needle. Always consult the user manual of your 3D printer. Be careful when handling the hot nozzle, wear safety work gloves and safety goggles and be careful of the hot nozzle and the molten plastic!
Cleaning needles (3djake)*
Cleaning needles (Amazon.com US)*
Personally, I usually replace the nozzle right away because it doesn’t happen often and when it does the nozzle is usually very worn out. That’s why it’s best to always have a few spare nozzles ready for your 3D printer.
Once the nozzle and the build plate of your 3D printer are prepared, you can start the print job. Once the 3D printer has done its work and the 3D print is finished and cooled down, the crucial question arises:
3. How do I remove 3D prints from the build plate
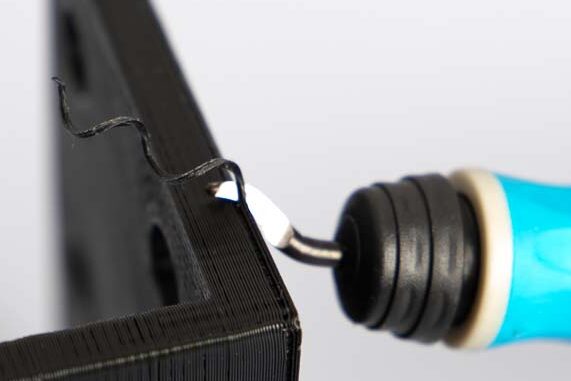
3D prints can usually be detached quite easily, but with certain filaments or geometries it can happen that the detachment of the 3D printed parts from the print bed causes some difficulties. There are countless removal tools on the market, all of which can best be compared to classic spatulas. In most cases, spatulas are also simply sold as a removal tool. An example of a special 3D printing spatula is the Buildtek removal tool. I have not had such good experiences with this and the classic spatulas. The edge at the front is not sharp enough to get between the printed part and the print bed and then the spatulas are too flexible to release the 3D print well. Especially with smaller components you don’t get very far with these 3D printing tools, so my top tool for removing 3D printed parts is: the chisel.
3.1. Chisel
Very sharp to easily get between the 3D print and the build plate and very stiff to easily detach it without flexing.
Does the printed part stick so firmly that it cannot be removed? Chisels have turned out to be the best tool for me here, because they are much sharper and stiffer than classic spatulas. Caution! Work carefully and take good care of the build plate and your hands!
Since the chisels are not needed for the long-term processing of wood, a cheap set like the one in the following link is sufficient. Of course, it can also be something better, but this is not necessary to detach the 3D prints.
Chisel set (Amazon.com US)*
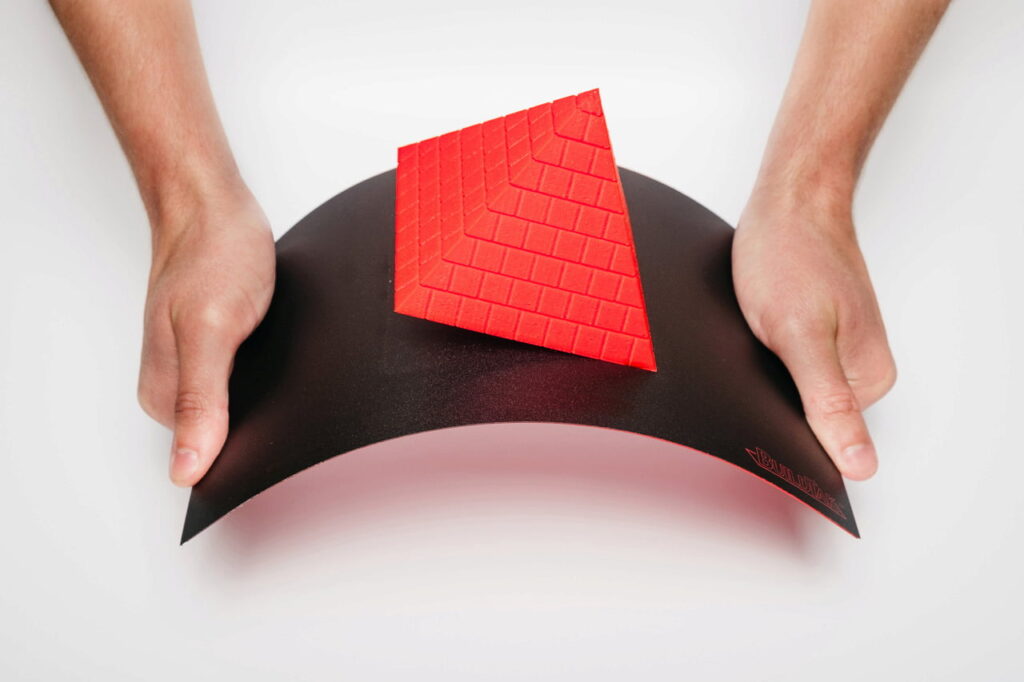
3.2. Flexible magnetic build plate
Super easy detachment of 3D prints saves time and nerves.
A game changer: Detaching the 3D prints with a flex plate. It used to be extremely tedious to carefully remove 3D prints from rigid glass plates fixed on the 3D printer heat bed. With the flex plates, that’s in the past now. Remove the flexible plate from the magnetic heat bed, flex it a little and the 3D print simply fall off. Clean the plate and quickly put it back into the 3D printer. Here you easily save up to 15 minutes in post-processing.
Most new 3D printers are already, right out of the box, equipped with a flexible magnetic build plate. Retrofit sets for 3D printers without a pre-installed flex plate are also available, see for example here:
FlexPlate System (Amazon.com US)*
The 3D printed part has been detached from the build plate, but unfortunately there are sometimes a few imperfections to be fixed, so here are the best 3D printing tools to rework 3D prints.
4. How do I get my 3D prints clean and beautiful
Not every 3D print is clean and beautiful right after printing. Unwanted fine plastic strings on the surface (stringing), a filament residue from the nozzle that has melted onto the part, a slightly protruding edge on the first layer (elephant foot). The following tools that should not be missing in any 3D printing workshop help here.
Caution! Use safety work gloves and safety goggles with all tools to avoid cut injuries and to protect your eyes if a piece of plastic, a blade or a wire tip breaks off and flies away.
4.1. Scalpel
Precise rework and cutting on the 3D printed parts.
Of course, no maker workshop should be without a scalpel to carry out fine and precise cutting work. I mainly use it to remove excess material on the 3D prints.
If you are lucky, you will know a surgeon, otherwise there are various scalpels for model construction, see the following links. Whether the Stanley or the Revell scalpel is a matter of taste, the slightly thicker rubberized handle is quite practical with the Revell scalpel. Since the fine blades bend or blunt very quickly, it is advisable to always have a few spare blades in stock.
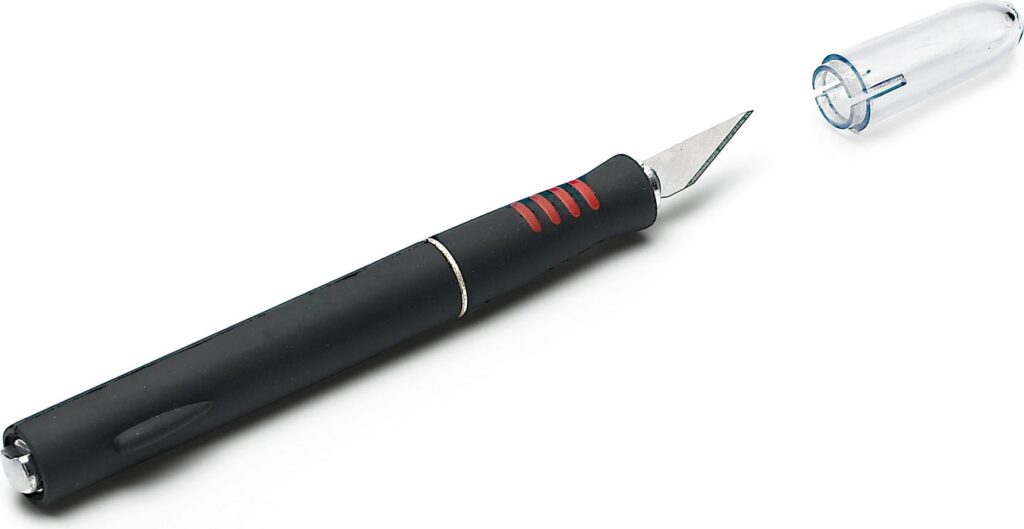
Revell scalpel incl. 5 replacement blades (3djake)*
Medical Scalpel (Amazon.com US)*
DIY Maker Scalpel (Amazon.com US)*
Think of replacement blades suitable for your type of scalpel.
4.2. Cutting mat
The important protection for your work bench or table.
To protect your table or workbench during work, it is advisable to use a cutting mat. Also, very practical when it comes to soldering and you want to avoid burns in your table.
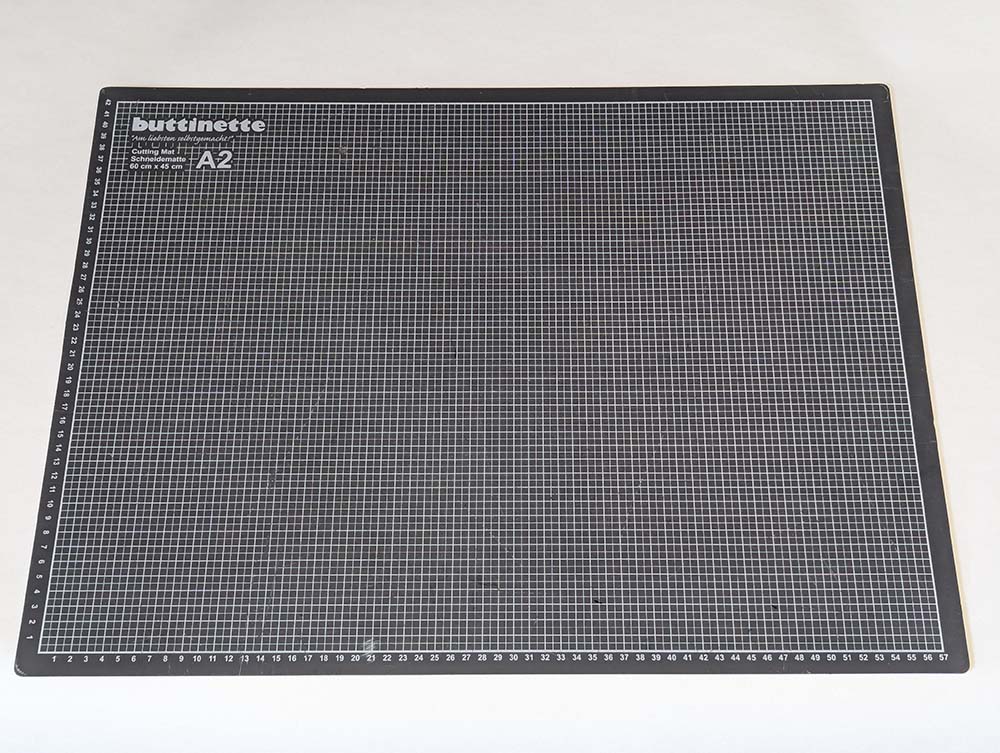
Cutting mat A2 (Amazon.com US)*
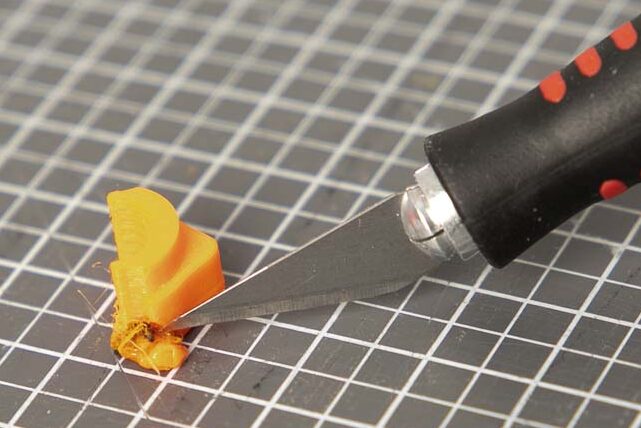
4.3. Deburring tool
The industry standard, practical and useful for post-processing.
The deburring tool is practical for removing sharp edges of the parts. If an edge on your finished 3D print is too sharp, simply pull over it with the blade and the edge is beveled and no longer poses a risk of injury.

This 3D printing accessory is particularly useful if your finished 3D print shows a so-called elephant foot. When printing, and the nozzle is too close to the print bed the first or even the first few layers are squeezed out beyond their actual area. It is problematic because the dimensions are no longer correct. For example, the holes in this area are then going to be too narrow, and an unsightly sharp edge is also created. Therefore, either cut the excess material away with a scalpel or, even easier, pull off once with the deburring tool.
Deburring tool (Amazon.com US)*
4.4. Modeling tools
Cleaning hard-to-reach places on the 3D printed parts.
This 3D printing tool is very helpful for hard-to-reach areas of a 3D print. With the various scratches and needles of the modeling tools you can get to any part of the 3D print and remove imperfections there. These 3D printing tools also helped me with maintenance in hard-to-reach places on my 3D printer, such as cleaning extruder gears.
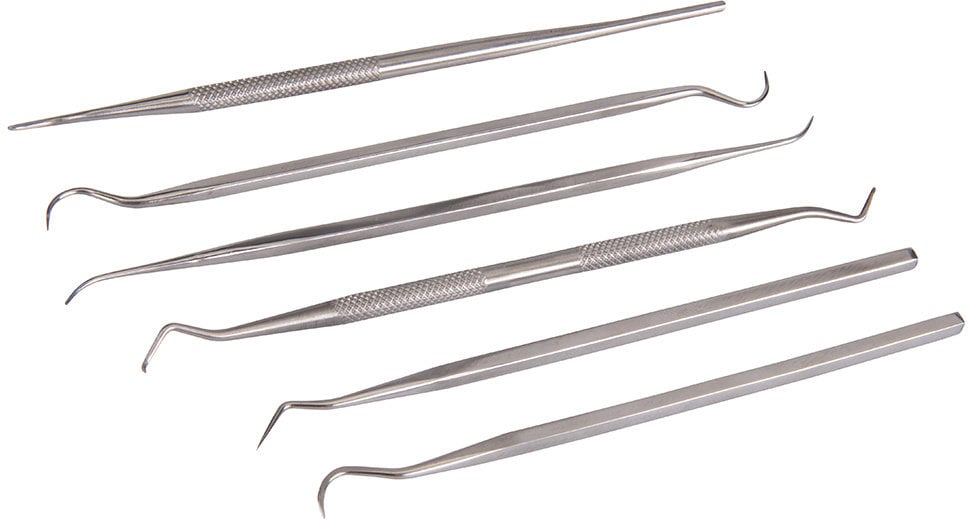
Modeling tools (Amazon.com US)*
4.5. Wire brush
Removing plastic strings.
In addition to cleaning the nozzle, I also use the mini wire brushes to remove the fine plastic strings from the parts, the so-called stringing. These fine threads are created with some filaments and 3D print settings, and then especially when several parts are printed at the same time. Caution! Make sure to wear safety work gloves, the fine wire bristles will immediately pierce the skin!
Wire brushes (Amazon.com US)*
4.6. Drill bit set
For expanding and cleaning printed holes.
The good old drill bit set should never be missing in a DIY workshop anyway. Of course, this is also very helpful for 3D printing. Provides a quick solution if a hole is clogged with residual filament or if the design is just a bit too narrow. Just clean it out and the 3D printed part is saved.
It is very practical if the drills in the set cover many diameters, for example with a gradation of 0.5 mm, as with this drill set from Bosch:
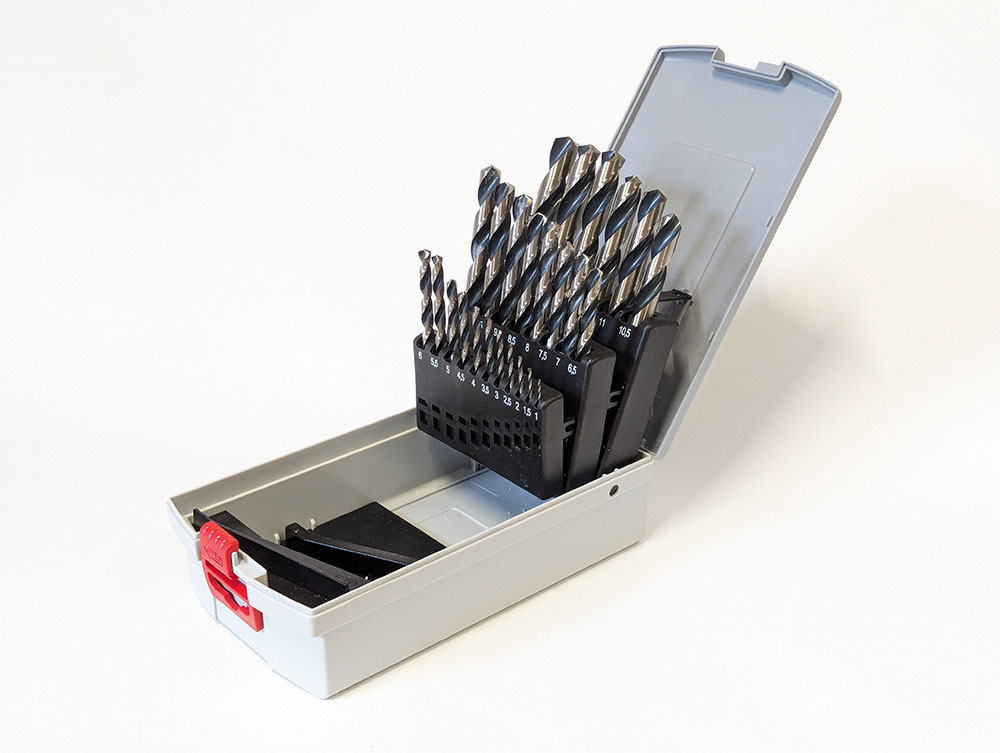
Drill bit set (Amazon.com US)*
Caution! When drilling with a cordless screwdriver or a drill, always without gloves! These can get caught in the drill and cause serious injuries.
4.7. Countersink drill bit set
Ideal if holes in the first layer are too narrow.
In addition to the drill set, countersink drills also help to save bores sometimes. For example, if the entrance to the hole is too narrow. Simply put it on and widen it a little with the resulting chamfer. Of course, this also works if a chamfer was simply forgotten, for example to hide the head of countersunk screws. Attention! If you do not print with 100% infill or with few outer layers, this can weaken the stability of the component.
Since we are printing only plastic parts, you don’t necessarily need a professional tool, a cheap countersink set like this one is enough:
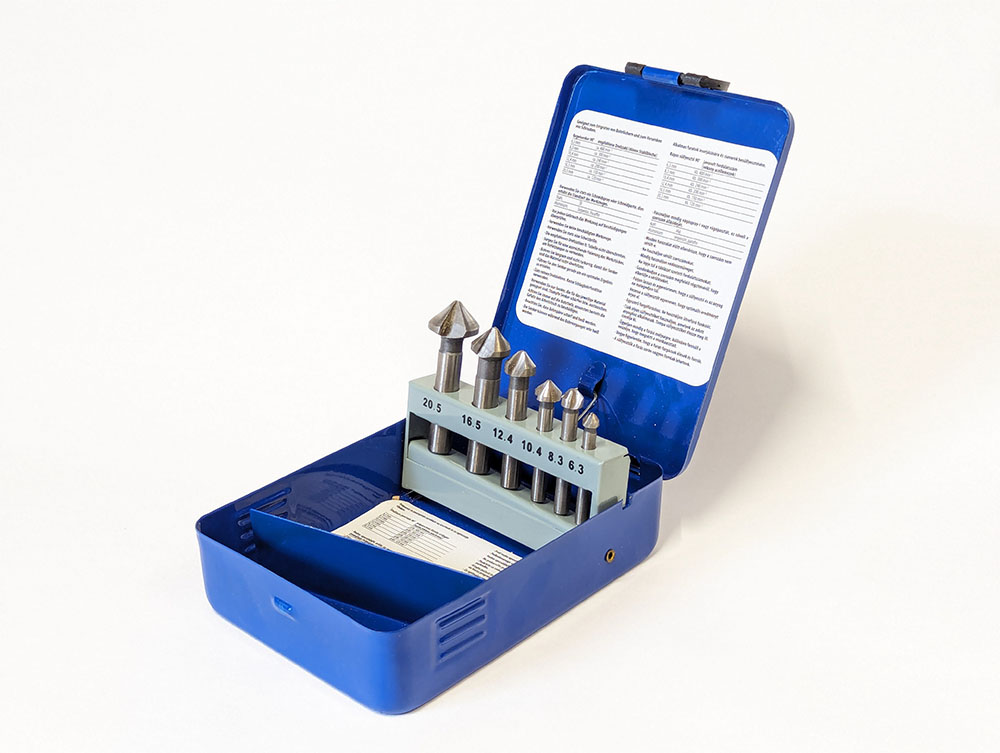
Countersink drill bit set (Amazon.com US)*
Caution! When drilling with a cordless screwdriver or a drill, always without gloves! These can get caught in the drill and cause serious injuries.
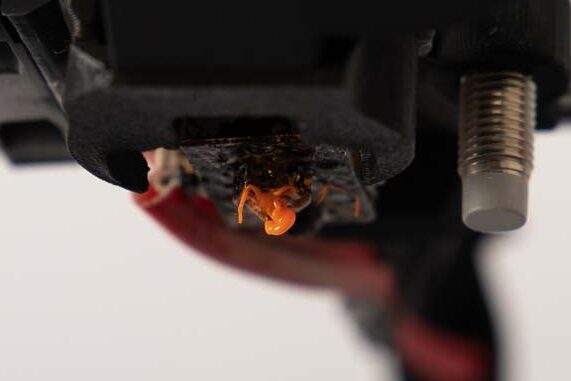
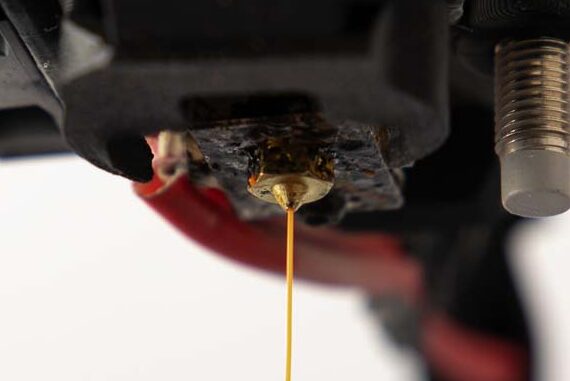
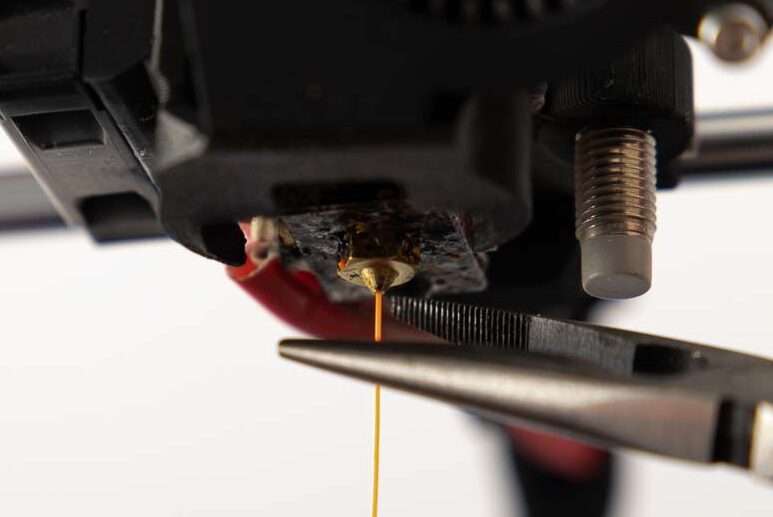
4.8. Mini hot-air gun
Easy removal of stringing (plastic threads on the surface).
The latest silver bullet against stringing! Point the hot-air gun at the fine plastic strings, which will then contract. Then simply wipe away the residue with a glove or brush. Caution the heated part could be still very hot!
It is best to place the hot-air gun on the table and hold the 3D printed part in front of it with pliers or tweezers and direct the hot air jet at the areas to be cleaned. Attention! Place the part only a few seconds in the hot air jet, otherwise the component will be damaged. The unsightly, thin strings contract due to the high temperature and can then be removed much more easily.

Mini hot-air gun (Amazon.com US)*
After finishing the part, the next print job is already waiting, or the 3D printer should take a few days off. But that raises the question: what to do with the remaining filament?
5. What is the best way to store the 3D printing filament?
After 3D printing, the filament must be stowed away and taken care of again. After unloading the filament from the 3D printer, the end is usually fused and deformed. A clean cut makes it ready for the next time. Since dust and moisture can cause unsightly misprints, the filament should be stored appropriately after use.
5.1. Knipex wire cutter
Simply separate the filament cleanly.
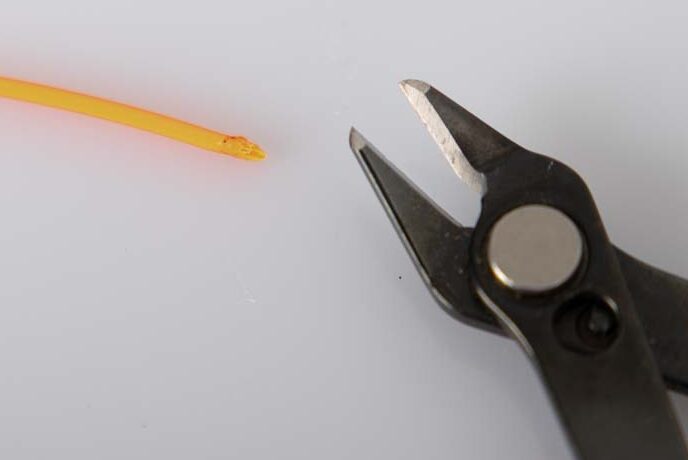
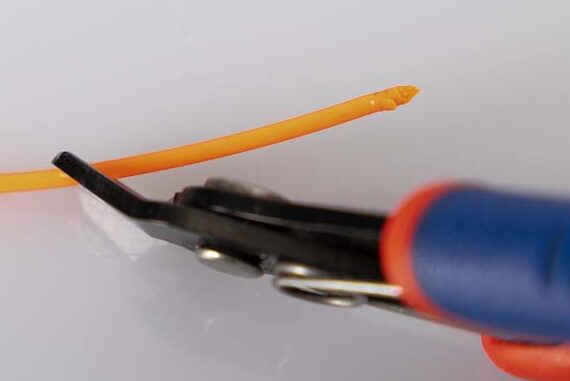
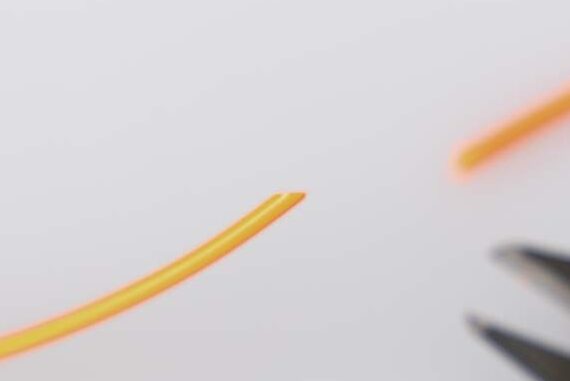
Forget the cheap side cutters from some pliers set that squeeze the filament rather than cut it. The Knipex wire cutter is a bit more expensive, but since it is extremely sharp and only ground on one side, the filament is cut very nicely and cleanly. This means that loading the filament in the extruder for the next 3D print is no problem. Of course, the wire cutter is also ideal for post-processing 3D prints and pinching off excess material quickly and effectively.
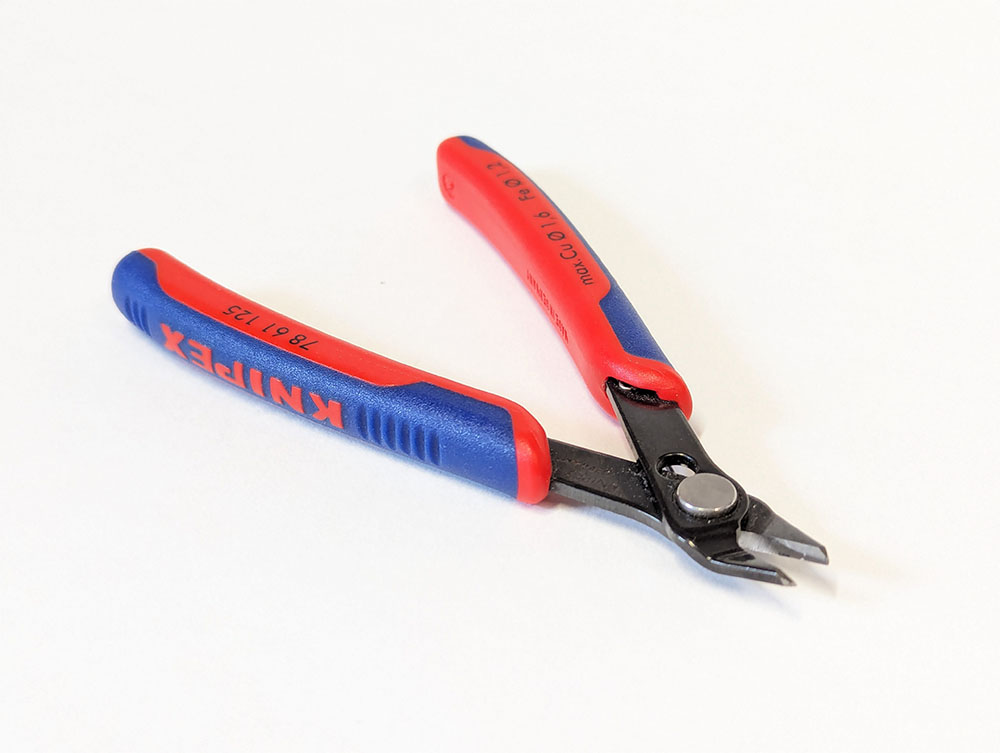
Knipex wire cutters (Amazon.com US)*
I think this wire cutter from Revell (3djake)* leads also to good results – haven’t tested it jet – please write me or in the comments if you got it.
5.2. Vacuum set with plastic bags
Filament storage very simple.
Easy and efficient to store filament spools in the airtight bags and protect them from moisture and dust. It is best to add some desiccant (silica gel) in the bags to be on the safe side and protect the filament from moisture.
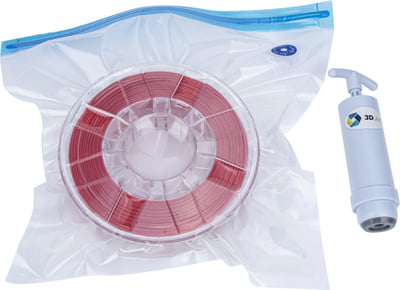
Vacuum set with plastic bags (3djake)*
Vacuum set with plastic bags (Amazon.com US)*
Silcia gel desiccant beads (Amazon.com US)*
5.3. Filament dry box
The thing for 3D printing professionals and print-a-lots.
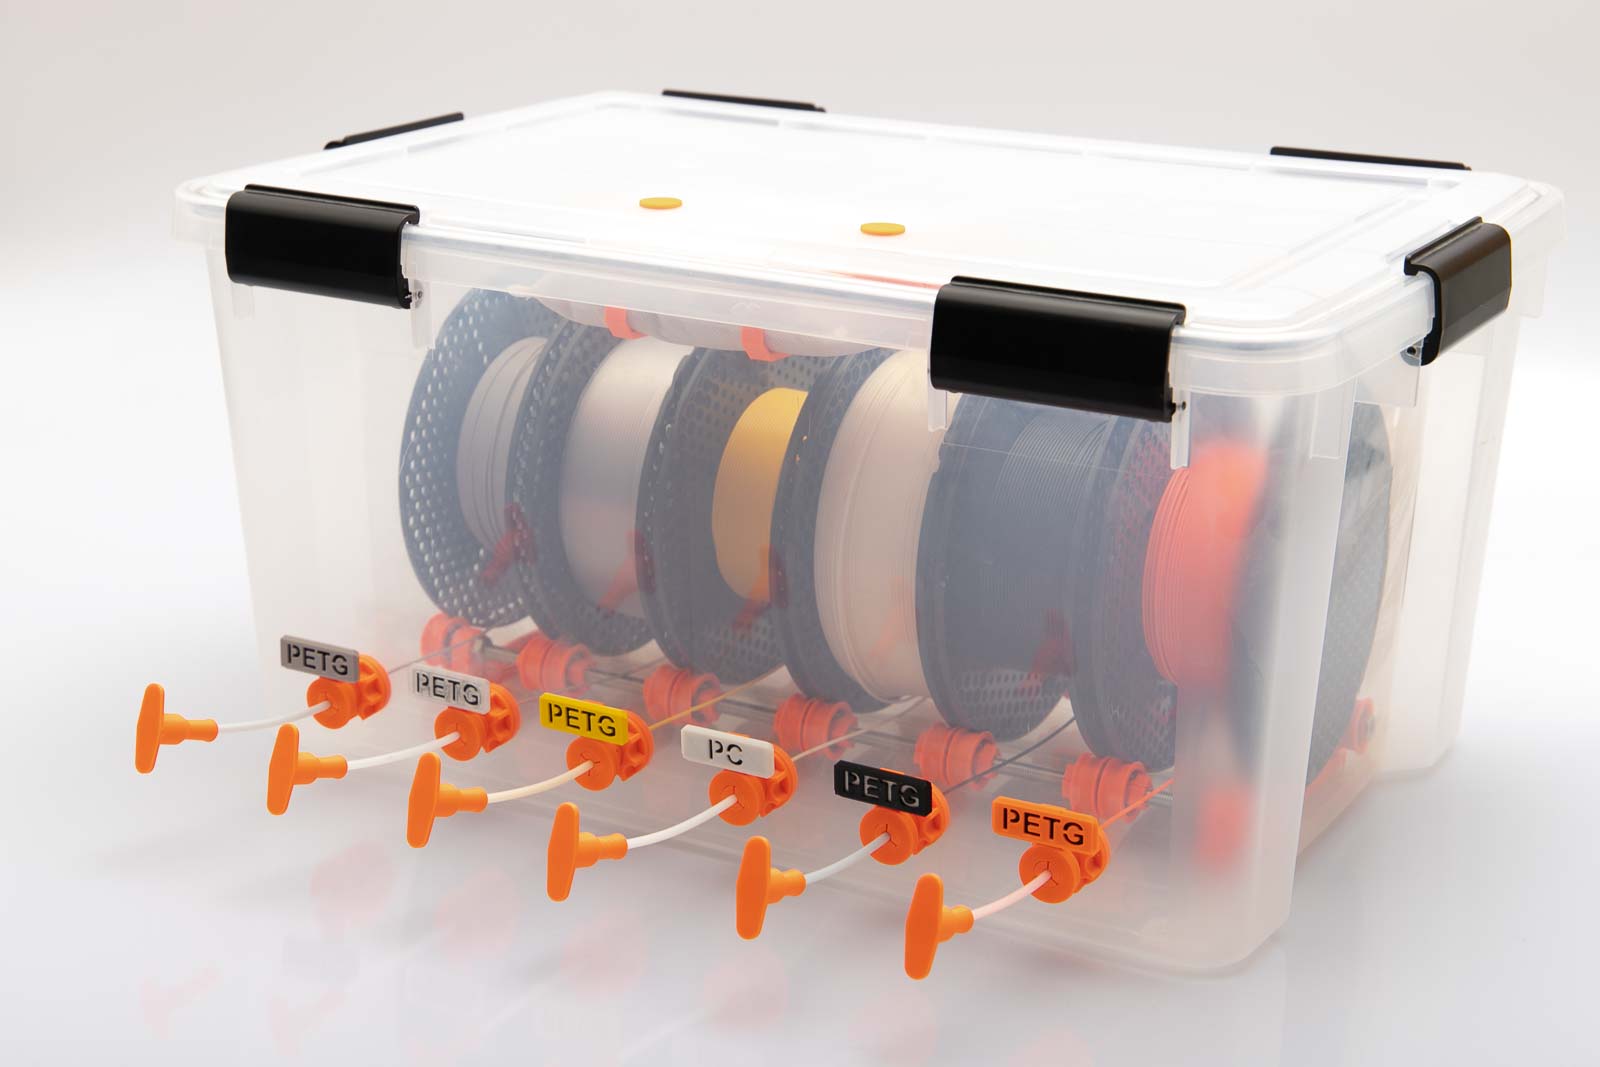
Of course, a little self-promotion should not be missing now. If the packing and unpacking of the filament spools annoys you, or if you want to switch quickly between the different filaments, then build the DIY filament dry box. Simply get the 3D print files of the DIY filament dry box, start the 3D printer and then build as many filament boxes as you want.
Each filament box has space for up to 6 spools and if you can’t resist new filament like me – then just build a few more filament boxes, you got the files :). I wish you a lot of fun with 3D printing!
Please post in the comments if you have any other suggestions for 3D printing accessories and tools that helps you with 3D printing or work great with your 3D printing setup.
If you found the article helpful, please share it and forward it to your 3D printer friends.
0 Comments