

Would you like to use loose silica gel in your DIY filament dry box instead of a silica gel desiccant bag? Then the 3D printed silica gel box is just the thing for you. You can get the necessary 3D print files of the DIY silica gel box for EUR 0 if you sign up for the email list. There is a large version of the box that offers space for approx. 500 g (1 lbs) silica gel granules and a small version with a capacity of approx. 200 g (0.4 lbs) desiccant.
The article contains affiliate links / advertising links, these are marked with an asterisk (*). If you make a purchase through these links, I may receive a commission at no additional cost to you.
Why the conversion from the original bracket?
Do you already have silica gel and do not want to buy new silica gel bags or do you want to buy cheaper loose silica gel? Then print the silica gel box to save space in the lid of the filament dry box.
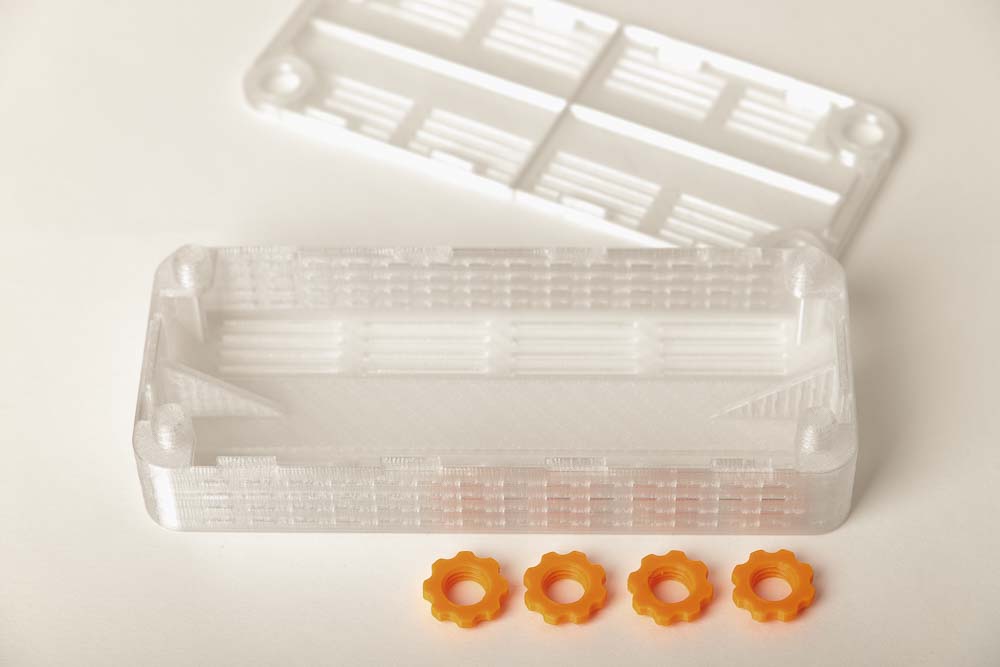
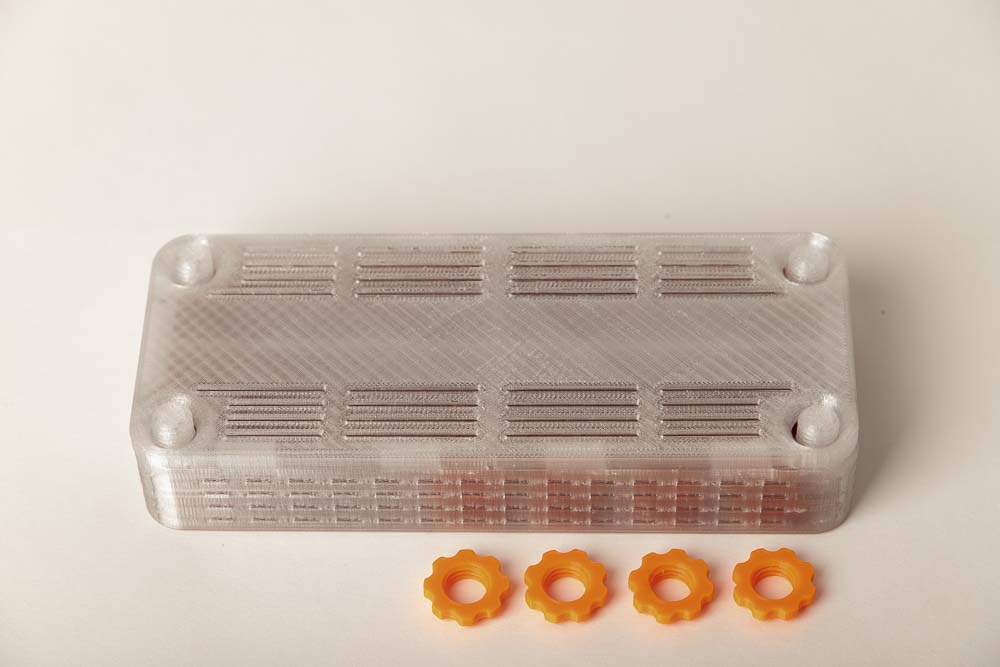
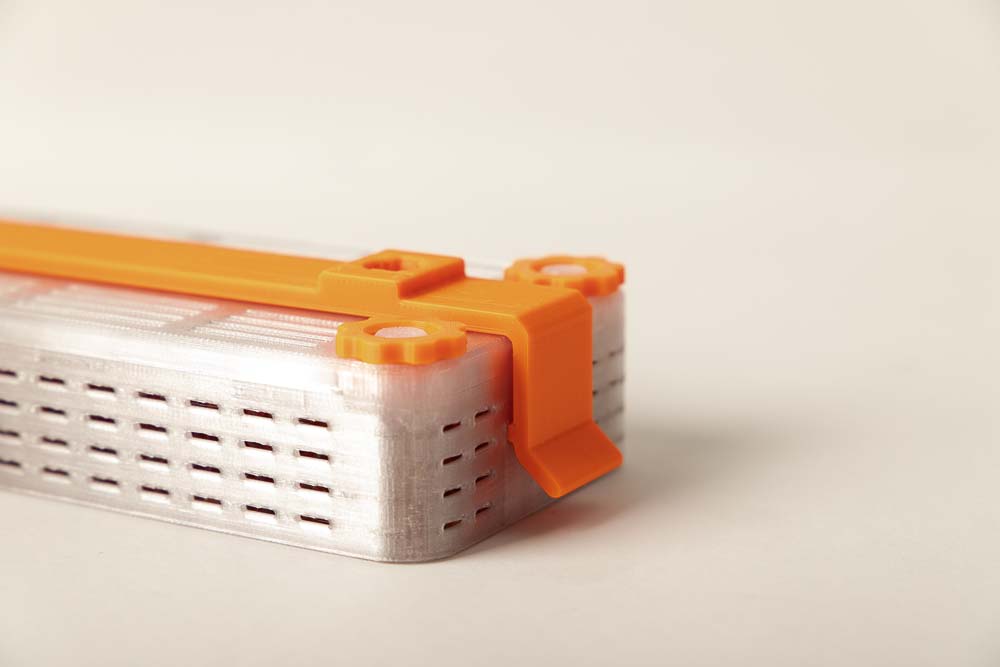
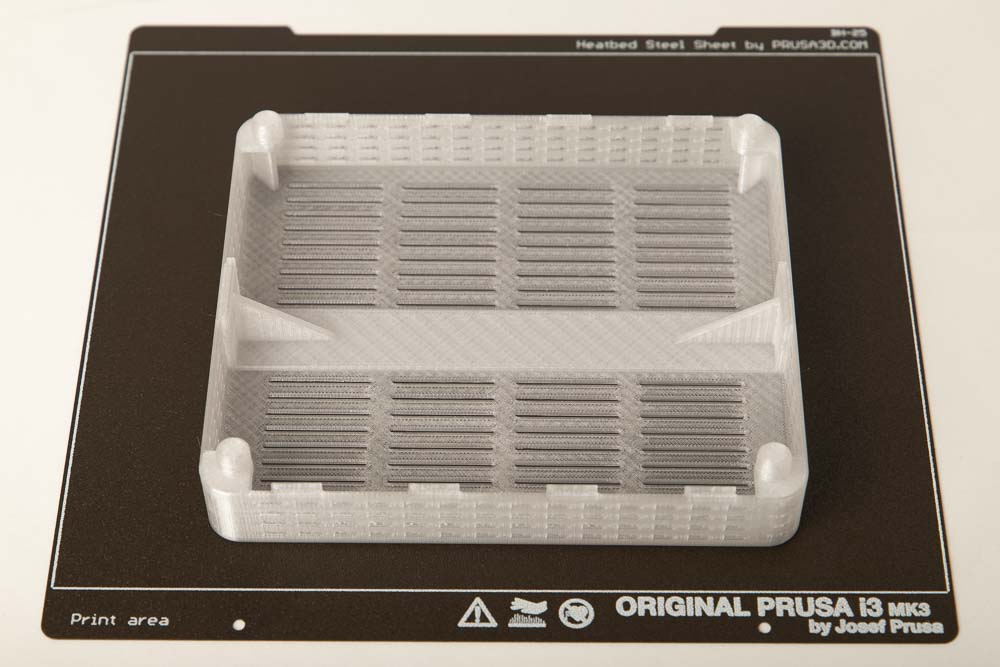
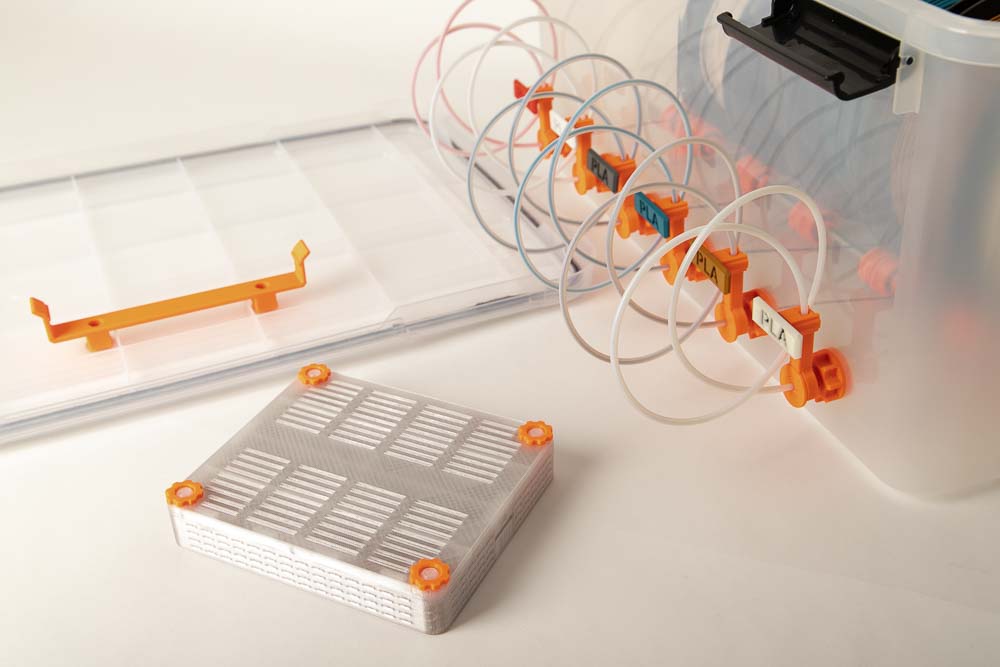
The box is provided with fine ventilation slots so that the air can reach the desiccant granules. The box is available in a small (S) and a large (L) version. The small box S can hold approx. 200 g and the large box L approx. 500 g silica gel granules. The small or large box is simply filled with loose desiccant granules and the lid is placed on the box. The box is closed with four nuts that are screwed onto the threads of the box.

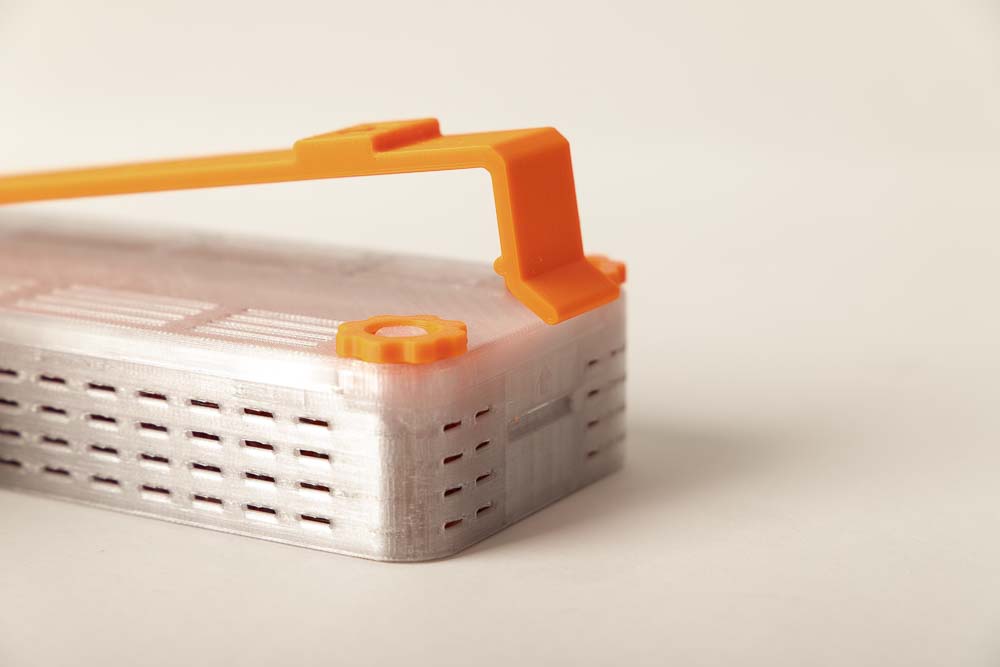
With the help of a 3D printed retaining clip, the silica gel box is then clipped and held on the lid of the filament box. The silica gel box can then simply be pulled out of the clip by bending the brackets of it away. Then the silica gel can be dried, or the box can be filled with fresh desiccant.
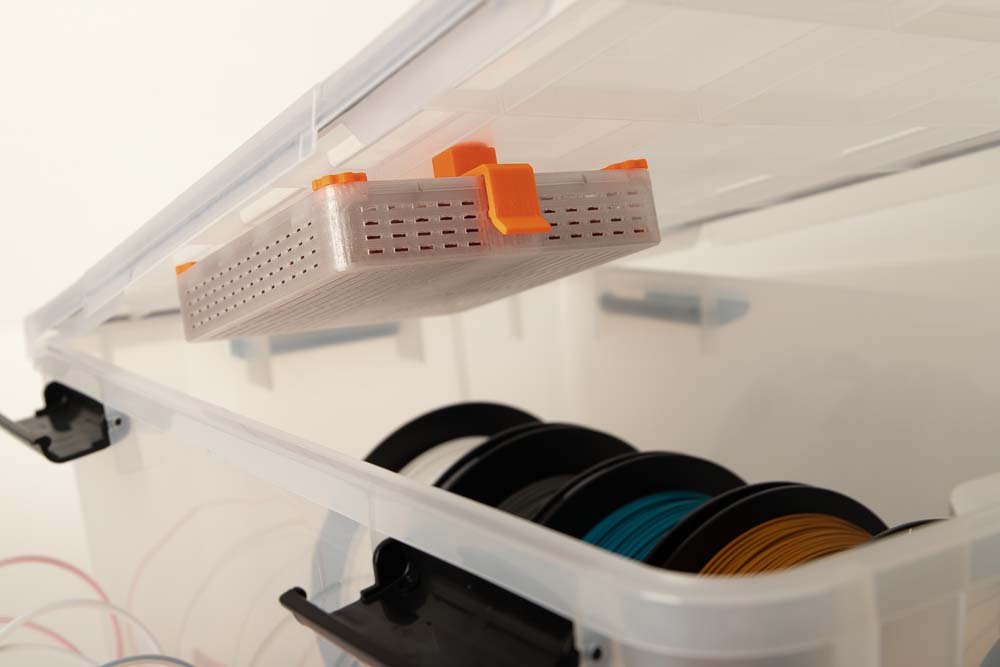
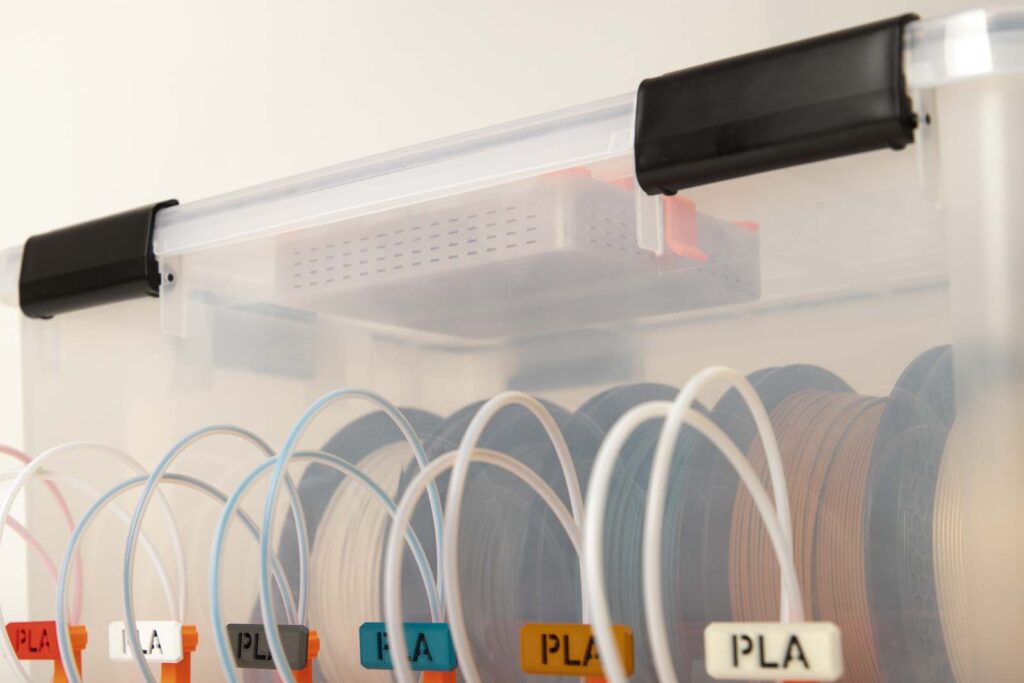
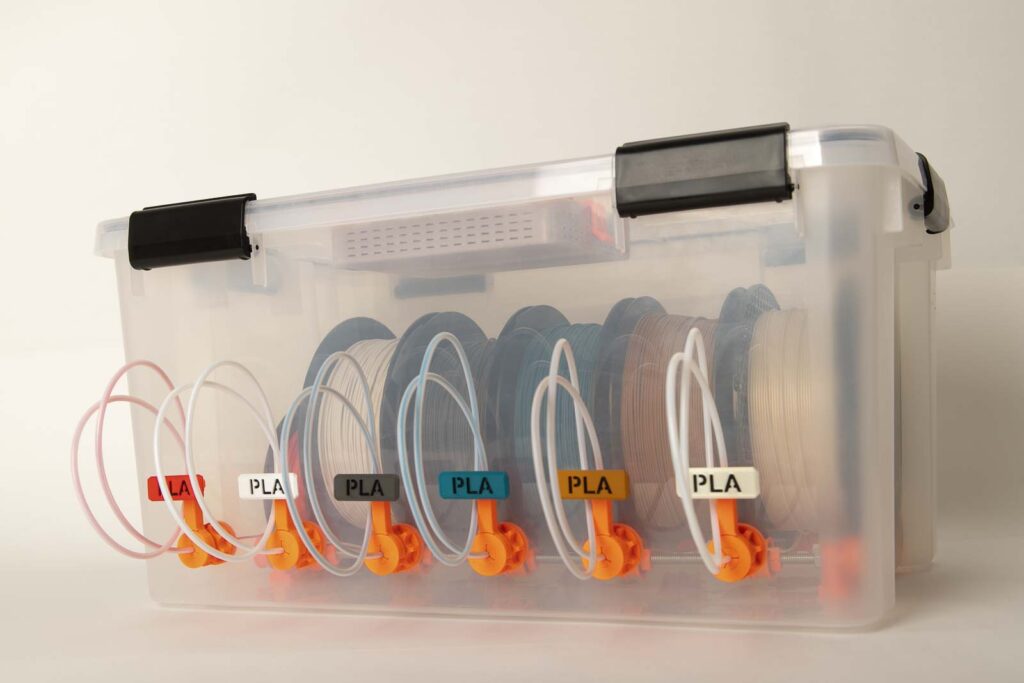
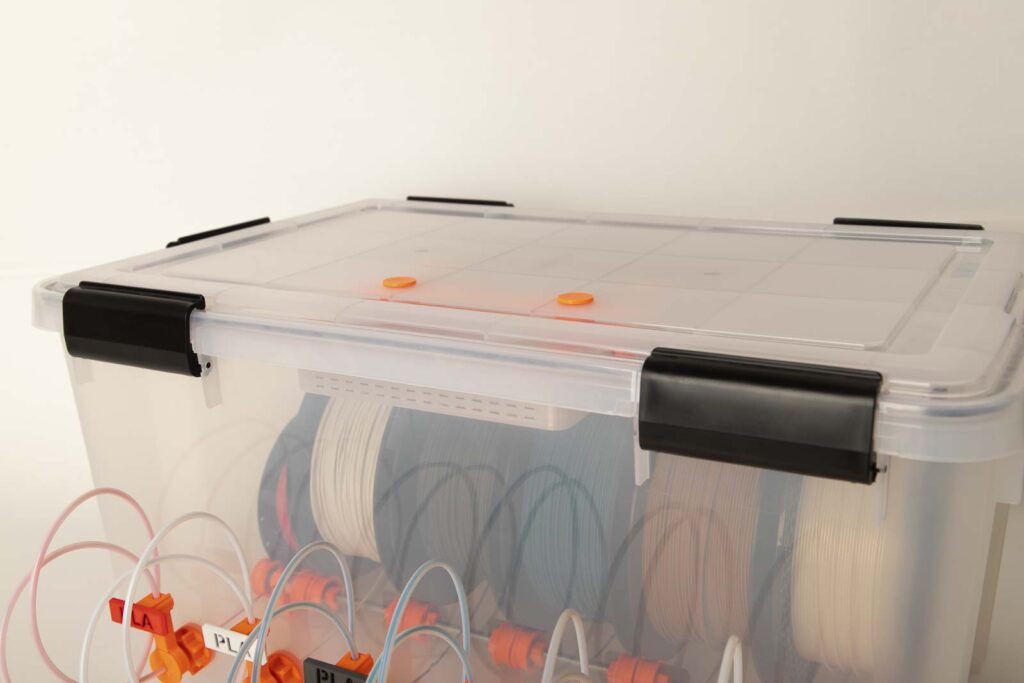
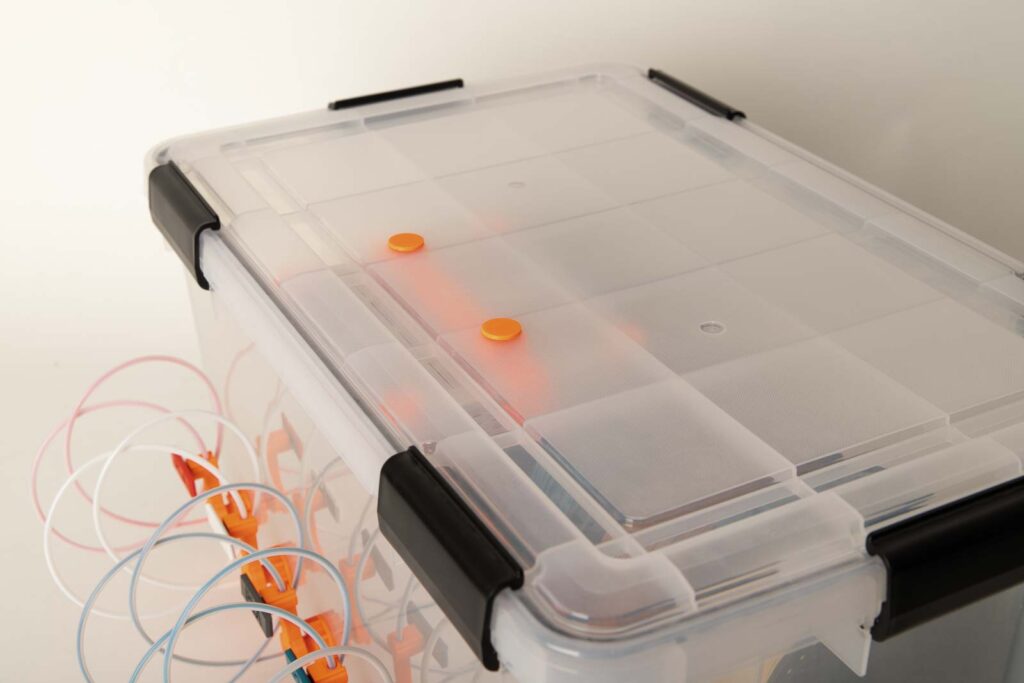
When the 3D printed box with the desiccant granules is installed, the filament box looks like the following pictures.
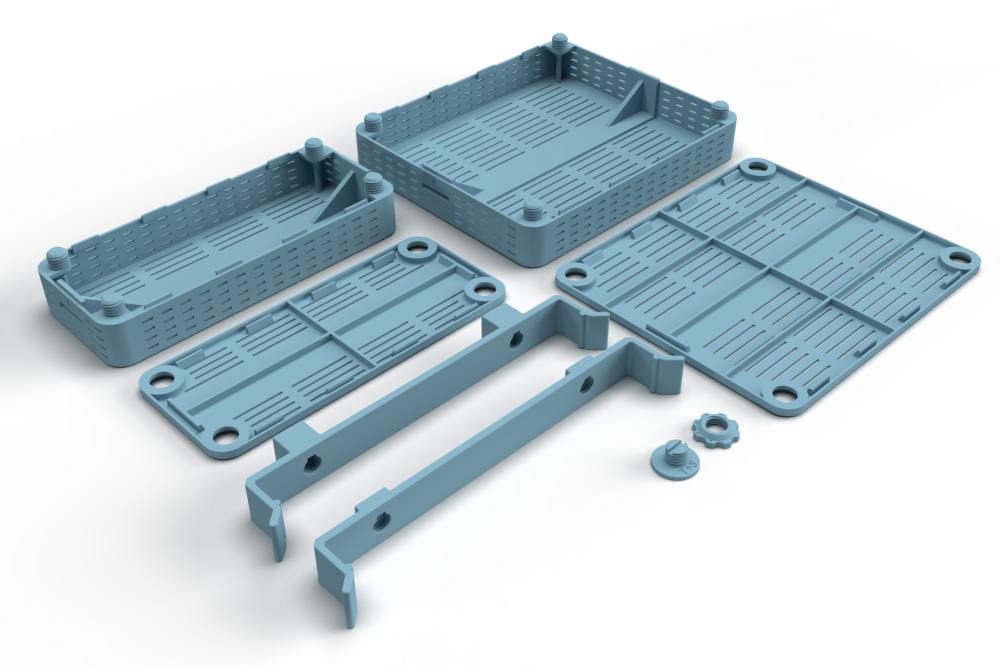
The instructions are divided into individual steps, the required 3D print parts, purchased parts and needed tools are summarized right at the beginning.
3D printed parts
The files of the required 3D printed parts are available by subscribing to the email list, so you don’t miss any new projects and discounts.
These are purely digital products, you get all the files you need to print them yourself. All STL files for the required components are combined in a ZIP folder.
- 007300_Silica_Gel_Clip_H3
- 007300_Silica_Gel_Clip_H12
- 007400_Silica_Gel_Screw_T## (PrintFit part for the optimal connection)
- 007700_Silica_Gel_Box_L
- 007720_Silica_Gel_Box_S
- 007800_Silica_Gel_Box_L_Lid
- 007820_Silica_Gel_Box_S_Lid
- 007900_Silica_Gel_Box_Nut_T## (PrintFit part for the optimal connection)
The largest 3D printed part of this project (Silica_Gel_Box_L) requires a footprint (X, Y) of 170 x 145 mm and is 33 mm high (Z). Any 3D printer with a build space (X, Y, Z) of at least 180 x 180 x 50 mm is suitable for this project.
3D print settings
For the box and lid:
- Layer height 0.2 mm and 20% infill (rectangular)
For all other components (clip, nut, and screw):
- Layer height 0.2 mm and 100% infill (rectangular)
The following settings have proven useful for both, the orange PETG* and the transparent PETG* used:
- Nozzle temperature: 250°C (First layer: 240°C)
- Bed temperature: 90°C (First layer: 85°C)
- Perimeter speed: 45 mm/s (First layer: 10 mm/s)
- External and short perimeter speed: 25 mm/s (First layer: 10 mm/s)
- Infill speed: 80 mm/s (First layer: 10 mm/s)
- Top solid infill speed: 40 mm/s
Used 3D printing filament and 3D printer
In this tutorial, the Prusament PETG Prusa Orange* and Prusament PETG Clear* filament were printed on a Prusa i3 MK3s* with a standard 0.4 mm nozzle.
With the selected settings, a total of approx. 164 g PETG Prusa Orange and Clear Filament are printed for the 3D print parts of the Silica Gel Box (large box L and clamp H12). With filament costs of 29.90 EUR/kg, that is approx. EUR 4.90 in material costs for one large dehumidifier box. The total printing time for all required components is approx. 17 hours. To calculate the total printing time, all printing times are added together, with the entire quantity of a component being printed at once.
Because of the higher stability and the low distortion, I recommend a filament made of PETG. The parts can also be printed with ABS, ASA or PLA, but no test prints have been carried out with these materials. With PLA, however, the parts may not be stable enough due to the brittle nature of the material and possibly lower layer adhesion.
Bill of materials: Needed purchased parts for the silica gel box
- 1 lbs Silica Gel Desiccant Beads (Amazon.com US)* (approx. 7 USD EUR / lbs)
The total cost of the purchased parts comes to around 7 USD if only the costs required for one box (large box L with a capacity of 1 lbs (500 g)) are added up.
There are many suppliers of silica gel granules, the more you purchase, the lower the costs per lbs or kg becomes.
Required tools
- Cordless drill(Amazon.com US)*
- Wood drill 2 mm (Amazon.com US)*
- Wood drill 10 mm (Amazon.com US)*
- Flathead / Slotted screwdriver (Amazon.com US)*
Wood drills cut through the plastic of the filament box lid best.
Assembly instructions: Build your own DIY silica gel box
The assembly instructions for the desiccant box are divided into 4 individual steps, which are divided into the following chapters:
- Step 1: Printing and preparing the silica gel box
- Step 2: Print the retainer clip
- Step 3: Installing the clip into the filament box
- Step 4: Assembly of the desiccant box
Safety Guidelines
Safety first! Read and follow the assembly instructions and the operating manual!
Read the entire assembly instructions and operating manual carefully and follow the instructions and safety warnings. If anything is unclear, simply contact support (support@3d-druck-vorlagen.de).
These instructions are only intended for persons of legal age (over 18 years old). If you lack knowledge in handling the tools or processes that occur, then it is essential to seek the help of trained persons. The preparation and assembly of the project is at your own risk.
Legend: Warnings and Symbols


General safety instructions for assembling the project
Wear protective goggles to protect your eyes during all processing steps that can produce chips (sawing, drilling).
When printing parts, sharp edges can occur (usually on the first layer), there is a risk of cuts. These edges must be deburred.
Step 1: Printing and preparing the silcia gel box
3D print the required parts
Depending on whether a large box L or a small box S should be printed, the corresponding parts (box and lid) are to be printed.
For the small desiccant box S with a capacity of approx. 0.4 lbs (200 g) silica gel granules:
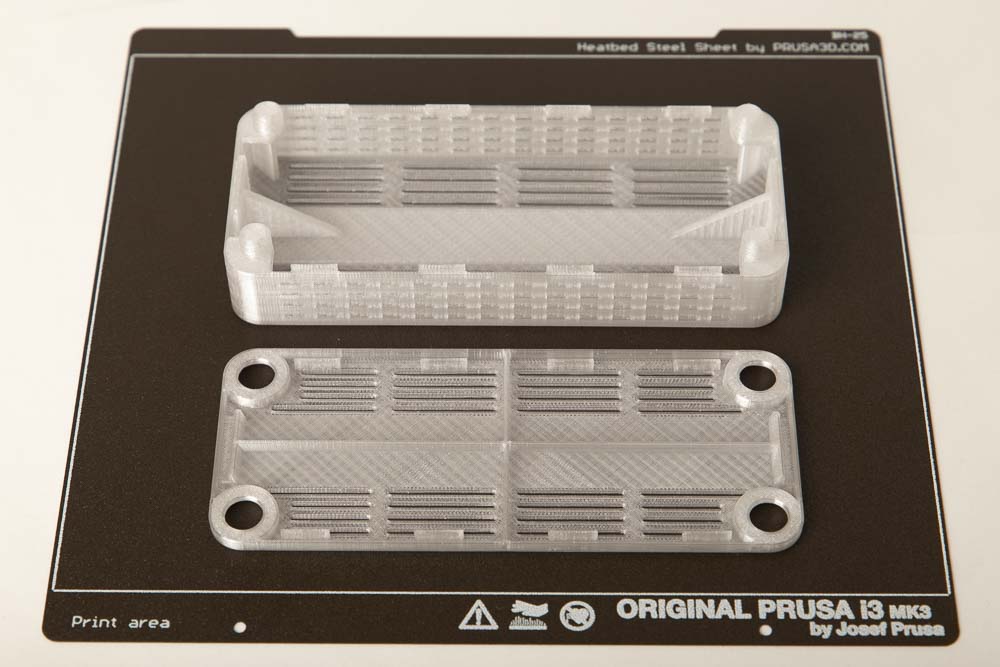
- 1 pc 007720_Silica_Gel_Box_S
- 1 pc 007820_Silica_Gel_Box_S_Lid
Layer height 0.2 mm and 20% infill (rectangular)
For the large desiccant box L with a capacity of approx. 1 lbs (500 g) silica gel granules:
- 1 pc 007700_Silica_Gel_Box_L
Layer height 0.2 mm and 20% infill (rectangular)
- 1 pc 007800_Silica_Gel_Box_L_Lid
Layer height 0.2 mm and 20% infill (rectangular)
Regardless of whether the box is small or large, always print 4 nuts to fix the lid.

- 4 pcs 007900_Silica_Gel_Box_Nut_T##
Layer height 0.2 mm and 100% infill (rectangular)
The nut is a PrintFit System part:
The standard 3D print template of the nut is the T+5. If this cannot be screwed onto the thread of the box, then print the T+6 version, which creates a larger thread gap. If the standard version of the nut is too loose on the thread, then print the T+4 version which leads to a smaller thread gap.
Assembling the silica gel box
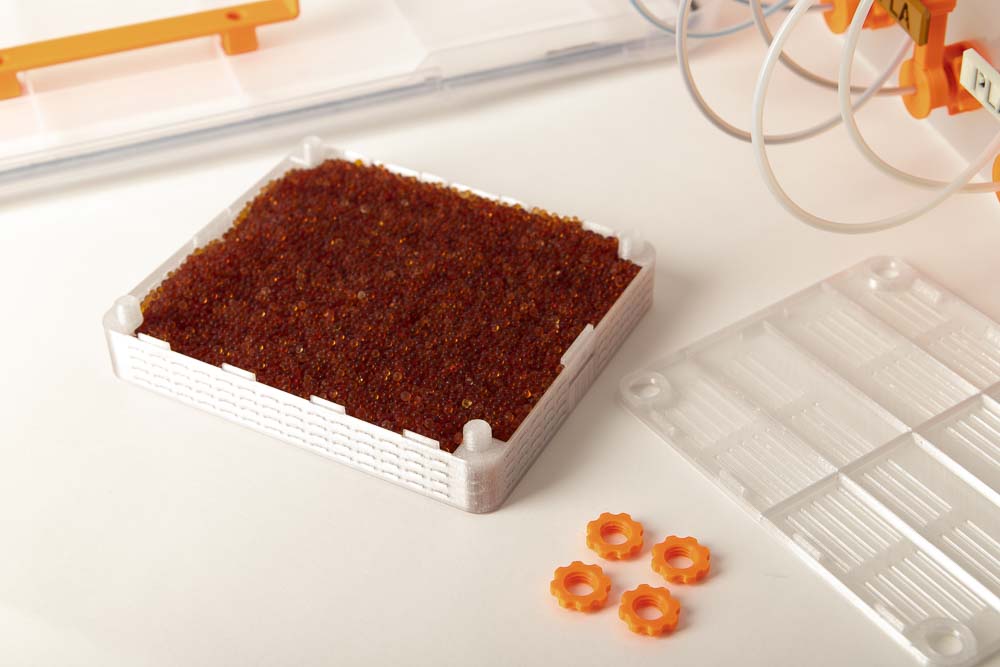
This is very simple. Fill the silica gel box to the top with dry desiccant granules.
The granules must not be too fine, otherwise it will trickle out of the box. The slots in the base and lid are 1.25 mm wide. Standard silica gel granules have a diameter of 2 to 4 mm.
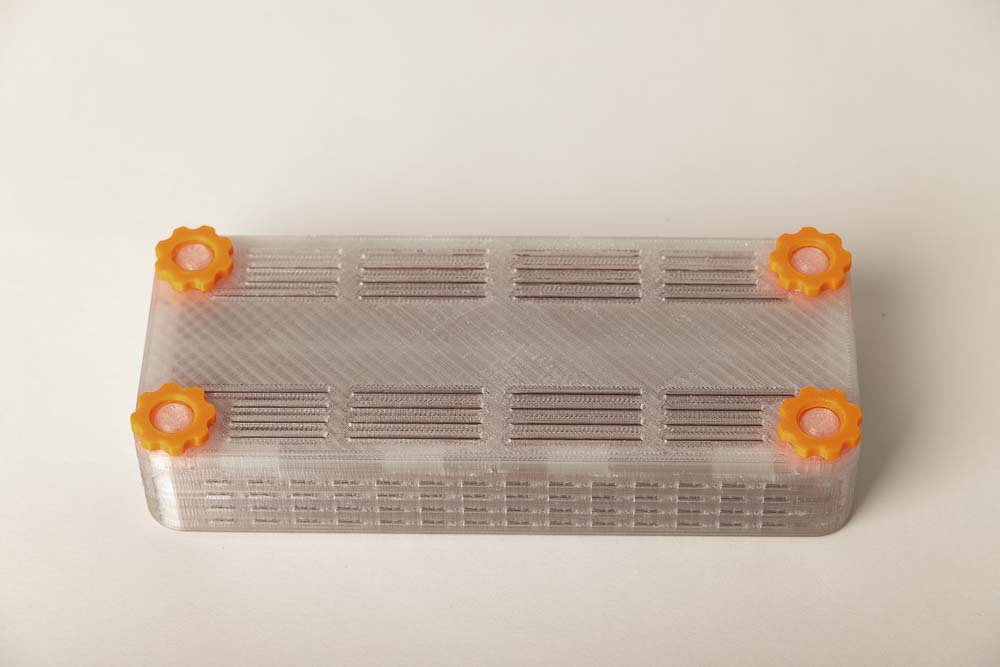
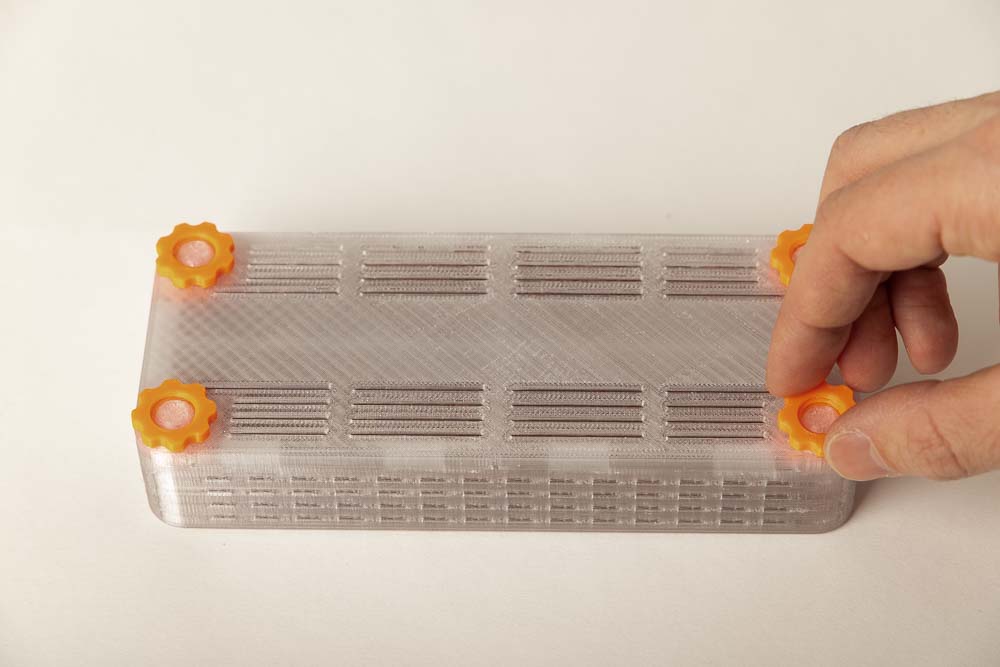
Then close the lid and fix it with the four nuts. Do not overtighten the nuts so that they can easily be loosened again when changing the desiccant.
Step 2: Print the retainer clip
3D print the required parts
The retaining clip for the silica gel box is available in two versions. If the clip is later mounted in the Iris 50L airtight box (Amazon.de GER)* linked in the DIY filament dry box instructions, then print the H12 version, as this can be mounted in the ribbed lid. If your filament box does not have a ribbed lid, then use the H3 version.
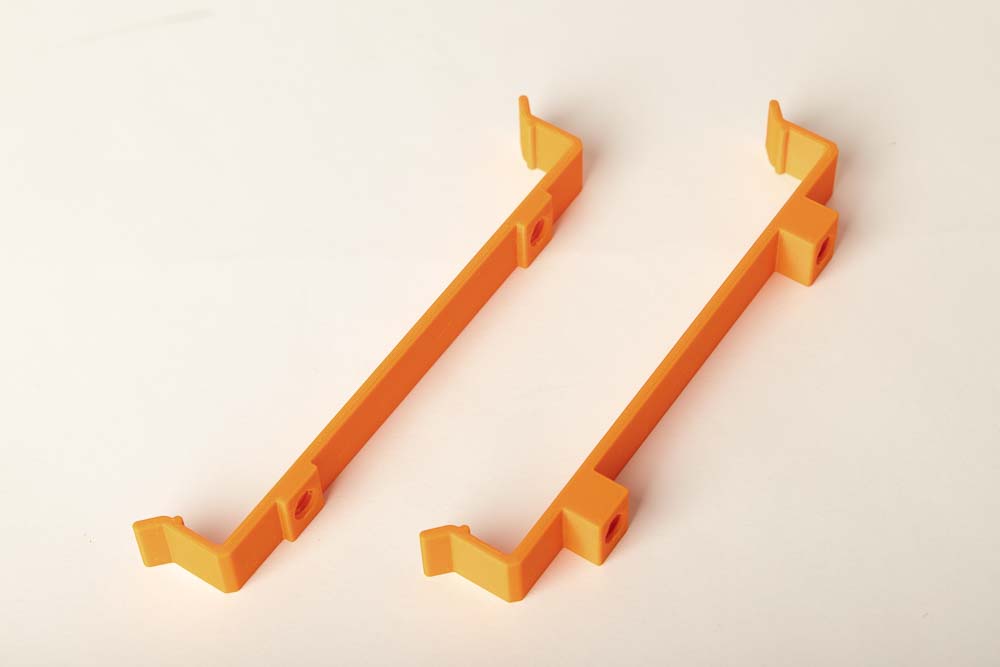
The photo shows the two possible versions of the clip. On the left you can see the Clip_H3, which has 3 mm high bars and is mounted in filament box lids without ribbing. On the right you can see the Clip_H12, which has 12 mm high bars and can be mounted in lids with ribbing.
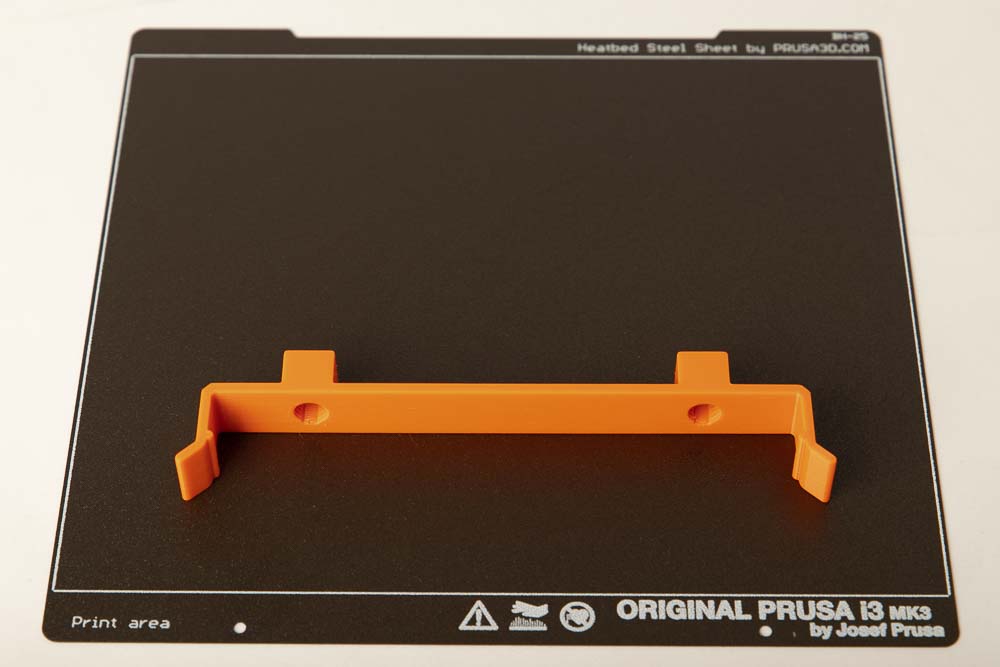
- 1 pc 007300_Silica_Gel_Clip_H12
Layer height 0.2 mm and 100% infill (rectangular)
or the Clip_H3 when using a filament box without a ribbed lid.
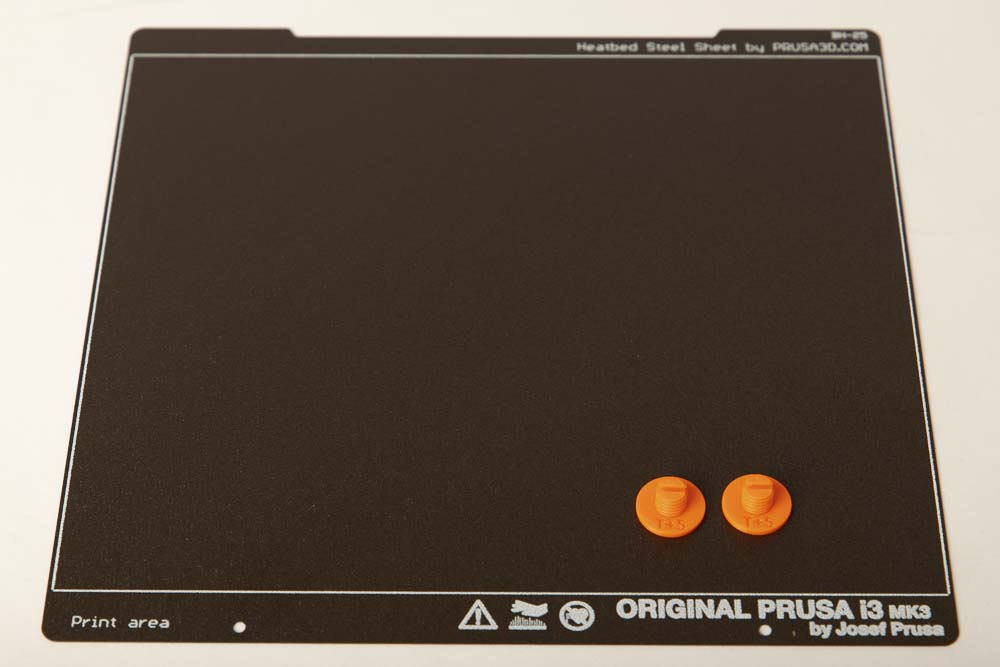
- 2 pcs 007400_Silica_Gel_Screw_T##
Layer height 0.2 mm and 100% infill (rectangular)
The screw is a PrintFit System part:
The standard 3D print template for the screw is the T+5. If this cannot be screwed into the thread of the clip, then print the T+6 version, which creates a larger thread gap. If the standard version of the screw is too loose, then print the T+4 version, which leads to a smaller thread gap.
Step 3: Installing the clip into the filament box
First two holes with a diameter of 10 mm must be drilled into the lid of the filament box. The distance between the holes must be 115 mm. The distance from the front edge depends on which silica gel box size is to be installed.
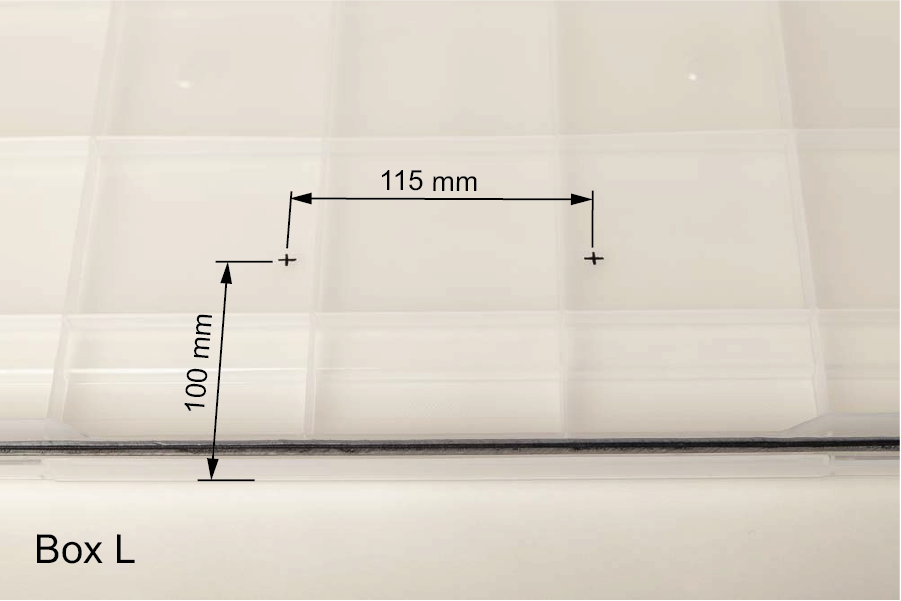
For the airtight box Iris 50L with ribbed lid (linked in the filament box instructions), the holes for the large desiccant box L must be at least 100 mm away from the front edge.
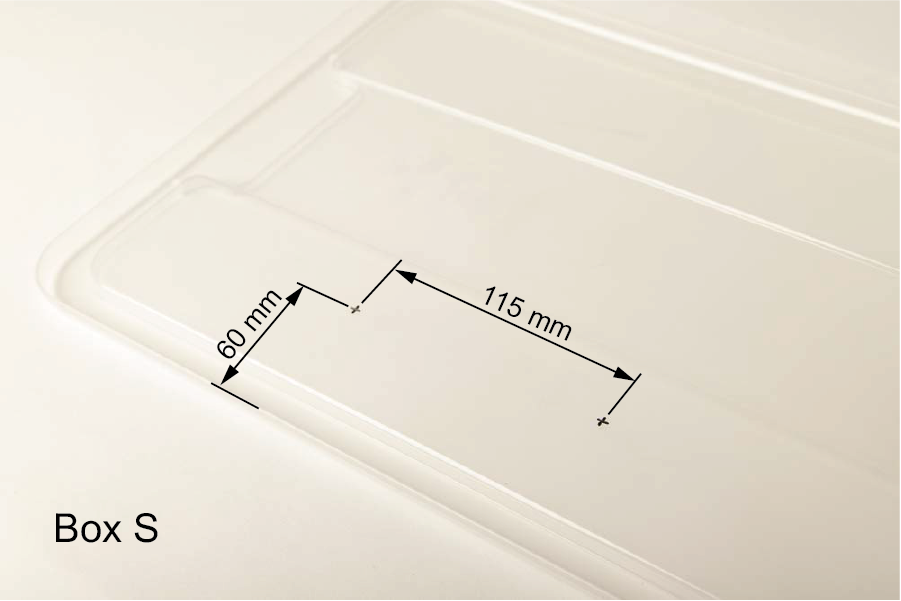
If a small desiccant box S is installed, the holes must be at least 60 mm away from the edge.
Make marks in the middle of the lid.
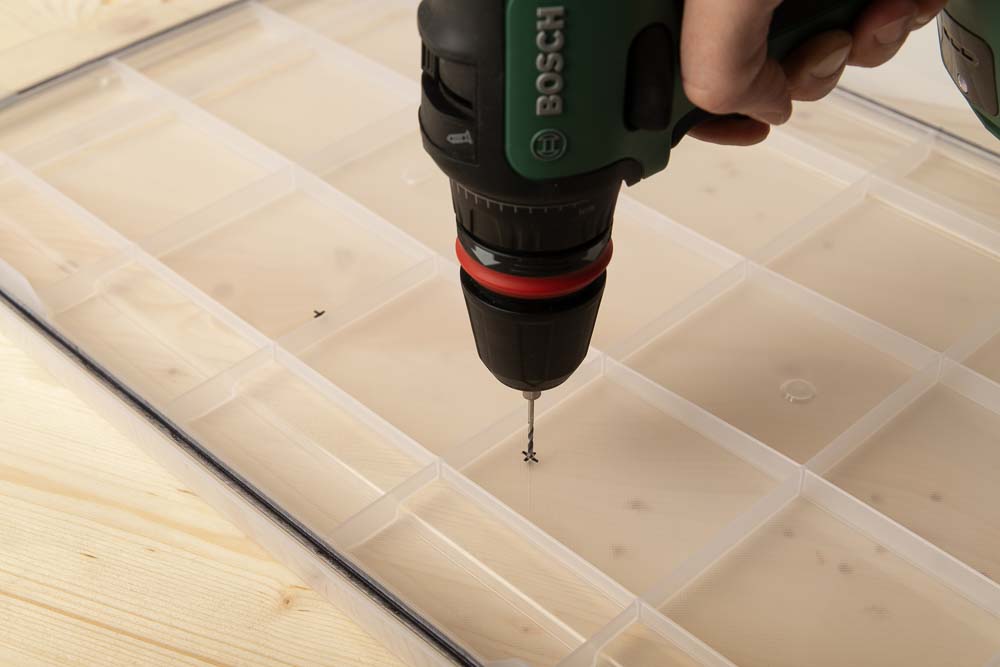
When they are marked, it is best to place a piece of sacrificial wood underneath and first pre-drill with the 2 mm wood drill.
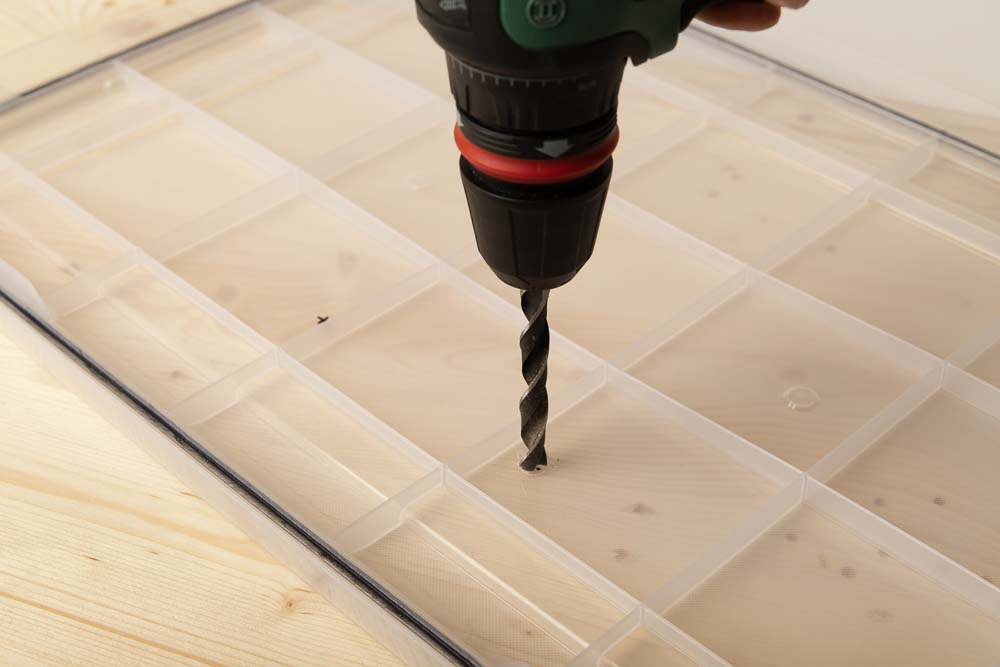
Then drill the final holes with the 10 mm wood drill.
It is best to pre-drill with the 2 mm wood drill and then drill the final holes with the 10 mm wood drill. Drill slowly so that the lid is not damaged when you pierce it.
Wear protective goggles to protect your eyes against chips!
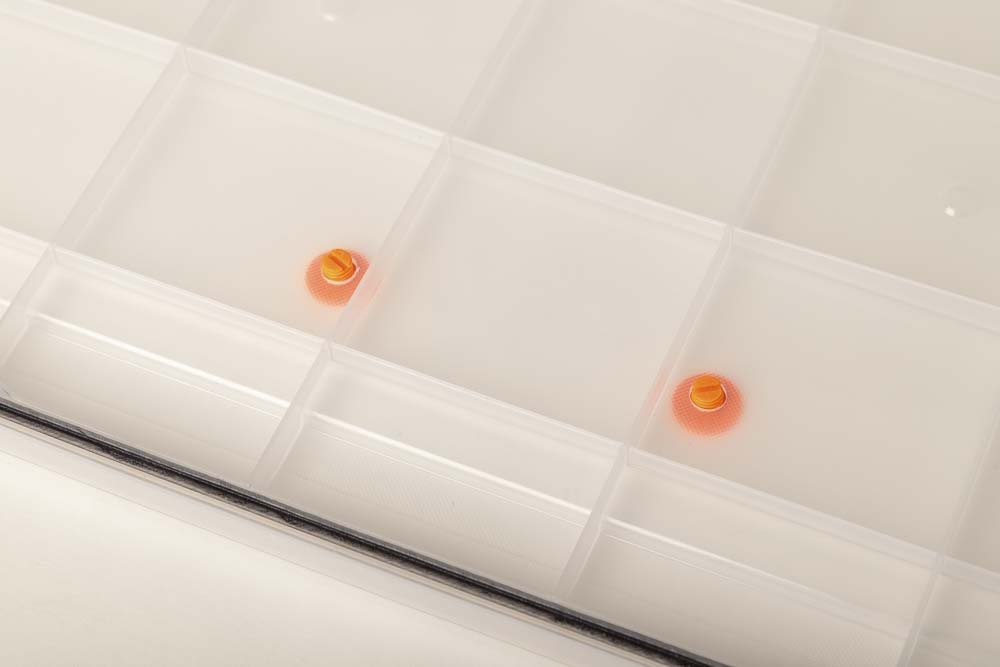
Put the 3D printed screws through the holes from the outside.
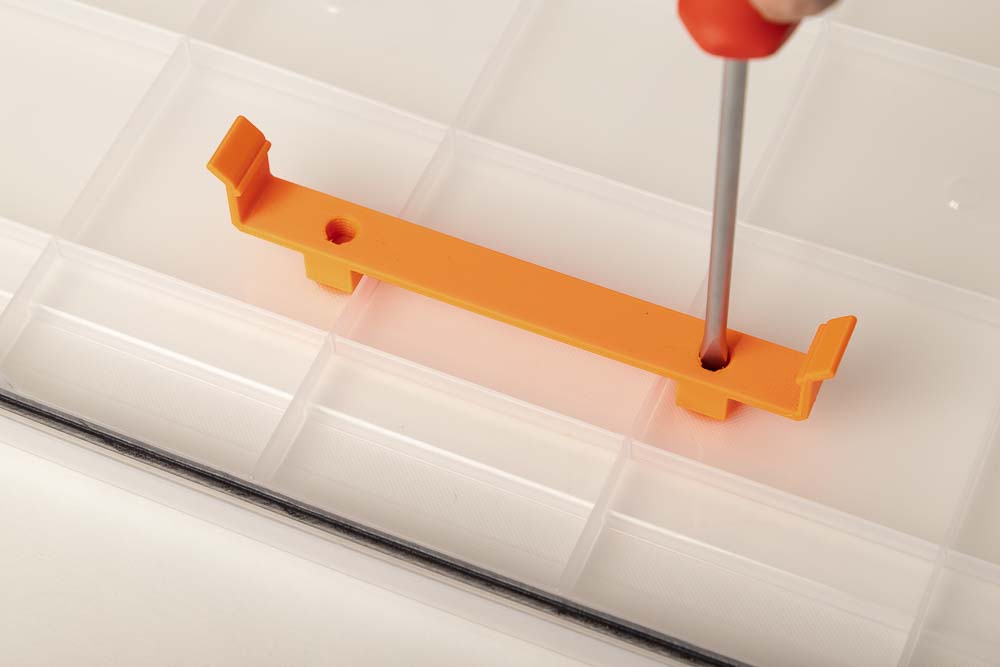
Place the printed clip on the screws and tighten by hand on the outside or with a flathead screwdriver on the inside. Do not tighten too much so that the 3D printed parts are not damaged.
If a screwdriver is used, remember that the screws should be tightened “counterclockwise” from the inside, not “clockwise”.
Check that the clip is screwed tight and correctly. The clip must not come loose when the filament box is in operation.
Step 4: Assembly of the desiccant box
Fill the desiccant box with silica gel granules.
Close the lid of the desiccant box with the nuts.
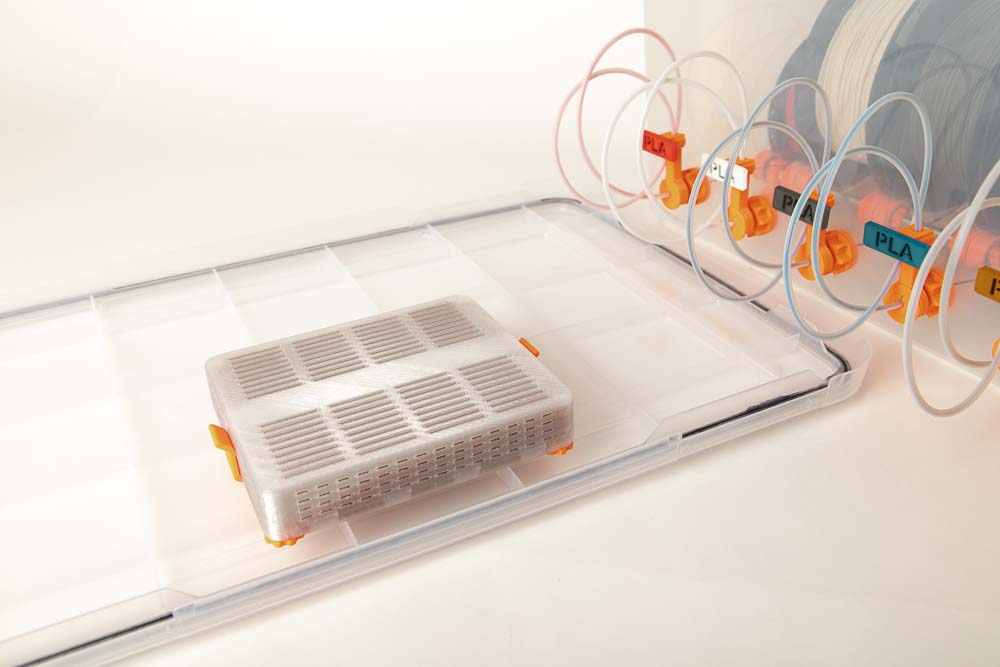
Place the desiccant box in the middle of the clip on the filament box lid and snap it into place.
Place the lid on the filament box.
Ohhh yeah nice! The desiccant box is now installed in the filament box.
If the silica gel box sits too loosely in the clip or falls out, check whether the clip snaps securely into the recesses provided for it in the box. If necessary, clean the recesses of residual filament.
Check the stability and secure fit of the silica gel box. It must not come loose when the filament box is in operation.
Every time the filament box lid is put on, check visually if the silica gel box sits correctly and check again before each printing process.
Congratulations! Now you can keep your filament boxes dry with loose desiccant.
Before starting up, be sure to read and follow the Operating manual of the DIY silica gel box and the safety instructions given there! In my experience, the silica gel only needs to be regenerated every 3 to 6 months. Happy printing!
Do you want to build a filament box to keep your filament dry and dust-free? Does the filament spool change on the printer annoy you and you want a simple solution for changing filaments?
Then you are well advised with the DIY Filament Box, here are the links for the instructions of the DIY filament dry box and the 3D print files of the DIY filament dry box in the shop.
Disclaimer
The instructions and the associated files are an inspiration of Ingenieurbüro Dr. Janko GmbH to build this project yourself. Since Ingenieurbüro Dr. Janko GmbH has no way of checking and influencing the required quality of the printed components and purchased parts as well as the quality of the assembly and the correct functioning of the project or if any inadmissible changes and modifications to the project has been made, Ingenieurbüro Dr. Janko GmbH accepts no liability for functionality, stability or damage incurred by the project.
0 Comments